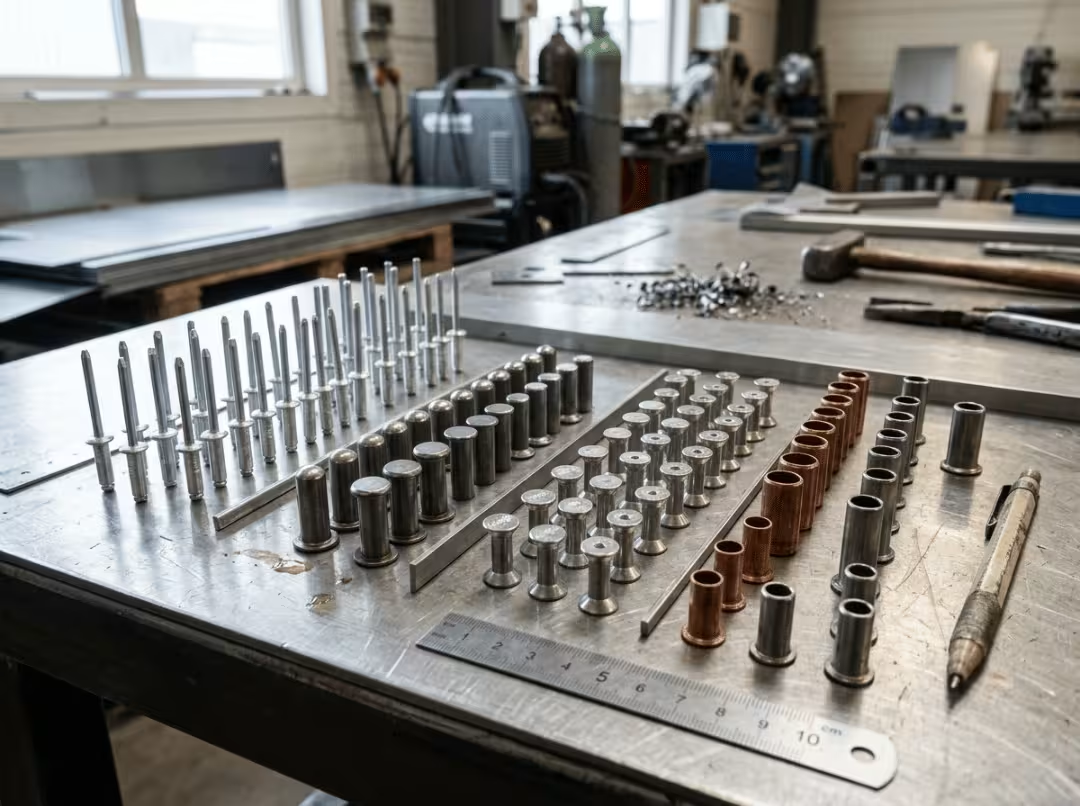
Pick the wrong rivet and the joint will tell you — usually at the worst time. Specify a blind rivet where a structural rivet is needed and the assembly may not hold load. Pair a steel rivet with an aluminum panel in a marine environment and the joint corrodes from the inside. Get the grip range wrong and the rivet either never fully sets or spins uselessly in an oversized hole.
Most rivet problems aren’t caused by bad rivets. They come from selection decisions made without working through access, load, material compatibility, and environment first.
This guide is organized around those decisions. It covers the two dominant rivet types in depth, when to use the alternatives, how to match materials without creating a corrosion problem, how to read grip range before it causes a failure, and what goes wrong most often on the shop floor. The industry applications table is there as a reference, but the core of this article is the selection logic — because that’s where most mistakes happen.
We machine and fabricate metal components every week, and a significant portion of them end up in riveted assemblies. The guidance here reflects what we see come back wrong, and why.
What Is a Rivet and How Does It Work?
A rivet is a permanent mechanical fastener — a head on one end, a shank that deforms to lock the joint on the other. Unlike a bolt or screw, it isn’t adjusted or removed. Once set, the joint is fixed.
How a riveted joint is formed
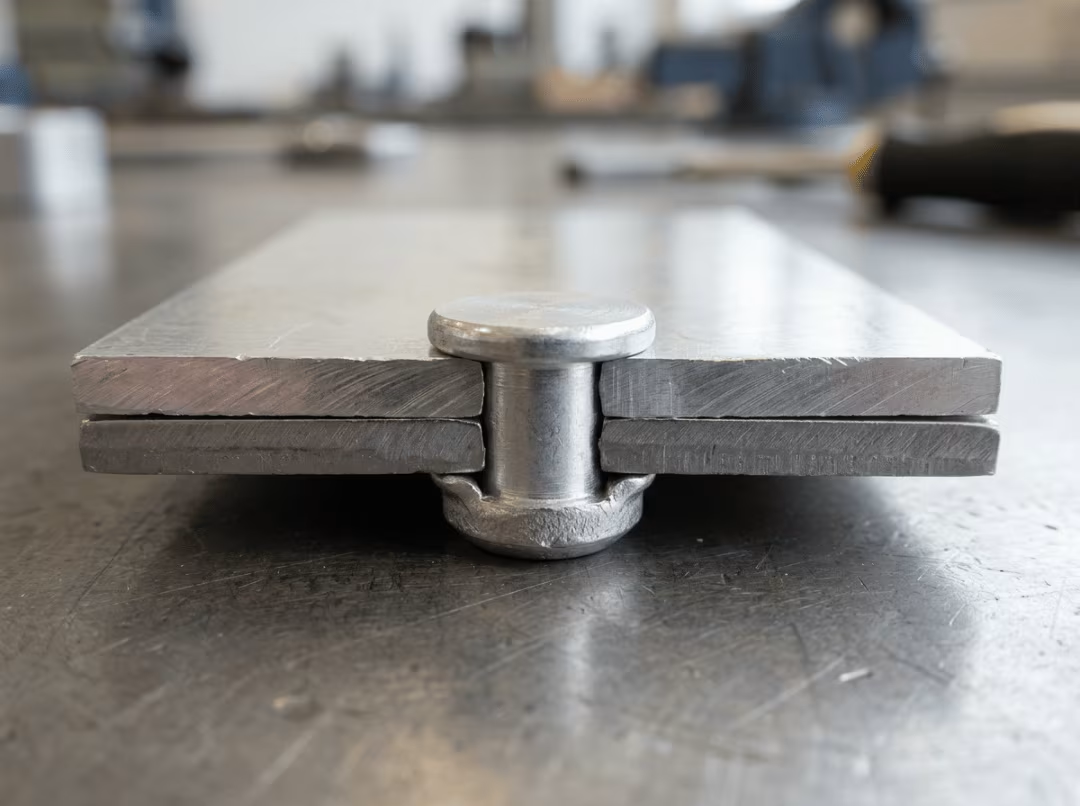
The mechanics are consistent across most types. Drill or pierce a hole, insert the rivet, then deform the tail so it can’t pull back through. On a solid rivet, a hammer or pneumatic gun flattens the tail into a second head. On a blind (pop) rivet, a tool pulls the mandrel, the tubular body flares against the back face, and the mandrel snaps off at a calibrated load.
What holds the joint is the clamped stack, not the rivet itself. Two things determine whether that clamping force is adequate: the rivet’s design clamp load, and whether the size was matched correctly to the material thickness. Both are selection decisions.
Rivets outperform threaded fasteners in three situations: permanent joints that must not loosen, assemblies exposed to vibration that would back out a screw, and locations where only one side is accessible.
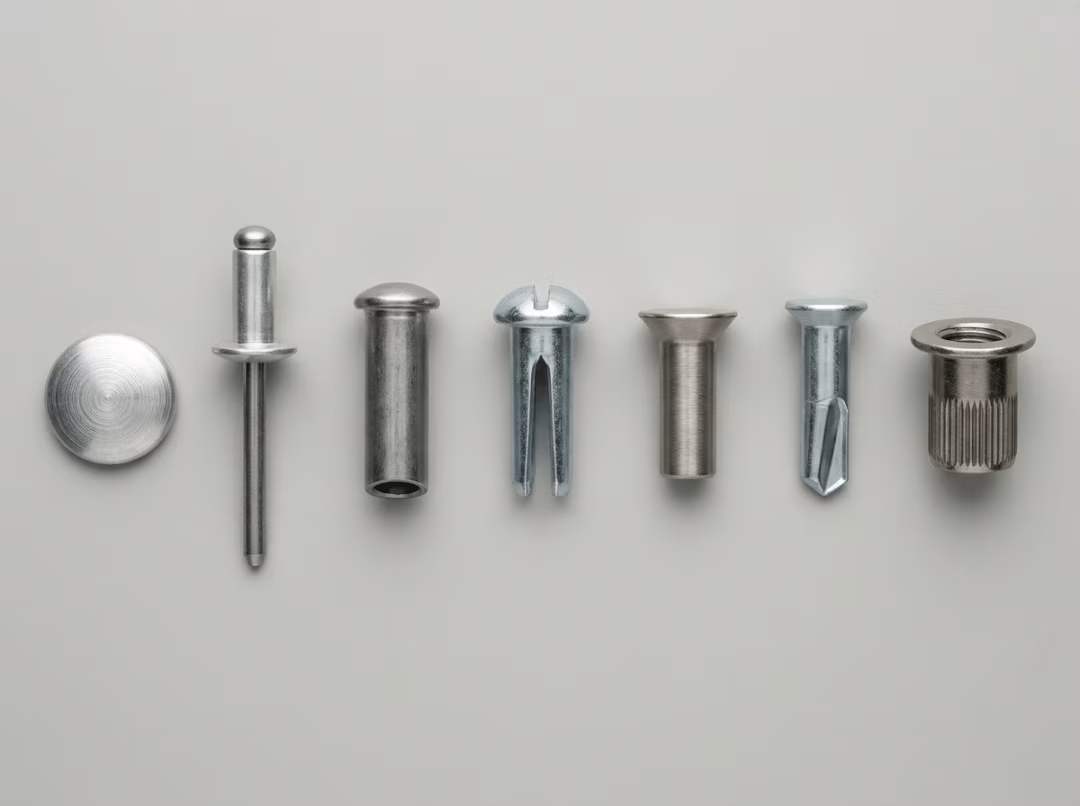
The Main Types of Rivets at a Glance
Here’s a field overview before the detailed comparisons. Use it to identify candidates, then verify the choice against the application sections below.
|
Rivet type |
Access needed |
Relative strength |
Best for |
Typical materials |
|---|---|---|---|---|
|
Solid |
Both sides |
Highest |
Structural, safety-critical joints |
Steel, aluminum, stainless |
|
Blind (pop) |
One side |
Moderate |
Sheet metal, enclosed assemblies |
Aluminum, steel, stainless |
|
Tubular / semi-tubular |
Both sides |
Low–moderate |
Soft materials, low-force setting |
Brass, copper, aluminum, steel |
|
Split (bifurcated) |
One or both |
Low |
Leather, plastic, wood, light-duty |
Copper, brass, steel |
|
Flush (countersunk) |
Both sides |
Moderate–high |
Smooth external surfaces, aircraft skins |
Aluminum, stainless |
|
Self-piercing (SPR) |
One side |
Moderate–high |
Mixed/dissimilar sheet, no pre-drill |
Steel, aluminum |
|
Rivet nuts (threaded inserts) |
One side |
Moderate |
Adding reusable threads to thin sheet |
Steel, aluminum, stainless |
The trade-off running through this table: access and strength tend to move in opposite directions. Solid rivets give maximum strength but require both sides. Blind rivets and rivet nuts trade some clamp force for one-side installation. Knowing which constraint matters more for your joint is where the selection starts.
Blind Rivets vs Solid Rivets: Which Should You Use?
This comparison covers the vast majority of rivet decisions and is worth treating carefully.
What is a blind rivet?
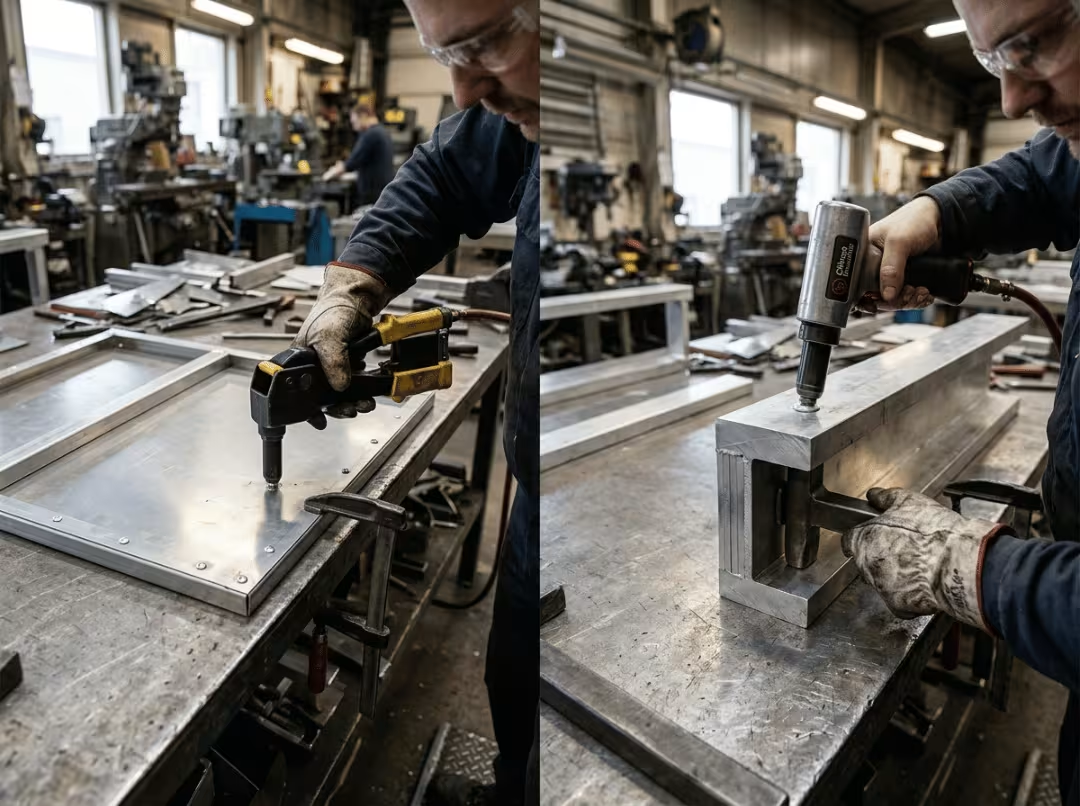
A blind (pop) rivet is a tubular fastener with a mandrel through the center. The entire installation happens from one side — the tool pulls the mandrel, the body flares against the back face, and the mandrel snaps at a set load. You never see the back of the joint during installation, which is where the name comes from.
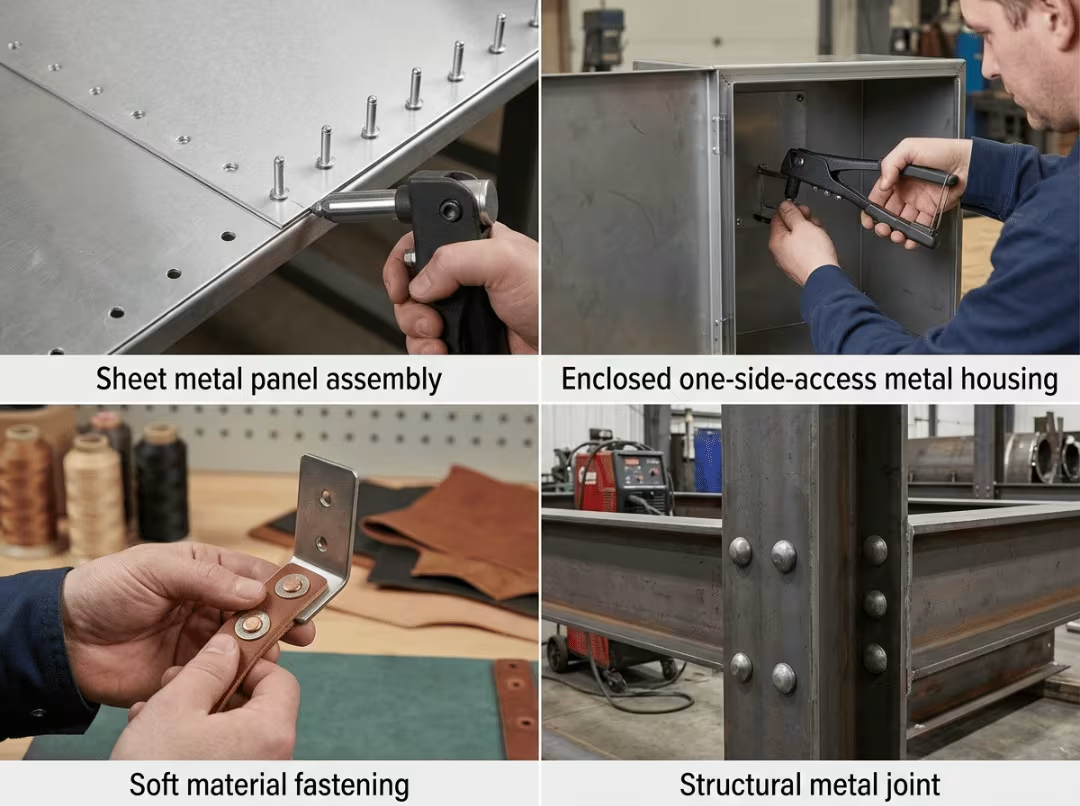
Blind rivets are the practical choice when the assembly is closed, boxed, or otherwise unreachable from behind: sheet metal enclosures, ductwork, hollow sections, and panels. Installation is fast — one operator with a hand or pneumatic riveter, no backing anvil required.
The limitation is clamp force. Standard blind rivets are rated for moderate loads. They’re not interchangeable with solid rivets in structural applications.
What is a solid rivet?
A solid rivet is a machined shank with a head, driven by hammer or rivet gun while a bucking bar holds the tail on the opposite side. Two-person or two-tool installation is the norm. In exchange, the joint is tighter, stronger, and more fatigue-resistant than any blind alternative — which is why solid rivets remain the standard in aircraft structure.
The requirement for two-side access rules them out in many fabrication situations, which is why blind rivets dominate general manufacturing.
Blind vs solid — side by side
|
Factor |
Blind (pop) rivet |
Solid rivet |
|---|---|---|
|
Access required |
One side |
Both sides |
|
Strength |
Moderate |
Highest |
|
Fatigue resistance |
Moderate |
High |
|
Installation speed |
Fast, single operator |
Slower, typically two operators |
|
Tooling |
Hand or pneumatic riveter |
Rivet gun + bucking bar |
|
Cost per joint |
Low |
Higher (labor) |
|
Best applications |
Sheet metal, enclosures, panels |
Structural, aircraft, safety-critical |
|
Main limitation |
Lower clamp load and strength |
Needs two-side access |
Which one to choose
Choose blind rivets when you can only reach one side, the joint is sheet metal or thin panel work, and the load falls within the rivet’s rated range. Blind rivets handle the majority of general fabrication.
Choose solid rivets when the joint is structural or safety-critical, you have access to both sides, and fatigue resistance or maximum clamp load matters more than installation speed. For aerospace structure, this is almost always the answer.
A note on “structural blind rivets”: some manufacturers produce blind rivets rated for higher loads, often with locking stems or multi-piece designs. These perform better than standard pop rivets but still don’t match well-driven solid rivets in fatigue-critical applications. Know the load rating before substituting.
Hole placement, size, and edge condition are set during part machining — not at the assembly bench. When components come off our CNC machining services, those parameters are already dialed in to the fastener spec so the rivet sets correctly the first time.
Other Rivet Types and Where They Fit
Blind and solid rivets cover most situations. The remaining types exist because they solve problems those two can’t.
Tubular and semi-tubular rivets
These have a partially hollow end that requires much less setting force than a solid rivet. The reduced force makes them appropriate for softer materials — leather goods, fabric assemblies, brake pads, and light consumer hardware. Semi-tubular is the common production version; the shallow hole preserves most of the joint strength while keeping the setting force manageable.
Not for structural work. Setting force and joint strength are deliberately low.
Split (bifurcated) rivets
Split rivets have a forked, sharpened tail that self-pierces soft materials — no pre-drilling needed. They’re used in leather, fabric, plastic, and thin wood. Installation is simple, but so is the load capacity.
Keep them out of anything load-bearing. They’re fasteners for light consumer goods, not for anything that has to hold under stress.
Flush (countersunk) rivets
Flush rivets sit in a countersunk or dimpled hole so the head is level with the surface. They’re used wherever a protruding head creates drag, interference, or a cosmetic problem — aircraft skins being the classic application. The extra prep (countersinking or dimpling) takes time, but the result is a clean, aerodynamic surface.
Expect more prep time than a standard rivet. The countersink has to be accurate, or the head won’t sit flush.
Self-piercing rivets (SPR)
Self-piercing rivets punch through the top sheet and flare into — but not through — the bottom sheet, forming a sealed mechanical interlock without a pre-drilled hole. SPR is common in automotive and EV body manufacturing because it handles dissimilar, coated, and mixed-thickness materials that can’t be resistance-welded reliably, and the process automates easily on production lines.
Not suitable for post-assembly disassembly. The joint is permanent and removing it damages the material.
Rivet nuts (threaded inserts)
A rivet nut is set like a blind rivet, but instead of a permanent joint, it creates a threaded boss — a reusable fastening point in thin sheet that’s too thin to tap directly. Enclosures, electronic chassis, brackets, and panels use rivet nuts wherever the assembly needs to come apart for service or inspection.
When the assembly must open again, a rivet nut is often the right call over a permanent rivet.
Rivet Materials and How to Match Them to the Joint
Material selection affects clamp load, corrosion behavior, appearance, how hard the rivet is to set, and how it interacts with the base materials. The principle is straightforward: match the rivet material to what you’re joining. The execution requires some care.
Common rivet materials
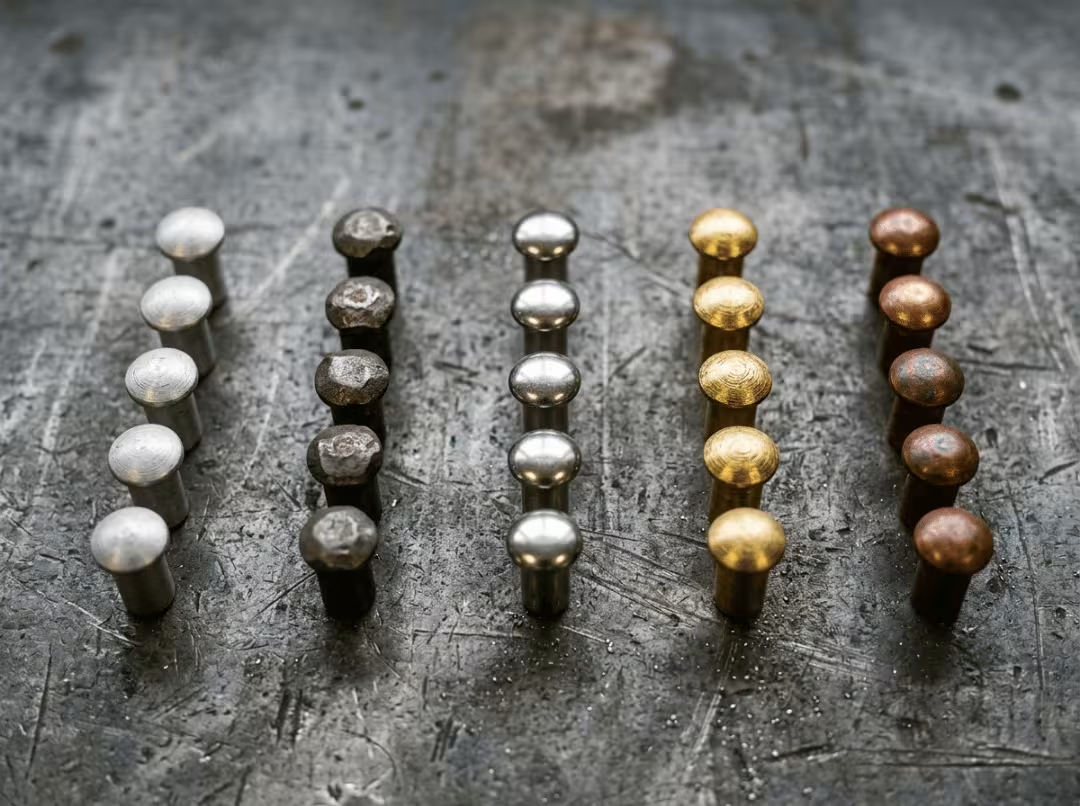
- Aluminum — lightweight, corrosion-resistant, easy to set. The default for aluminum sheet assemblies and most light-to-moderate duty work. Lower tensile strength than steel.
- Steel — stronger and more economical, the standard choice for structural metalwork. Usually zinc-plated or otherwise coated to resist corrosion.
- Stainless steel — corrosion resistance combined with high strength. Appropriate for marine, outdoor, food-contact, and demanding service environments. Harder to set, so tooling and rivet gun capacity need to match.
- Copper and brass — soft, conductive, and corrosion-resistant. Used for electrical work, plumbing fittings, and decorative assemblies. Brass won’t create a spark, which is why it shows up in gas equipment.
Match strength and material to the joint
Aim for a rivet at least as strong as the weaker of the two materials being joined, but not so hard that it deforms the base material on setting rather than forming a proper head. For visible assemblies, appearance is a real constraint — a stainless rivet in a black anodized aluminum panel will stand out, and a copper rivet in structural steel is both visually and mechanically wrong.
Galvanic corrosion: the failure mode most often overlooked
Two dissimilar metals in electrical contact in the presence of moisture form a galvanic cell. The more active metal corrodes faster than it would in isolation — often much faster. A steel mandrel inside an aluminum rivet body, in a panel exposed to humidity or salt, will corrode at the joint and eventually loosen it.
The safe path: keep the rivet material close to the base material on the galvanic scale. Aluminum rivets in aluminum panels, stainless rivets where the assembly sees salt, moisture, or outdoor service. When a dissimilar combination is unavoidable, isolate the metals with a coating, sealant, or washer, and factor in accelerated inspection intervals.
This failure mode is common precisely because it’s invisible during assembly. The joint looks fine until it doesn’t.
How to Choose the Right Rivet by Application
Find the situation that matches yours. The recommended type reflects what works in practice, not just what’s technically permissible.
For sheet metal assemblies
Blind rivets are the working default. Select a grip range that covers your combined sheet thickness with no margin — a rivet that’s too long for the stack won’t flare correctly. On very thin sheet, use a wide flange head or back the rivet with a washer to distribute load and prevent pull-through. Watch the edge distance: too close to the edge and the sheet tears rather than holding.
When you only have one-side access
Blind rivets or rivet nuts — solid rivets require access to both faces to buck the tail. If the joint is permanent, use a blind rivet. If it needs to open later for maintenance or inspection, install a rivet nut and bolt into it. Choosing a blind rivet for a serviceable joint is a common error that creates problems during the first maintenance cycle.
For high-vibration joints
Solid rivets or rated structural blind rivets. The key property here is sustained clamp force under cyclic loading — threaded fasteners back out under vibration unless locked; rivets don’t. This is why aircraft structure uses rivets, not screws. A standard blind rivet in a high-vibration joint is marginal; a solid rivet or a locking-stem structural blind rivet is correct.
For soft materials — leather, plastic, wood, fabric
Tubular, split, or washer-backed rivets. The priority is load distribution, not clamp force. A high-clamp rivet pulls through soft material rather than holding it. Washer backing on the tail side further spreads the load.
For flush, aerodynamic, or cosmetically sensitive surfaces
Countersunk (flush) rivets. The hole has to be countersunk or dimpled accurately — a flush rivet in a badly prepared countersink sits proud and defeats the purpose. Budget for the extra prep time.
For sealed or watertight joints
Closed-end blind rivets seal the mandrel cavity and prevent moisture intrusion through the fastener itself. For a genuinely watertight joint, add a sealant or gasket — riveting alone rarely achieves a reliable seal at the interface. Know whether the spec calls for watertight or just water-resistant; the two have different solutions.
For structural or safety-critical assemblies
Solid rivets, or structural blind rivets with documented load ratings. Work from the manufacturer’s shear and tensile specifications against the actual joint load — not a general sense that “solid is stronger.” For any joint in a certified or safety-critical structure, the fastener selection should trace back to a calculation, not a habit.
Panels and brackets in structural joints need accurate hole patterns, clean edges, and flat mating surfaces before a rivet is installed. We hold those parameters on our CNC milling service so the rivet pattern is correct when the parts arrive at assembly.
Rivet Size, Grip Range, and Hole Planning
Type and material narrow the candidates. Getting size and grip range right determines whether the joint actually performs.
Diameter and length
Diameter drives the load capacity of the joint — a larger rivet shears at a higher force. A practical starting point is a rivet diameter roughly three times the thickness of the thinner sheet, though the actual choice should follow the design load. Edge distance — the distance from the center of the rivet hole to the nearest edge — should be at least two rivet diameters; closer than that and the sheet tends to tear rather than the rivet shearing.
Length needs to accommodate the full stack thickness plus enough shank to form a proper tail. Too short and the tail won’t fill the hole; too long and the excess shank can buckle or produce an off-center head.
What grip range means — and why getting it wrong is the most common size error
Grip range is the rated range of total material thickness a given rivet is designed to clamp. Every blind rivet has a minimum and maximum grip.
Install a rivet where the stack is thinner than the minimum grip and the body flares before it contacts the back face — the result is a loose rivet that spins when you try to torque a mating fastener. Install it where the stack is thicker than the maximum grip and the mandrel can’t generate enough pull to set the rivet at all.
Most “loose rivet” problems on the bench trace back to grip range mismatch, not defective rivets. Measure the actual stack thickness — including any paint, coating, or gasket — before selecting.
Hole size and preparation
The hole needs to be slightly larger than the rivet body: a common clearance is 0.1–0.2 mm over nominal, though the fastener spec takes precedence. Undersize and the rivet is hard to insert without damaging the shank; oversize and the rivet sits loose, which reduces clamp force and allows movement in shear.
Deburr both sides of every hole. A burr on the mating face creates a gap; a burr on the head side interferes with the flange seating. Neither is obvious until the joint fails earlier than expected.
Hole position, size, and edge distance belong on the machining drawing, not in the assembly notes. When we machine parts destined for riveted assembly, those parameters come from the fastener specification up front, not as an afterthought.
Common Rivet Selection Mistakes
These are the patterns that show up most often, in roughly the order they cause trouble.
- Specifying by diameter alone and ignoring grip range. The single most common cause of loose joints after installation.
- Pairing dissimilar metals without checking the galvanic table. The joint looks fine on day one; six months of humidity later, the aluminum has corroded around a steel rivet and the panel shifts.
- Using a standard blind rivet in a structural application. Standard pop rivets are not rated for structural loads. When the spec calls for a structural rivet, that’s a specific product category, not a judgment call.
- Failing to confirm backside clearance before committing to blind rivets. The mandrel stub and flared body need room to form. A wall, a web, or another fastener closer than the minimum distance makes proper setting impossible.
- Drilling holes to nominal rivet diameter instead of adding clearance. Undersized holes damage the shank during insertion. The resulting deformation reduces the effective clamp area.
- Skipping deburring. A burr on the mating face creates a visible gap and a stress concentration. Not cosmetic — structural.
- Selecting a rivet for the material, not the environment. Aluminum rivets in aluminum panels look correct on the spec. If those panels live outdoors in a coastal environment without a coating, the mandate becomes stainless.
- Mismatching rivet hardness to base material. A rivet harder than the base sheet deforms the panel on setting instead of forming a proper tail. A rivet too soft for the joint load shears early.
Pre-selection checklist
Run through this before finalizing any rivet specification:
- Access: one side or both available at installation?
- Load: shear, tensile, vibration, fatigue? What are the rated values?
- Stack thickness: measured total, including coatings and gaskets?
- Grip range: does the selected rivet’s rated range cover that thickness?
- Materials: rivet material compatible with base materials in the service environment?
- Environment: wet, salty, hot, outdoor, food-contact?
- Hole size and prep: clearance correct, deburring specified?
- Edge distance and spacing: within the fastener manufacturer’s requirements?
- Serviceability: does this joint need to open for maintenance?
Rivets vs Screws vs Bolts vs Welding
The rivet selection question sometimes sits inside a larger question: is a rivet the right fastener at all?
|
Method |
Permanent? |
Strength |
Access needed |
Material fit |
Speed |
Cost |
Best use |
|---|---|---|---|---|---|---|---|
|
Rivet |
Yes |
Moderate–high |
One or both sides |
Wide, incl. dissimilar |
Fast |
Low |
Permanent, vibration-resistant joints |
|
Screw |
No |
Moderate |
One side |
Wide |
Fast |
Low |
Serviceable joints, frequent disassembly |
|
Bolt |
No |
High |
Both sides |
Wide |
Moderate |
Moderate |
High-load, removable joints |
|
Welding |
Yes |
Highest |
One or both sides |
Similar metals mainly |
Varies |
Varies |
Maximum-strength permanent metal joints |
Use rivets when the joint is permanent, vibration resistance matters, and — particularly — when dissimilar materials or one-side access rules out welding or bolting.
Use screws when the joint needs to come apart regularly without damaging either part.
Use bolts when the joint must be removed and the load requires a rated, torqued connection.
Use welding when both parts are weld-compatible metals, maximum strength is the priority, and heat distortion won’t cause problems. For thin or coated sheet where heat is a problem, rivets or SPR often become the better answer even when both sides are accessible.
Rivet Applications by Industry
|
Industry |
Typical parts |
Common rivet type |
Common material |
|---|---|---|---|
|
Aerospace |
Fuselage skins, structural frames |
Solid, flush |
Aluminum, titanium |
|
Automotive / EV |
Body panels, mixed-material joints |
Self-piercing, blind |
Steel, aluminum |
|
Construction |
Cladding, gutters, ductwork |
Blind |
Aluminum, steel |
|
Electronics |
Enclosures, chassis, grounding tabs |
Blind, rivet nuts |
Aluminum, steel |
|
Consumer goods |
Cookware, hardware, luggage |
Tubular, split |
Brass, copper, aluminum |
The pattern across industries: structural and fatigue-critical work defaults to solid or flush rivets; sheet and panel work uses blind rivets; soft-material assembly uses tubular or split. Self-piercing rivets have grown significantly in automotive and EV manufacturing as dissimilar-material body structures have become standard.
How to Get Riveting-Ready Parts
A riveted joint is only as good as the parts going into it. Holes off position, burrs on mating faces, or panels that don’t sit flat against each other mean the rivet is fighting the geometry before it’s even set. No fastener corrects for a poorly prepared joint.
That preparation happens at the machining stage. When we build components headed for riveted assemblies, hole size, spacing, edge distance, and flatness all come from the fastener spec — not from assumptions made after the parts are cut. The result is that rivets install correctly and the assembly closes cleanly. The same approach applies to turned and cylindrical components on our CNC turning service when they’re part of a riveted structure.
Send us a drawing or model and we’ll review the hole pattern and mating conditions against your fastener choice, flag anything likely to cause installation problems, and quote the parts built to assemble cleanly.
Frequently Asked Questions
What is the difference between a blind rivet and a solid rivet?
A blind rivet installs from one side — a mandrel pull flares the body against the back face, then the mandrel snaps off. No rear access required. A solid rivet needs access to both sides: a gun drives the head while a bucking bar forms the tail. The trade-off is strength and fatigue resistance: solid rivets deliver both at higher levels.
What is rivet grip range and why does it matter?
Grip range is the minimum and maximum total material thickness a specific rivet is rated to clamp. Below the minimum, the body flares before contacting the back face and the joint stays loose. Above the maximum, the rivet can’t generate enough pull to set at all. Most loose-rivet failures on the bench come from grip range mismatch, not from defective product.
What rivet should I use for sheet metal?
Blind rivets are the standard choice. Select a rivet whose grip range covers your combined sheet thickness; use a wide-flange head or washer backing on thin material to prevent pull-through; maintain the manufacturer’s minimum edge distance.
Which rivet is best when I can only reach one side?
Blind rivets for a permanent joint; rivet nuts if the assembly needs to come apart for service. Solid rivets require access to both sides and aren’t usable in this situation.
What is the strongest type of rivet?
Properly driven solid rivets give the highest strength and best fatigue resistance, which is why they’re specified for aircraft structure. Among blind rivets, rated structural blind rivets with locking stems are the strongest available option, though they don’t match solid rivets in fatigue-critical applications.
Can dissimilar metals be riveted together safely?
Yes, but galvanic corrosion is a real risk in damp or salty environments. The more active metal corrodes faster at the joint. Keep rivet material close to the base material on the galvanic scale, or isolate dissimilar metals with a coating, sealant, or washer. In coastal or marine service, this isn’t optional.
Are rivets stronger than screws or bolts?
Rivets outperform screws and most bolts under vibration — they don’t back out. A high-grade torqued bolt generally develops more clamp load than a rivet of similar diameter. The real distinction is permanence: rivets are set once; bolts and screws can be removed. Choose based on whether the joint needs to be serviceable.
What size hole do I drill for a rivet?
Slightly larger than the rivet’s nominal body diameter — typically 0.1–0.2 mm clearance, though the rivet manufacturer’s spec takes precedence. Deburr both sides. Undersized holes damage the shank on insertion; oversized holes reduce clamp force and allow shear movement.
Conclusion: Match the Rivet to the Joint
Four questions determine the right rivet: What access do you have? What load does the joint carry? What materials are you joining? What environment will it operate in? Answer those correctly and the type, material, size, and grip range follow logically.
The practical failure point is usually one of two things: grip range wasn’t checked against the actual stack, or material compatibility wasn’t thought through for the service environment. Both are easy to catch in selection and expensive to fix after assembly.
Rivet selection is also downstream of part quality. If the holes are wrong, the edges are burred, or the mating surfaces aren’t flat, no rivet corrects that. The joint starts with the machined part.
If you have components headed for a riveted assembly, send the drawing or model. We’ll review the hole pattern, edge prep, and mating conditions against your fastener choice and machine the parts so they assemble correctly.