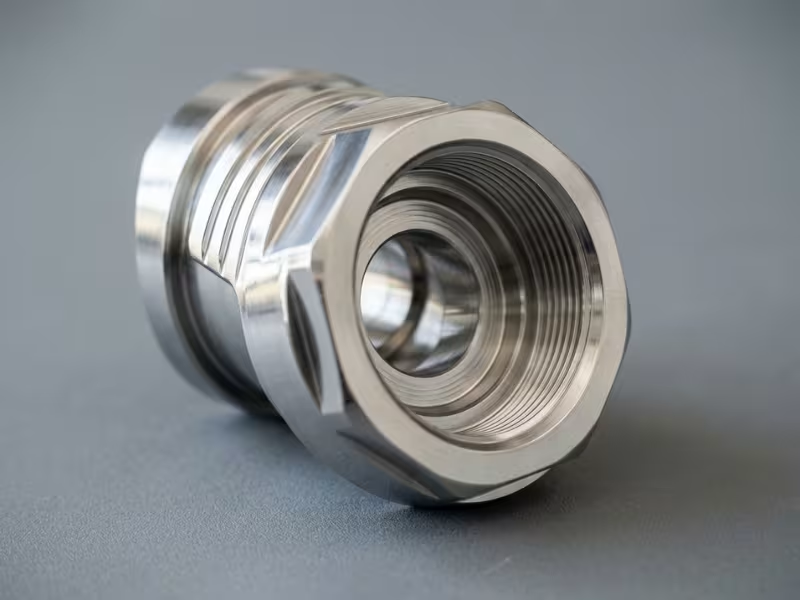
A drawing lands on your desk. It says “polished stainless surface.” Simple, right? Then three suppliers send back three very different quotes. One assumes a light sanitary finish. Another prices a full mirror polish. The gap is huge, and nobody is wrong — the spec just didn’t say enough.
That gap is why metal polishing matters.
Metal polishing is a controlled way to remove tiny surface peaks, so a part meets a target for looks, cleanability, corrosion behavior, or friction. It is not paint. It is not plating. And “polished” alone is not a real spec.
This article helps you decide what finish you actually need, which method fits your part, and how to spec it so quotes match.
What Is Metal Polishing?
Metal polishing removes material. That is the first thing to understand. When I polish a part, I am shaving off microscopic peaks on the surface, one abrasive stage at a time, until the surface reaches a target smoothness.
This is where most confusion starts, so let me clear it up fast.
Polishing is not coating
It does not add a layer. Plating and paint sit on top of the metal. Polishing works into the metal by taking material away.
Polishing is not repair
It cannot pull out a dent, fill a gouge, or hide deep damage. If a part shows real defects, you fix those before polishing ever begins. Otherwise you just make the damage shinier.
And here is the point I push hardest with clients: “polished” on its own is not a spec. It tells me nothing I can quote or verify. A real spec needs a number, a recognized standard, or an approved sample I can match against. Without one of those, two shops will read the same word and deliver two different parts.
Metal polishing is not just about making a part shiny. It is about controlling surface condition for appearance, cleanability, corrosion behavior, or friction.
That shift — from looks to function — is where polishing becomes an engineering choice, not a cosmetic afterthought.
Metal Polishing vs. Grinding, Buffing, and Other Finishing Steps
People mix these terms all the time, and that confusion drives bad quotes and wrong results. Let me line them up so you can see where polishing really sits.
Each step does its own job. Skip one, and the next step struggles.
Grinding shapes the part first.It removes a lot of material fast to hit size, flatten a weld, or knock down a rough casting. Grinding leaves a coarse surface, so it never gives you a finished look. Think of it as heavy work, not fine work.
Sanding cleans up what grinding left behind.I use it as the middle stage, stepping through finer abrasives to erase deep scratches and even out the surface. Sanding sets the stage for polishing, but it stops short of a refined finish.
Polishing refines the surface condition.By this point I am chasing a real target — a smoother, more uniform surface that meets a look, a roughness number, or a cleanability goal. Polishing removes only the fine peaks left from earlier stages.
Buffing brings the final sheen.It uses soft wheels and compound to lift gloss, so a mirror surface really pops. Buffing barely removes material, and it never fixes scratches underneath. Fix those before you buff.
Passivation and electropolishing sit apart.Passivation is a chemical treatment that boosts corrosion resistance on stainless — it is not polishing and adds no shine. Electropolishing does smooth and brighten the surface through an electrochemical bath, so it overlaps here, but it works nothing like a wheel.
Process
Main purpose
Removes material?
Best used for
Grinding
Shape and size
Yes, heavy
Welds, castings, stock removal
Sanding
Remove prior marks
Yes, moderate
Blending, prep before polish
Polishing
Refine surface condition
Yes, light
Meeting a finish target
Buffing
Final sheen
Minimal
High gloss, mirror surfaces
Passivation
Corrosion resistance
No
Stainless, after finishing
Read the table left to right, and the logic clicks: shape it, blend it, refine it, then shine it. Passivation comes after — a chemistry step, not a polish.
Metal surface at four finishing stages side by side
How the Metal Polishing Process Works
Good polishing follows a logic, not a magic trick. Once you see the order, the whole process makes sense — and you can spot a shop that skips steps.
Here is how I work a part from raw surface to finished result.
1. Assess the material and finish target
Before I touch anything, I need to know two things: what metal I am working with, and what the finish must hit. Stainless behaves differently from aluminum. A sanitary finish and a mirror finish call for different plans. Define the target first, or every later choice becomes a guess.
2. Prep and clean
I remove oil, dirt, and loose debris. A dirty surface drags contamination into every stage after it. Clean parts also let me see the real defects I need to deal with.
3. Remove coarse defects
Now I attack the deep stuff — scratches, tool marks, weld lines. I use a heavier abrasive to level the surface. This stage does the hard cutting, so later stages can focus on refinement.
4. Step through finer abrasives
This is where the core rule lives: each grit must erase the scratch pattern left by the grit before it. Skip a step, and you trap deep lines under a smooth-looking top layer. Move stage by stage, and the surface gets progressively finer with no shortcuts.
5. Final polish, inspect, and protect
The last stage brings the surface to its target — the look, the roughness number, the cleanability goal. Then I inspect it against the spec, not against my gut. If the part meets a mirror or sanitary target, I protect it right away so handling does not undo the work.
Two ideas carry through all five steps. Remove the scratch pattern one stage at a time. And know your finish target before you start, because the target shapes every decision along the way.
Metal Polishing Methods Compared
No single method wins every job. The right one depends on your part, your finish target, and your budget. Let me walk you through the main options and where each earns its place.
Mechanical polishing
Uses wheels, belts, and abrasives to work the surface by hand or machine. It shines on flat faces, outer surfaces, and cosmetic parts where you want control over the look. But it struggles to reach inside tubes, deep pockets, or tight internal passages. People choose it for precision and appearance. It turns costly on high volumes, since each part eats labor time.
Vibratory and mass finishing
Tumbles many parts together in a bath of media. This method loves small and medium batches — deburring, edge rounding, and light smoothing across lots of parts at once. It cannot deliver a mirror finish or handle finish-critical cosmetic zones. Choose it when you need consistent, hands-off results on volume. It falls short when a part needs a sharp, uniform show surface.
Electropolishing
Removes metal through an electrochemical bath. It reaches surfaces a wheel never could — internal passages, complex shapes, tight corners. It also brightens stainless and improves cleanability. But it will not fix deep scratches or heavy tool marks. Choose it for sanitary and corrosion-sensitive parts. It gets expensive when parts are large or when the starting surface is rough, since prep still matters.
Chemical polishing and pickling
Uses acid baths to smooth or clean the surface. Pickling strips scale and heat tint. Chemical polishing gives a mild brightening on complex shapes. Neither hits a precise finish target, so treat them as support steps, not headline finishes.
Abrasive flow and specialty methods
Push abrasive media through internal channels or use focused techniques for hard-to-reach features. These solve narrow problems — think internal bores or intricate ports. They cost more, so reserve them for parts nothing else can finish.
Method
Best for
Strengths
Limits
Typical finish character
Mechanical polishing
Flat faces, cosmetic parts
Precise, controllable look
Poor internal access, labor-heavy at volume
Uniform, up to mirror
Vibratory/mass finishing
Batches of small parts
Hands-off, consistent
No mirror, no critical show zones
Smooth, matte to satin
Electropolishing
Complex shapes, sanitary parts
Reaches internals, boosts cleanability
Won’t fix deep defects
Bright, clean, refined
Chemical polishing/pickling
Scale removal, mild brightening
Handles complex geometry
Not precise, support role
Even but modest
Abrasive flow/specialty
Internal passages, intricate features
Reaches what others can’t
High cost, narrow use
Depends on setup
Here is the part many people miss: real projects rarely use one method. Strong finishes usually stack steps.
A stainless valve body might get mechanical polishing plus electropolishing — the wheel handles the outside, the bath handles the inside and cleanability. A batch of small brackets might run deburring, then vibratory finishing, then a final polish on show faces only. Polishing also pairs naturally with the earlier stages of CNC metal machining, where the incoming surface sets up how easy the finish will be.
Think in combinations, not single choices. Match each step to what that step does best, and you get a better result for less money.
How to Choose the Right Polishing Method
Forget “which method is best.” That question has no answer. The real question is “which method fits my part?” — and to answer it, I run through a short list of questions before I pick anything.
Work through these with me, and the right method usually picks itself.
Question
Why it matters
What metal is it?
Stainless, aluminum, and brass all cut and react differently. The metal rules out some methods right away.
What does the geometry look like?
Flat faces polish easily. Deep pockets, corners, and curves fight a wheel.
Can I reach the internal surfaces?
Wheels and belts can’t enter tubes or bores. Internal passages often need electropolishing or abrasive flow.
What’s the finish target?
A satin look and a mirror finish need different plans. Sanitary parts need a set Ra number, not a vibe.
How many parts?
One part suits hand polishing. Thousands push you toward mass finishing to control labor cost.
Is it cosmetic, sanitary, or functional?
Each purpose chases a different goal — looks, cleanability, or performance.
How sensitive is the part to size change?
Thin walls and tight tolerances can’t absorb aggressive material removal.
Now let me put those questions to work with real parts.
Cosmetic parts
These live and die on consistency and reflectivity. A visible stainless panel must look uniform across the whole surface, with no swirl or dull patch. Mechanical polishing gives me that control, and buffing lifts the final gloss.
Sanitary parts
These care about cleanability, not shine. Here I chase a roughness target — often Ra ≤ 0.8 µm — so residue can’t cling to surface peaks. Mechanical polishing sets the base, and electropolishing refines it and reaches the inside.
Parts with internal passages
These expose a hard limit: a wheel simply can’t get in there. If the flow path matters, mechanical polishing alone won’t do it. I turn to electropolishing or abrasive flow to treat those hidden surfaces.
Thin-walled parts
These carry a real risk. Push too hard with mechanical polishing, and heat and pressure warp the part or thin the wall past tolerance. For these, I go gentle — lighter stages, or a chemical route that removes material evenly without force.
See the pattern? The part tells you what it needs. Match the method to the geometry, the finish target, and the purpose — and you stop overpaying for finishes your part never required.
What Metal Polishing Actually Improves
Polishing does more than change how a part looks. When I smooth a surface, I change how it behaves. Let me show you the four gains that actually matter, and why each one happens.
Appearance
Light bounces cleanly off a smooth surface, so it reads as uniform instead of hazy.
Cleanability
Fewer pits means fewer places for residue and bacteria to hide.
Corrosion behavior
A smoother surface drains and dries evenly, giving pitting less room to start.
Surface performance
Fewer high spots lower friction and wear on sealing and contact faces.
Appearance and reflectivity. This is the obvious one, but the reason runs deeper than “it looks nice.” Light bounces cleanly off a smooth surface, so a polished panel reflects evenly and reads as uniform. Rough surfaces scatter light in every direction, which shows up as haze, swirl, and dull patches. Fewer peaks and valleys mean less scatter — and that is what gives a mirror finish its depth.
Cleanability and hygiene. Here polishing earns its keep in food, dairy, and pharma work. A rough surface is full of microscopic peaks and pits, and those pits trap residue, bacteria, and product. Smooth the surface down to a low Ra, and there are fewer places for anything to hide. Cleaning solutions reach the whole surface, rinse away clean, and leave less behind. That is why polished stainless is easier to clean and faster to validate — the surface simply holds less.
Rough metal surface next to polished mirror surface
A word of caution on corrosion: polishing is not a magic shield. A smoother surface can drain and dry more evenly, so moisture and contaminants sit for less time in crevices where pitting starts. On stainless, a clean, refined surface also supports the passive layer that resists corrosion. But polishing alone does not guarantee better corrosion resistance across every metal and every environment. It helps in the right conditions — it does not replace the right material choice or a proper passivation step.
Friction, wear, and surface performance. This is the gain people forget. On sealing faces and contact surfaces, a smoother finish lets two parts mate closely with fewer high spots grinding against each other. That can lower friction, reduce early wear, and help a seal hold. Fewer surface peaks also mean fewer stress points that start cracks or shed particles. For a valve seat, a pump face, or a sliding surface, the right finish can improve how the part behaves in service — not just how it looks on the shelf.
So when someone asks what polishing does, I don’t say it “improves quality.” I ask what the part needs to do. Appearance, cleanability, corrosion behavior, and surface performance are separate goals — and the finish target should match the one that matters for your part.
What Parts and Scenarios Are Good Candidates
Not every part needs polishing. But some parts practically demand it. Instead of scanning a list of industries, look at what the part does and where its surface has to perform.
Sanitary tubing, valves, and tanks
These carry food, dairy, drugs, or beverages. Their inner surfaces must resist buildup and rinse clean. A low Ra target keeps residue and bacteria from clinging, which makes cleaning faster and validation easier.
Cosmetic stainless or aluminum parts
Think visible panels, housings, and trim. Buyers judge these by looks alone. Polishing gives an even, reflective surface with no swirl or dull patch, so the whole part reads as uniform.
Sealing faces and flow-contact surfaces
A valve seat or pump face has to mate closely. A smoother finish removes the high spots that cause leaks and early wear, so the seal holds and the surface lasts.
Medical and instrument components
Surgical tools and precision parts need clean, smooth surfaces for hygiene and reliable function. Polishing cuts the places where contamination hides and helps the part meet strict finish requirements.
Parts with internal passages
Manifolds, bores, and flow paths hide surfaces a wheel can never touch. When those hidden surfaces matter, specialty methods like electropolishing or abrasive flow do the work traditional polishing can’t.
Part / scenario
Why polishing matters
Sanitary tubing, valves, tanks
Low Ra resists buildup, cleans faster
Cosmetic stainless/aluminum
Even, reflective, uniform appearance
Sealing and flow-contact faces
Fewer high spots, better seal and wear
Medical and instrument parts
Hygiene and reliable function
Internal passages
Specialty methods reach hidden surfaces
Polished stainless valve and tubing in clean facility
Notice the thread here. Each part chases a specific goal — cleanability, looks, sealing, hygiene, or reach. That goal decides both whether you polish and how far you take it. Match the finish to what the part actually has to do, and you spend your budget where it earns its keep.
How to Specify a Polished Finish Correctly
The word “polished” causes more disputes than any other term on a drawing. It means one thing to you and something else to your shop. Fix that, and you kill most rework and price surprises before they start. If you want a deeper reference, our guide to CNC machining surface finish walks through common finish targets in detail.
Here is how I write a spec I can quote and verify.
Name the material.Stainless 316L polishes and reacts differently from aluminum or brass. State the alloy, so the shop plans the right stages.
Point to the exact surface.Which face matters? Say so. “Polish wetted surfaces” tells me where to work. Leaving it blank tells me to guess.
Give a finish target I can measure.Drop “shiny” and “mirror-like.” Use a real target instead — an Ra value, a recognized standard, a comparator plate, or an approved sample. A number I can check with a profilometer beats a word every time.
Split the important zones from the ignorable ones.Not every surface needs the same finish. Call out the critical zones, and mark the rest “as-machined.” That one line can cut your cost in half without hurting function.
Address internal surfaces, edges, and threads directly.These features get missed constantly. State whether bores, sealing edges, and threaded holes need polishing or stay untouched. Silence here leads to either overwork or a rejected part.
Ask for a first article sample on finish-critical work.When looks or cleanability drive acceptance, approve one part before the full run. A signed-off sample settles arguments no words can.
Now see the difference on paper:
Weak spec
Better spec
“Polished stainless surface”
“Polish wetted surfaces to Ra ≤ 0.8 µm; verify by profilometer; non-wetted exterior as-machined”
“Mirror finish”
“316L, #8 mirror finish per approved sample; visible face only; back face as-machined”
“Smooth all over”
“External faces to Ra ≤ 0.4 µm; internal bore not polished; break sharp edges 0.2 mm”
“Make it shiny and clean”
“Satin finish per comparator plate #4; threads and blind holes excluded; first article required”
Read the right column, and you can quote it, run it, and inspect it. Read the left, and every shop invents its own version. A tight spec protects both sides — you get the part you pictured, and your supplier prices the work you actually need.
What Drives Metal Polishing Cost
Two parts made from the same metal can cost wildly different amounts to polish. Once you see what drives the price, you can quote smarter and spec smarter.
The insight most people miss: geometry often matters more than part size. A small part with tight corners, blind pockets, and internal passages eats far more labor than a large, flat panel.
Labor time.This sits at the center of it all. Polishing is hands-on work, and every extra stage adds minutes per part. More minutes, more cost.
Geometry complexity.Curves, edges, and hidden surfaces slow every stage. A flat panel polishes fast; a manifold with internal ports does not.
Starting surface condition.A rough casting or a scratched blank forces extra coarse stages before the real polishing even begins.
Finish target.A satin finish takes a few stages. A mirror finish takes many more, plus buffing and careful inspection.
Method chosen.Hand polishing runs high per part. Mass finishing spreads cost across a batch. Electropolishing adds chemistry and setup.
Masking, protection, inspection, and batch size.Selective zones need masking. Cosmetic parts need careful checking and protective wrapping. And one part carries all the setup cost alone, while a run of a thousand spreads it thin.
Cost driver
Why it raises cost
Labor time
Each stage adds hands-on minutes per part
Geometry complexity
Corners, pockets, and internals slow every stage
Starting surface
Rough or damaged blanks need extra coarse work
Finish target
Higher finish means more stages and buffing
Method chosen
Specialty methods add setup and chemistry
Masking/protection
Selective zones need masking and careful handling
Inspection/packaging
Critical finishes need checks and protective wrap
Batch size
Setup cost spreads across fewer parts
You can cut cost without cutting function. Improve the incoming surface, so fewer coarse stages are needed. Skip cosmetic finishes the part’s job never requires. Limit polished zones to the surfaces that matter, and leave the rest as-machined. Then align the finish target with actual use — not with habit. Match the spec to the real requirement, and the price follows.
In-House vs. Outsourced Polishing
Should you polish parts yourself or send them out? The answer depends on volume, finish target, and what your shop is set up to handle.
When in-house makes sense
Keep it in-house when you polish steadily, run simple finishes, and already have the belts, wheels, and skilled hands. If you polish the same parts week after week, owning the process gives you control and quick turnaround. Light deburring and satin finishes rarely justify shipping.
When outsourcing wins
Send it out when the work needs specialty chemistry. Electropolishing and chemical polishing demand acid baths, ventilation, and waste treatment — a real cost and a real headache to run safely. Outsource low-volume jobs too, since setup for a handful of parts rarely pays off. And lean on a specialist for mirror finishes, where consistency takes experienced people you may not have on staff.
One more risk: cosmetic parts scratch in transit. If you outsource a show finish, factor in careful packaging and the chance of damage on the road.
What to prepare for a quote. Give the shop enough to price the job right the first time: the material and alloy, the finish target (Ra, standard, or sample), the critical versus ignorable zones, the quantity and schedule, and any internal surfaces, edges, or threads that need attention. Add a drawing and, for finish-critical parts, an approved sample.
The choice comes down to honesty about your own shop. If you lack the chemistry, the ventilation, the volume, or the skilled labor, a good outside partner delivers a better part for less than you’d spend building the capability yourself.
Common Mistakes That Cause Rework
Most polishing failures don’t happen at the final stage. They start earlier, when someone cuts a corner that shows up later as scrap. Here are the ones I see most.
Skipping grit stages
You can’t jump from coarse to fine and hope the deep scratches vanish. They hide under a smooth top layer, then reappear under light. Work every stage in order.
Cross-contaminating abrasives
One coarse grain left on a fine belt drags an ugly scratch across a nearly finished surface. Keep coarse and fine tools apart, and clean between stages.
Polishing over scale or heat tint
Weld tint and mill scale sit harder than the base metal. Strip or pickle them first, or you just smear the mess.
Ignoring dimensional change
Polishing removes material. On tight tolerances or thin walls, aggressive work pulls a good part out of spec. Check your stock removal.
Over-specifying a mirror finish
A mirror surface costs real time and buffing. If the part’s job never needs it, you’re paying for looks nobody uses.
Leaving compound in crevices
Polishing compound hides in threads, corners, and blind holes. Dried residue fails inspection and traps contamination. Clean it out completely.
None of these are exotic. They’re the quiet habits that separate a part that passes from one that comes back for rework.
Frequently Asked Questions
Q: What is metal polishing?
A: Polishing removes tiny peaks from a metal surface, one abrasive stage at a time, until the surface hits a target smoothness. It shapes how a part looks, cleans, and performs — it doesn’t add a layer like plating or paint.
Q: How is polishing different from buffing?
A: Polishing refines the surface by cutting away fine material with abrasives. Buffing comes after, using soft wheels and compound to lift gloss. Buffing barely removes anything, so it can’t fix scratches underneath. I polish out the flaws first, then buff for shine.
Q: Which metals can be polished?
A: Most common metals take a polish — stainless steel, aluminum, brass, copper, carbon steel, and titanium among them. Each behaves differently. Stainless steel holds a bright, lasting finish. Aluminum polishes fast but scratches easily. The alloy shapes both the process and the final look, so I always plan around the specific material.
Q: What does Ra mean in a polishing specification?
A: Ra stands for average roughness. It measures how smooth a surface is, usually in micrometers (µm) or microinches. A lower Ra means a smoother surface. For example, Ra ≤ 0.8 µm is a common sanitary target. Ra gives you a number I can measure with a profilometer — far better than words like “smooth” or “shiny.”
Q: Can polishing remove scratches or dents?
A: Scratches, yes — within limits. I can polish out shallow scratches by working through abrasive stages until the marks disappear. Deep scratches need more material removal, which can affect size. Dents are different. Polishing removes material; it can’t push metal back into shape. You fix a dent before polishing, not with it.
Q: Is it better to polish parts in-house or outsource them?
A: It depends on your volume, finish target, and setup. Keep it in-house when you run steady work with simple finishes and already own the tools and skilled hands. Send it out for specialty chemistry like electropolishing, for low-volume jobs, or for mirror finishes that demand consistency. When you lack the ventilation, waste treatment, or experience, a good outside partner delivers a better part for less than building that capability yourself.
The Bottom Line
Metal polishing is a controlled surface treatment, not a quick way to add shine. It removes material stage by stage to hit a real target — for looks, cleanliness, corrosion behavior, or performance.
No single method wins every job. The right choice comes down to four things: your geometry, your material, your finish target, and the part’s purpose. Get those clear, and the method usually picks itself.
Before your next order, do three things. Write a spec you can measure and verify. Ask for a first article sample on finish-critical work. And question whether you truly need that finish level at all.
Match the finish to the job, and you get the part you pictured — without paying for shine nobody uses.
Please upload 3D and 2D files if available. If you cannot do so, please try compressing the files into a Zip or rar format before uploading. You can also email us at sales@essengoldparts.com.