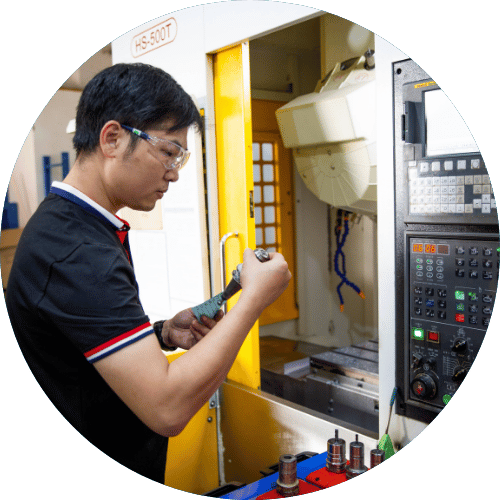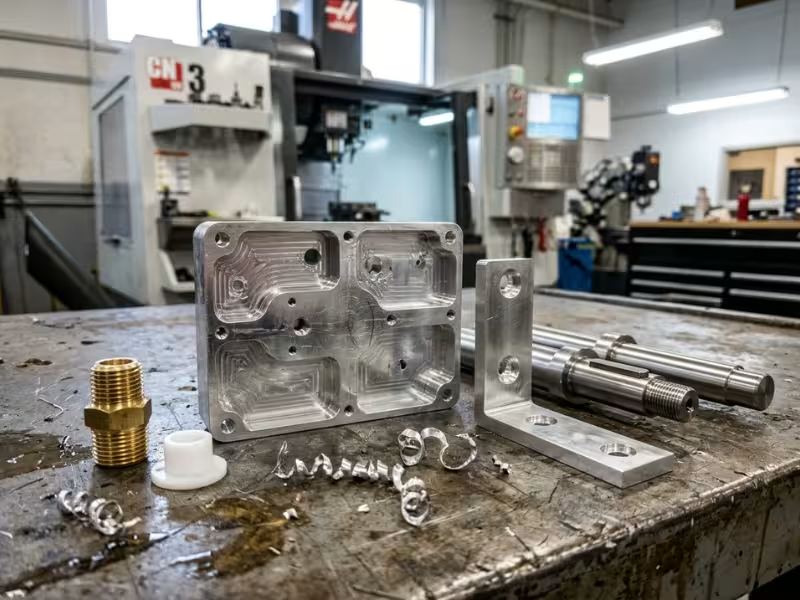
An engineer needs 200 aluminum housings for a new sensor. Launch is eight weeks away, and the design may still change. Should she machine, mold, or cast them?
Machined parts are parts a cutting tool shapes from a solid block or bar.
Teams choose them for clear reasons. They hold tight tolerances and use strong engineering materials. They also need no costly mold, so design changes stay cheap.
I help engineers and buyers make this call every week. This article shows you how to judge whether machining fits your part, and how to design and source it well.
What Machined Parts Really Are
Machining works by taking material away. You start with a solid block, bar, or plate. A cutting tool then removes everything that isn’t the part. Engineers call this subtractive manufacturing.
Today, CNC machines do almost all of that cutting. A program guides the tool along each path, so part 1 and part 50 come out the same. Manual mills and lathes still handle quick fixes and one-off repairs. But when buyers say “machined parts,” they usually mean CNC parts.
Other methods differ mainly in how they form the shape:
- Casting pours molten metal into a mold. It suits complex shapes at volume, but cast surfaces and holes often need machining afterward.
- Forging presses hot metal into shape. It gives tough grain flow for highly stressed parts, but it needs costly dies.
- 3D printing builds parts layer by layer. It handles internal channels well. Most printed parts, though, can’t match machined strength, finish, or tolerance.
Machining needs no mold or die. The part also keeps the full strength of the wrought stock, because nothing melts or fuses along the way.
I point customers toward machining when their part checks most of these boxes:
- Key features need tolerances of about ±0.05 mm or tighter.
- The part must use a specific alloy or engineering plastic, such as 6061 aluminum, 316 stainless, or PEEK.
- The order runs from one prototype to a few thousand pieces.
- The design may still change.
- Mating faces, bores, or threads must seal or fit precisely.
If your part checks three or more, start with machining.
Common Types of Machined Parts and How They’re Made
Most machined parts fall into a few families. Once you know your part’s family, you know which machine will make it and what will drive its cost. I sort every new drawing this way before I quote it.
Start with the shapes that fill most mill tables.
Housings, Brackets, and Plates
These parts have flat faces, pockets, slots, and bolt patterns. In CNC milling, the machine holds the block still while a spinning cutter removes material. Electronics enclosures, hydraulic manifolds, motor brackets, and fixture plates all start here.
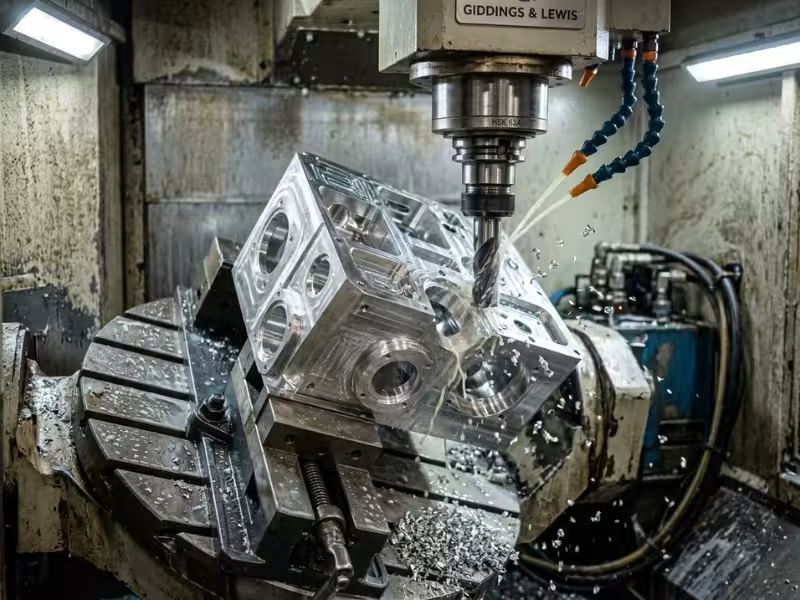
A 3-axis mill handles most of them. The catch comes when features sit on several faces. Every time the operator flips the part, you pay for a new setup. Each flip also adds a little position error.
A 5-axis machine reaches most faces in one clamping. On a housing with angled ports, I’ve cut four setups down to one. The ports also lined up better with each other.
For these parts, cost depends on two things: how much metal you remove and how many setups you need.
Round parts take a different path.
Shafts, Pins, Bushings, and Threaded Parts
On a lathe, the bar spins and the tool stays put. Anything symmetrical around a center line belongs here: motor shafts, dowel pins, bushings, spacers, and threaded fittings.
Turning gives you concentricity almost for free. When the lathe cuts the outside diameter and the bore in one chucking, they often run true within about 0.01–0.02 mm.
Mill-turn centers go further. They add flats, cross holes, and keyways without moving the part to a second machine.
Small turned parts often cost the least per piece of any machined part. A bar-fed lathe can run for hours with little help.
Whatever the family, holes usually carry the tightest requirements on the drawing.
Precision Holes, Bores, and Sealing Features
A drill gets you close, often within about ±0.05–0.1 mm. Reaming brings a hole to roughly ±0.01–0.02 mm. Boring fixes both size and position, so I use it for bearing seats and press fits. Tapping or thread milling then cuts the threads.
Sealing features need more than size. O-ring grooves and gasket faces need a smooth finish, often around Ra 0.8–1.6 µm. Any tool marks across that path can leak.
Depth matters too. Past about 10 times the diameter, a drill must back out often to clear chips. That adds time and risk.
My advice is simple: mark only the critical holes. Let the rest take standard drill tolerance.
Some features go beyond what a mill or lathe can cut.
Features That Need Grinding or EDM
Grinding takes over when a part needs extreme precision or when heat treatment has already hardened it. Bearing journals, hardened pins, and gauge faces often hold about ±0.005 mm with a finish near Ra 0.2–0.4 µm.
EDM uses electric sparks instead of a cutter. Wire EDM cuts sharp inside corners, narrow slots, and keyways in hardened tool steel. Sinker EDM burns blind cavities and square holes that no round tool can reach.
Both processes run slowly and add cost. I save them for features that truly need them.
If a feature on your drawing doesn’t fit any of these families, flag it before you request quotes.
Choosing the Right Material for Machined Parts
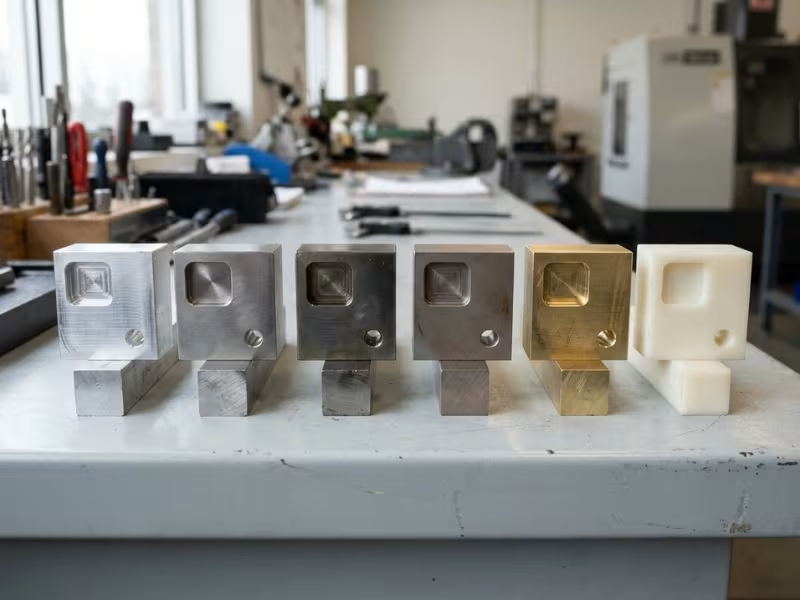
Material choice drives cost more than most buyers expect. The same bracket can cost $30 in aluminum and $120 in titanium. Raw stock explains only part of that gap. Machine time, tool wear, and finishing add the rest.
I start with three questions. What loads will the part carry? What environment will it face? How hard will it be to cut? Here’s how the common options compare at a glance:
|
Material |
Machinability |
Strength |
Corrosion resistance |
Relative cost |
Typical parts |
|---|---|---|---|---|---|
|
Aluminum 6061/7075 |
Excellent |
Medium–high |
Good (better when anodized) |
Low |
Housings, brackets, plates |
|
Stainless 303/304/316 |
Fair |
High |
Excellent |
Medium |
Fittings, valves, medical parts |
|
Carbon/alloy steel |
Good |
High–very high |
Poor without coating |
Low–medium |
Shafts, gears, tooling |
|
Titanium Ti-6Al-4V |
Poor |
Very high for its weight |
Excellent |
High |
Aerospace and implant parts |
|
Brass/copper |
Excellent (brass) / Poor (copper) |
Low–medium |
Good |
Medium |
Electrical and fluid fittings |
|
Engineering plastics |
Good |
Low–medium |
Excellent |
Low–high |
Insulators, bushings, seals |
The table gives you the trade-offs. The details below show how each material behaves on the machine.
Aluminum: Where Most Projects Should Start
Aluminum cuts fast, and tools last a long time in it. That keeps cycle times short and quotes low.
6061 covers most jobs. It resists corrosion well, welds easily, and takes anodizing cleanly. 7075 nearly doubles the strength, so I use it for high-load brackets and aerospace fittings. It costs more and resists corrosion less, so I always anodize it.
If your part can run in aluminum, start there. Aluminum CNC machining gives you the shortest lead time and the lowest price of any common metal.
Stainless and Carbon Steel: Strength With Different Costs
Stainless steel resists rust, but it fights the cutter. Grades like 304 and 316 work-harden as you cut. A dull tool or a light, rubbing pass makes the surface harder for the next pass. In stainless steel CNC machining, expect machine time at roughly two to three times that of aluminum.
Pick the grade by its job:
- 303 machines the easiest, thanks to added sulfur. Use it for fittings and fasteners that don’t need welding.
- 304 suits general hardware and food equipment.
- 316 handles salt water and medical cleaning chemicals.
- 17-4 PH hardens after machining for high-strength parts.
Carbon and alloy steels cost less to cut. 1018 and 12L14 machine easily for pins and spacers. 4140 gives you tough shafts and gears, and you can heat-treat it for wear resistance. The catch is rust. Plan for black oxide, zinc plating, or paint in the quote.
Titanium: Worth It Only When Weight or Biocompatibility Matters
Ti-6Al-4V matches many steels in strength at about 60% of the weight. It also resists corrosion and works well inside the body.
It cuts poorly, though. Titanium holds heat at the cutting edge, so I run slow speeds with heavy coolant. Raw stock costs several times more than aluminum. A titanium part often costs three to five times the same part in aluminum.
Use titanium for aerospace parts, implants, and racing components. For anything else, check whether 7075 aluminum or stainless can do the job first.
Brass and Copper: Conductors and Fittings
C360 brass may be the easiest metal to machine. Chips break cleanly, tools barely wear, and threads come out crisp. That makes it ideal for valve bodies, fluid fittings, and electrical connectors. It does contain lead, so I check RoHS and drinking-water rules first.
Pure copper, such as C110, conducts heat and electricity better. But it’s soft and gummy, and it smears under the tool. I use it for bus bars, heat sinks, and grounding parts, and I price in extra deburring time.
Engineering Plastics: Light, Quiet, and Insulating
Plastics win when a part needs low weight, electrical insulation, low friction, or chemical resistance. In CNC plastic machining, each resin behaves differently:
- POM (Delrin) cuts cleanly and holds size well. It’s my first pick for gears, bushings, and wear pads.
- Nylon costs less and handles impact well. It absorbs moisture and swells, so avoid tight tolerances in humid places.
- PEEK handles heat up to about 250°C and harsh chemicals. Stock costs a lot, so I save it for medical, semiconductor, and oil-and-gas parts.
- PTFE resists almost every chemical and slides easily. It’s soft and creeps under load, so expect looser tolerances.
All plastics expand more with heat than metals do. I usually loosen tolerances to about ±0.05–0.1 mm on plastic parts unless the design truly needs more.
Choose the least expensive material that handles your loads, environment, and finish. Upgrade only when a real requirement demands it.
Why Companies Choose Machined Parts
Most teams don’t pick machining because it’s cheap per piece. They pick it because it lowers risk. When launch is close and the design isn’t locked, machining keeps your options open. These four reasons come up most often.
Precision you can repeat. A well-run CNC shop holds about ±0.1 mm on general features without extra effort. Critical bores and fits often hold ±0.01–0.025 mm. The program doesn’t drift between parts, so a batch of 300 housings shares the same bolt pattern and bore size. A bearing seat that fits on part 1 and part 300 saves your assembly line from sorting and rework.
Design changes cost hours, not weeks. No mold or die stands between your CAD file and the part. Say testing shows a wall needs 1 mm more thickness. The programmer edits the toolpath, and the next batch can ship within days.
Compare that with injection molding. A modest steel mold often costs $10,000–$50,000, and changing it means welding or cutting new inserts. I’ve watched teams run three design revisions on machined parts in the time one mold change would take.
Real engineering materials. Machined parts start from wrought bar or plate. That stock carries known mechanical properties, often backed by a mill certificate traced to the heat lot. Nothing melts or fuses during cutting, so the finished part keeps that strength.
A 7075 bracket or a 316 valve body performs as the datasheet says. Aerospace and medical customers rely on that traceability. Many printed or cast parts can’t offer it without extra testing.
A fit for prototypes and low-to-mid volumes. Machining has almost no fixed cost beyond programming and fixturing. On a typical part, that runs about $200–$800. Spread it over 1 part or 1,000 parts, and it stays manageable. A mold needs thousands of parts to pay back.
Here’s how volume usually plays out:
- 1–10 pieces: functional prototypes in the final material
- 10–500 pieces: pilot runs and early production
- 500–5,000 pieces: steady production, especially for metal parts or tight tolerances
Past a few thousand pieces, the math starts to shift. But many industrial products never reach that point. Their lifetime volume stays in the hundreds, and machining serves them from the first prototype to the last order.
The real advantage is flexibility. You get production-grade parts now, without betting on a design you may still change.
When Machining Stops Making Sense
I sometimes tell customers not to machine their part. We can cut it, but another process would serve them better. Here’s where I draw that line.
High volumes of plastic parts. Say you need 50,000 ABS housings a year. A machined housing might cost $25–$40 each. An injection mold costs $20,000–$50,000 up front, but each molded part then lands near $1–$3. The mold pays for itself within the first few thousand parts. Once your design is frozen and volume climbs, molding wins.
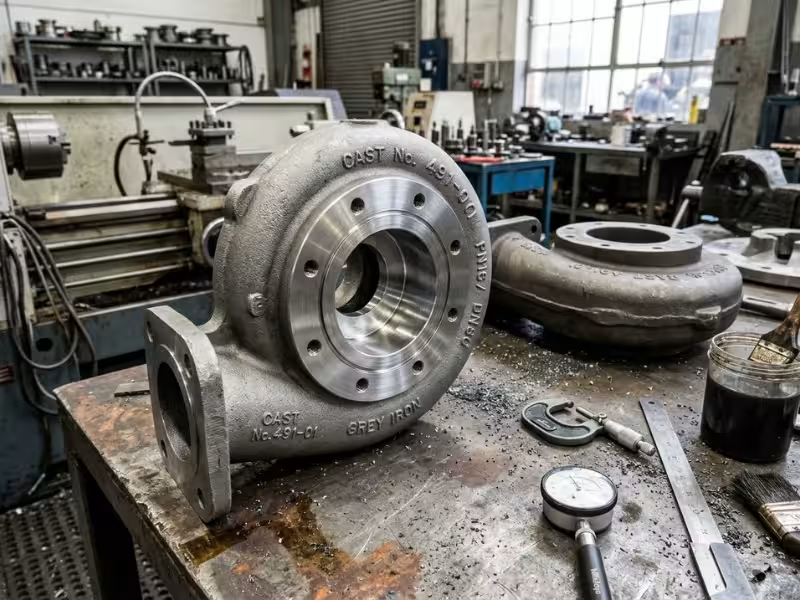
Large cast structures. Pump bodies, gearbox housings, and machine bases can weigh 50 kg or more. Machining one from solid means you buy a huge billet and cut most of it away. Casting forms the rough shape first. Then I machine only the bearing bores, mating faces, and threads. That hybrid route often cuts the part cost by half or more.
Material waste. Some machined parts turn 70–90% of their stock into chips. Aluminum and brass chips recycle well, so the loss stays small. With titanium, Inconel, or PEEK, you pay for costly stock that ends up in the chip bin. If your part hollows out most of its billet, ask about a casting, a forging, or a near-net blank.
Shapes a cutter can’t reach. A tool needs a straight path to every surface it cuts. Curved internal cooling channels, sealed hollow bodies, and lattice structures fall outside that reach. You can sometimes split the part into two machined halves. But that adds a joint, a seal, and an assembly step. For these shapes, metal 3D printing often makes more sense.
Per-part cost that won’t come down. Machining gets cheaper with volume, but only up to a point. Setup cost spreads out, while cycle time stays fixed. A part that takes 40 minutes on a 5-axis machine costs about the same at piece 1,000 as at piece 100. When cycle time drives most of the quote, compare it against die casting or metal injection molding.
None of this makes machining a weak choice. It means you should match the process to the part, not force the part to fit the process.
How to Design Machined Parts for Lower Cost and Fewer Problems
Design decisions lock in most of a part’s cost before anyone requests a quote. By the time a drawing reaches my desk, the tolerances, corners, and feature layout have already set the price. I can’t machine around a costly design. I can only quote it.
The good news is that a few design habits cut cost without hurting function. The biggest savings usually start with the numbers on the drawing.
Tolerances and Finish: Spend Precision Where It Earns Its Keep
Every tight tolerance asks the shop to slow down. That can mean extra passes, more inspection, and sometimes a different machine. Here’s roughly how precision affects cost on a typical milled part:
|
Tolerance |
What it takes |
Cost impact |
|---|---|---|
|
±0.1–0.2 mm |
Standard machining |
Baseline |
|
±0.05 mm |
Careful finishing passes |
Slight increase |
|
±0.025 mm |
Finishing tools, in-process checks |
Often 20–50% more |
|
±0.005–0.01 mm |
Reaming, boring, or grinding |
Can double the feature cost |
I often see drawings with ±0.01 mm on every dimension. That usually comes from a template, not from a real need. Put tight tolerances only on features that fit, seal, or locate something else. For everything else, add one title-block note, such as “Untoleranced dimensions per ISO 2768-m.”
Surface finish works the same way. Most CNC shops produce about Ra 3.2 µm straight off the machine at no extra cost. Ra 1.6 µm needs a lighter finishing pass. Ra 0.8 µm slows the cut further. Ra 0.4 µm or better often calls for grinding or polishing. Specify fine finishes only on sealing faces, bearing surfaces, and sliding contacts.
Tolerances set how carefully we cut. Geometry sets which tools we can use at all.
Corners, Holes, Walls, and Undercuts
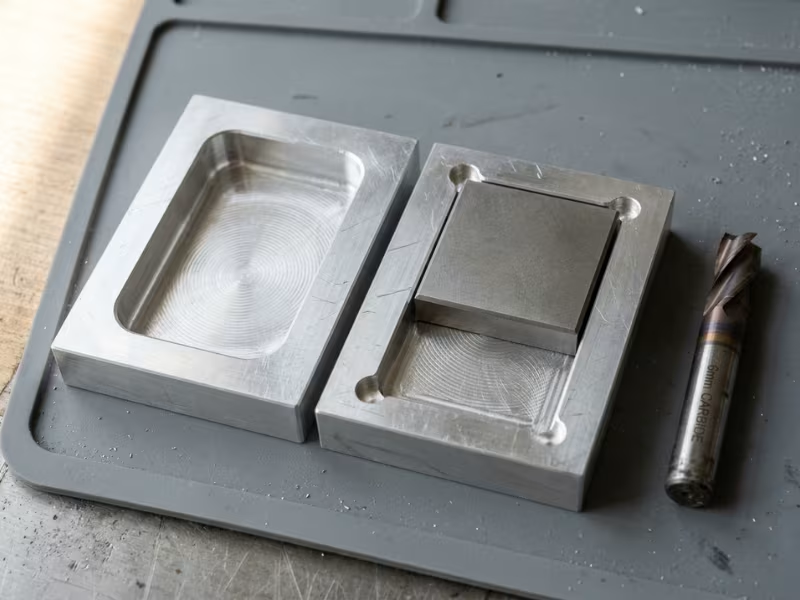
Internal corners. End mills are round, so every inside pocket corner has a radius. A sharp 90° internal corner means a smaller, slower tool, or EDM. As a rule, I ask for internal corner radii of at least one-third of the pocket depth. A 15 mm deep pocket should have corners of 5 mm or more.
Make the radius slightly larger than the tool radius, too. That lets the cutter sweep around the corner instead of plunging into it and chattering. If a square part must fit into the pocket, add small “dog-bone” relief cuts in the corners. They solve the fit without EDM.
Holes. Use standard drill sizes wherever you can. A drill reaches about 4× its diameter deep without trouble. Past roughly 10×, it needs constant pecking or a gun drill, which adds time and breaks tools. For tapped holes, a thread depth of 1.5× the diameter carries nearly the full load. Deeper threads add cycle time and almost no strength.
Wall thickness. Thin walls vibrate and spring away from the cutter. I recommend at least 0.8 mm for metal walls and 1.5 mm for plastic. I prefer 1.5–2 mm in metal when the wall stands tall. A tall, thin wall next to a deep pocket often ends up tapered or marked by chatter.
Undercuts. A standard end mill can’t cut under a ledge. Undercuts need T-slot or dovetail cutters, or another setup from a different side. If you need one, size it to match a standard cutter width. Leave clearance around it so the tool can enter.
Fixing features helps. Reducing how often the part moves helps even more.
Fewer Setups, Fewer Tools, Shorter Cycles
Every time an operator unclamps and flips a part, you pay for setup time. You also add a small alignment error. A part that needs six setups can cost twice as much as a similar part that needs two.
These moves cut both cost and risk:
- Group features on as few faces as possible. If most holes and pockets face one direction, I can finish them in one clamping.
- Standardize sizes. Use one hole diameter, one thread size, and one corner radius wherever you can. Each new size means another tool change and another tool in the magazine.
- Leave room to clamp. A flat face or a spare flange gives the shop a solid place to hold the part. Without one, we may need a custom fixture, and you pay for it.
- Skip cosmetic features that only add cut time. Engraved logos, decorative chamfers, and deep text all add minutes to every part.
- Loosen non-critical dimensions. Opening a tolerance from ±0.025 mm to ±0.1 mm often lets me skip a finishing pass entirely.
Before you send a drawing out, ask one question about every callout: what happens if this feature comes out 0.1 mm off? If the answer is “nothing,” relax it. That one review usually cuts more cost than any price negotiation.
Machining vs 3D Printing, Molding, and Casting
Most parts can come from more than one process. The best one depends on your volume, your material, and which features must hold tight size. Buyers ask me about three alternatives most often. Here’s how they stack up against machining.
|
Factor |
CNC machining |
3D printing |
Injection molding |
Casting/forging |
|---|---|---|---|---|
|
Best volume |
1–5,000 |
1–50 |
5,000+ |
500+ |
|
Tooling cost |
None |
None |
High |
Medium–high |
|
Typical tolerance |
±0.01–0.1 mm |
±0.1–0.3 mm |
±0.05–0.1 mm |
±0.5 mm+ as-cast |
|
Surface finish |
Ra 0.8–3.2 µm |
Visible layer lines |
Matches the mold |
Rough until machined |
|
Design changes |
Fast, low cost |
Fastest |
Slow, costly |
Slow, costly |
The table sets the frame. Each matchup has its own tipping point.
Machining vs 3D Printing
Printing wins two contests: speed on the first few parts, and internal channels no cutter can reach. Machining wins most of the rest.
A machined part keeps the full strength of the bar in every direction. Printed plastic parts stay weaker between layers. You can also machine almost any alloy or plastic sold as bar or plate. Printers work from a much shorter list.
Tolerance and finish follow the same pattern. Printed features usually land within ±0.1–0.3 mm with visible layer lines. Sealing faces and bearing bores still need a machining pass.
Printing costs stay flat per part. For a small plastic bracket, printing often wins below 10–20 pieces. Past about 50, machining usually costs less, especially in aluminum.
Machining vs Injection Molding
Molding trades a large upfront check for a very low part price. A mold often runs $10,000–$50,000 or more. Molded parts then cost cents to a few dollars each.
I use a simple threshold. Below 1,000 parts a year, machining usually wins. Once the design is frozen and volume passes 2,000–5,000 a year, molding takes over. In between, the part’s size and complexity decide.
Machining vs Casting and Forging
Casting forms large, complex shapes, such as pump bodies and gearbox housings. Forging builds tough grain flow into crankshafts, flanges, and connecting rods. Both need patterns or dies. Expect 4–12 weeks before the first good part. I can often ship machined parts in one to two weeks.
As-cast surfaces rarely hold better than ±0.5 mm, and castings can hide porosity. So I seldom recommend choosing one or the other. Cast or forge a near-net blank, leave 1.5–3 mm of stock on critical surfaces, and machine only the bores, faces, and threads. You get the low cost of the blank and the precision of machining.
When Mixing Processes Pays Off
That hybrid idea works well beyond castings. I often machine the first 50 parts and then move the frozen design to a mold. Some customers mold a plastic housing and press in a machined brass insert for the threads. Others print a complex manifold and then machine its ports to size.
Match each feature to the process that makes it best. One part can use two methods.
How to Source Machined Parts Without Surprises
Most quoting problems start with a thin RFQ. When a shop has to guess, it pads the price or sends questions that cost you a week. A complete package gets you faster and tighter quotes.
Send a complete RFQ. Include these items:
- A 3D model (STEP works everywhere) plus a 2D PDF drawing
- Tolerances, with critical features clearly marked
- The exact material grade, such as 6061-T6 or 316, not just “aluminum” or “stainless”
- First-order quantity and expected annual volume
- Finish and post-processing, such as anodize type and color, plating, or heat treatment
- Inspection needs, such as a first-article report or material certs
Read the quote line by line. Most quotes have three parts:
- Setup and programming covers CAM work and fixtures. Shops usually charge it once.
- Per-part price covers material and machine time.
- Expedite charges can add 25–50% for rush lead times.
Ask for pricing at two or three quantities, such as 10, 100, and 500. That shows you where setup cost stops driving the price.
If one quote lands far below the rest, find out why. The shop may have missed a tolerance, a finish, or an outside process.
Ask these questions before your first order:
- Which features on my drawing drive the most cost?
- Do you machine everything in-house, or do you outsource finishing?
- How will you check critical dimensions: CMM, gauges, or calipers?
- What happens if a part fails inspection?
- Can I get first-article parts before the full run?
A good shop answers quickly. It also suggests design changes before you ask.
Check certifications only where they apply. ISO 9001 shows the shop runs a documented quality system. Aerospace work usually requires AS9100. Medical devices call for ISO 13485. If your part doesn’t need these, don’t pay extra for them.
Start with a small batch. It tests the shop’s quality, communication, and lead time before you commit to volume.
Machined Parts FAQ
What are machined parts?
Machined parts start as a solid bar, block, or plate. A cutting tool removes material until only the finished shape remains.
Most shops now use CNC mills and lathes. A program guides every cut, so each part in a batch matches the last one.
When should I choose machined parts instead of cast parts?
Choose machining when you need tight tolerances, a specific wrought alloy, or a design that may still change. It also fits orders from one prototype to a few thousand pieces.
Casting needs a pattern or die and often 4–12 weeks before the first good part. It pays off for large, complex shapes at higher volumes.
For many parts, I suggest using both. Cast a near-net blank, then machine only the bores, faces, and threads.
What materials are best for machined components?
Start with 6061 aluminum. It cuts fast, resists corrosion, and keeps quotes low. From there, match the material to the job:
- 303 or 316 stainless for wet or corrosive environments
- 4140 steel for shafts and gears that need strength
- Titanium only when weight or biocompatibility truly matters
- POM or PEEK for insulation, low friction, or chemical resistance
How accurate can CNC machined parts be?
Most shops hold about ±0.1 mm on general features without extra effort. Critical bores and fits often reach ±0.01–0.025 mm. Grinding can hold about ±0.005 mm.
Each tighter step adds time and inspection. Put tight tolerances only on features that fit, seal, or locate another part.
Why do custom machined parts get expensive?
These five issues push most quotes up:
- Tight tolerances on every dimension
- Features on many faces, which need extra setups
- Hard-to-cut materials like titanium or stainless
- Deep pockets, sharp internal corners, and thin walls
- Small orders, where setup cost spreads over just a few parts
Review the drawing before you negotiate price. Relaxing non-critical dimensions often saves more.
Is CNC machining good for prototypes and low-volume production?
Yes. Machining needs no mold, so fixed costs usually stay around $200–$800 for programming and fixturing.
You can test prototypes in the final material, change the design, and run the next batch within days. Machining stays cost-effective from a single part to a few thousand.
Start With a Clean Drawing
Machining fits your part when four things line up: geometry a cutter can reach, a material worth cutting, tolerances that need real precision, and volumes below the point where molding or casting wins.
Your design sets most of the cost before any shop sees your file. Corners, tolerances, and setups decide the price long before the quote does.
So start there. Send a STEP model and a 2D drawing. Mark the critical features clearly, and relax everything else. Then request quotes from two or three shops at a few quantities. Their answers will show you the right path.