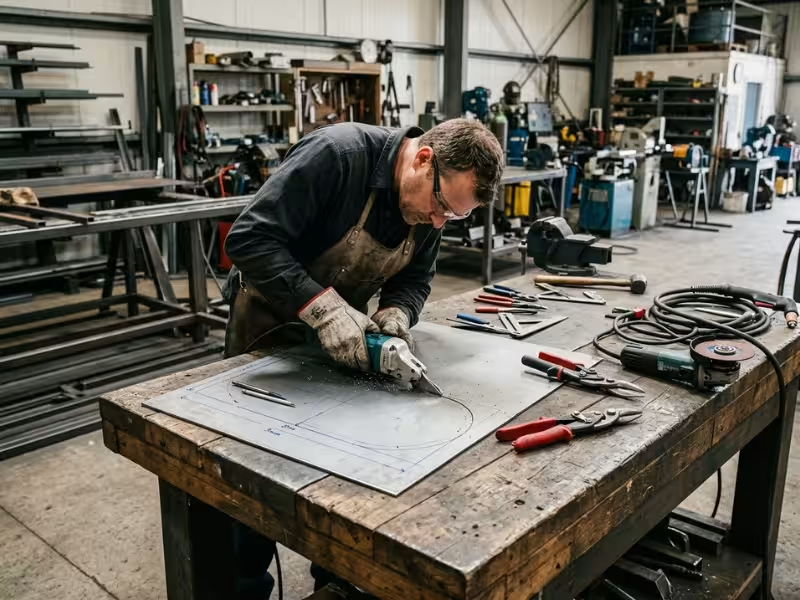
Most bad sheet metal cuts I fix in our shop don’t come from poor technique. They come from using the wrong tool for the gauge. The damage looks the same every time: chewed edges, wavy panels, burned coatings, and snips that won’t close.
Three things determine the right method: the sheet’s actual thickness, the metal type, and the cut shape.
This guide helps you quickly match the tool to the job, cut clean edges the first time, and skip rework that wastes time and material.
What to Check Before You Cut
Before I pick up any tool, I check three things: thickness, metal type, and cut shape. If you skip one, the cut usually goes wrong.
Thickness comes first. Sheet metal runs from about 0.5 mm to roughly 6 mm (1/4 in). Anything thicker is plate, and anything thinner is foil. Most cutting trouble starts when someone misjudges where their sheet falls in that range.
Gauge numbers run backward. A lower gauge means thicker metal.
Here’s what most guides skip: gauge thickness changes by metal. For example, 18 ga steel measures about 1.2 mm, while 18 ga aluminum measures about 1.0 mm. Galvanized steel follows its own chart. Tool makers rate capacity for mild steel, so I measure every sheet with calipers or a gauge wheel instead of trusting the label.
Metal type shifts real capacity.
- Stainless work-hardens. Treat a tool’s stainless limit as about two gauges thinner than its mild steel rating.
- Aluminum cuts easily but clogs abrasive discs.
- Zinc or paint coatings limit which methods are safe to use.
Cut shape and volume narrow the field. Decide whether you need straight or curved cuts, edge cuts or interior cutouts, and one part or fifty.
Common Gauge Thicknesses at a Glance
Use this chart to turn a gauge number into real thickness. Confirm the exact values against your supplier’s spec sheet.
|
Gauge |
Mild Steel (mm / in) |
Aluminum (mm / in) |
Typical Uses |
|---|---|---|---|
|
26 |
0.45 / 0.018 |
0.40 / 0.016 |
Flashing, gutters |
|
24 |
0.61 / 0.024 |
0.51 / 0.020 |
Roofing, HVAC duct |
|
22 |
0.76 / 0.030 |
0.64 / 0.025 |
Ductwork, light enclosures |
|
20 |
0.91 / 0.036 |
0.81 / 0.032 |
Appliance panels |
|
18 |
1.21 / 0.048 |
1.02 / 0.040 |
Auto body panels |
|
16 |
1.52 / 0.060 |
1.29 / 0.051 |
Brackets, toolboxes |
|
14 |
1.90 / 0.075 |
1.63 / 0.064 |
Frames, heavy enclosures |
|
12 |
2.66 / 0.105 |
2.05 / 0.081 |
Trailer parts |
|
10 |
3.42 / 0.135 |
2.59 / 0.102 |
Machine guards, heavy brackets |
How to Choose the Right Tool: A Gauge-to-Tool Framework
When someone asks me which tool to buy, I don’t name a brand. I ask three questions in order.
Thickness narrows the options. Cut shape picks the tool. Volume decides whether you buy, rent, or outsource.
Find your thickness band below, then choose the column that matches your cut.
|
Thickness Band |
Straight Cuts |
Curves and Cutouts |
Avoid |
Notes |
|---|---|---|---|---|
|
26–24 ga and lighter |
Tin or aviation snips |
Red or green aviation snips |
Angle grinders |
Grinders overheat and warp thin sheet |
|
22–18 ga |
Electric shears |
Nibbler |
Snips on long runs |
Aviation snips hit their upper limit here |
|
16–14 ga |
Electric shears or thin cut-off disc |
Nibbler or plasma |
Hand snips |
Snips are past capacity |
|
12–10 ga |
Plasma, angle grinder, or metal-cutting circular saw |
Plasma |
Hand tools |
Hand tools stop being practical |
|
Over 10 ga |
Plasma |
Plasma |
Light power tools |
This is plate work, so outsource precision cuts to laser or waterjet |
If a row lists two tools, start with the one you already own. Switch tools if the cut fights you. A tool that struggles leaves a rough edge, and that edge costs you time later.
Volume settles the last question. For a few cuts on thin sheet, a $20 pair of aviation snips does the job. For an occasional heavy job, rent a plasma cutter for the weekend instead of buying one. For dozens of identical parts, send the drawing to a shop.
Matching the Tool to Common Jobs
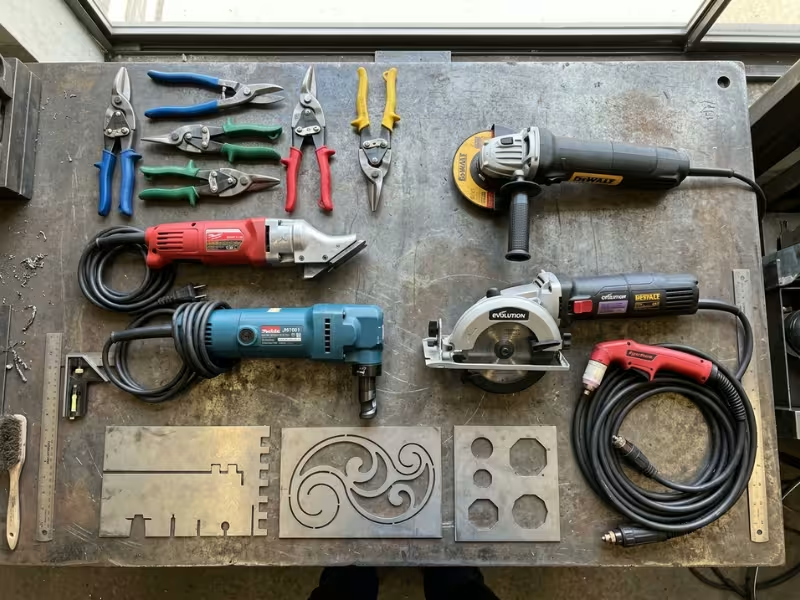
The table covers thickness. Real projects add their own twists, so here’s how I adjust for the jobs I see most often.
- Roofing panels and corrugated sheet: Use electric shears or a nibbler. Cut from the face the tool maker specifies, so the burr lands on the hidden side. Keep abrasive discs off coated panels, because sparks burn the paint and zinc.
- HVAC ductwork: Grab aviation snips and a hand seamer. That pair is the standard trade kit, and it handles almost every duct gauge.
- Auto body patch panels: Use a thin cut-off wheel or an air saw. Make short passes and let the panel cool, or the heat will warp it.
- Interior cutouts such as vents or holes: Drill a starter hole first. Then finish with a nibbler or a jigsaw with a metal-cutting blade.
- Repeated identical parts: Outsource to laser cutting. A laser repeats the same shape to tight tolerances, and you skip hours of marking and cleanup.
If your job fits two rows, follow the thicker band. That way you never push a tool past its limit.
Sheet Metal Cutting Tools Compared
Here’s how I rate the tools I reach for most often.
|
Tool |
Best For |
Thickness Range (mild steel) |
Edge Quality |
Speed |
Cost |
Skill Level |
|---|---|---|---|---|---|---|
|
Tin snips |
Short cuts, flashing |
Up to 24 ga |
Clean |
Slow |
$ |
Beginner |
|
Aviation snips |
Straight cuts, curves |
Up to 18 ga |
Clean |
Slow |
$ |
Beginner |
|
Electric shears |
Long straight cuts |
Up to 14–16 ga |
Very clean |
Fast |
$$ |
Beginner |
|
Nibbler (power) |
Curves, cutouts, corrugated sheet |
Up to 14–16 ga |
Good, small ridges |
Medium |
$$ |
Intermediate |
|
Angle grinder with cut-off disc |
Quick cuts, awkward spots |
20 ga to plate |
Rough, burred |
Medium |
$ |
Intermediate |
|
Circular saw with metal blade |
Long cuts in thick sheet |
16 ga to 1/4 in |
Good |
Fast |
$$ |
Intermediate |
|
Plasma cutter |
Thick stock, curves |
18 ga to plate |
Good, some dross |
Very fast |
$$$ |
Intermediate |
|
Hacksaw |
Small backup cuts |
Up to 16 ga |
Fair |
Very slow |
$ |
Beginner |
|
Laser or waterjet (outsourced) |
Precise, repeated parts |
Foil to plate |
Excellent |
Very fast |
Per job |
None (the shop runs it) |
Shears and snips cut cold. They leave the cleanest edges, and they never scorch a coating.
Grinders handle almost any shape or thickness. But they leave the roughest, hottest edge on this list, so plan time for deburring.
Plasma cutters race through thicker stock. The machine, air supply, and consumables make them the most expensive tool to set up.
If you cut sheet every week, bench, throatless, and Beverly shears are shop-grade upgrades that slice heavier gauges with one lever pull. Reciprocating saws work for demolition and rough cuts, not for parts that need a precise edge.
How to Cut Sheet Metal Step by Step
Picking the right tool is only half the job. Good technique still decides whether the edge comes out clean or chewed. Below are the methods I teach new fabricators, with safety notes placed right where they apply.
Using Tin Snips and Aviation Snips
Snips look simple, but small habits make a big difference. Start by grabbing the right pair.
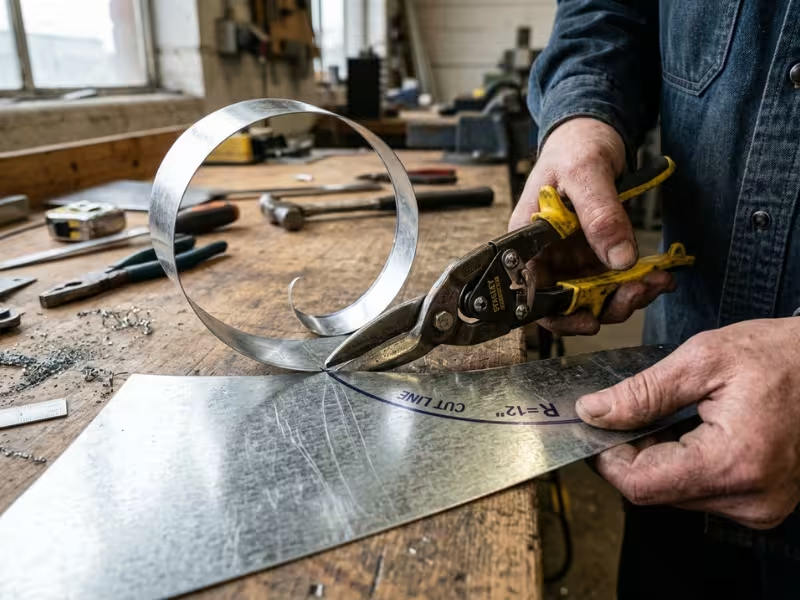
- Pick your snip by color.
An easy rule: the waste should curl away on the side you’re not keeping. If the offcut curls into your part, you grabbed the wrong pair. -
- Yellow cuts straight lines and gentle curves.
- Red turns left and pushes the waste off to the right.
- Green turns right and pushes the waste off to the left.
- Mark the line and cut on the waste side. File to the line afterward.
- Take long, partial strokes. Don’t close the jaws all the way. The tips leave a small notch or burr at every full bite.
- Let the offcut curl down and away. On long cuts, keep the main panel flat and supported on the bench.
- Cut tight radii in stages. Remove most of the waste first. Then make small relief cuts and trim to the line.
- Wear cut-resistant gloves. Fresh snipped edges and slivers cut like razors.
Know your stop signal: if you need two hands and the jaws still won’t close, you’ve passed the snip’s capacity. Switch tools before you spring the jaws or strain your wrist.
Using Electric Shears and Nibblers
These two tools often get lumped together, but they cut in very different ways.
- A shear slices the sheet like powered scissors. It makes a clean, chip-free cut with little distortion. Use it for long, straight runs.
- A nibbler punches out small crescent-shaped chips. It doesn’t distort the sheet, turns tight radii, and handles corrugated panels well.
Follow these steps with either tool:
- Clamp a straightedge as a guide for any long, straight cut. Run the tool’s base along it.
- Let the tool set the pace. If you force the feed, the motor stalls and the edge tears.
- Check the blade gap or punch-and-die setting when you change gauge on adjustable shears. A wrong gap leaves a rolled or ragged edge.
- Clean up nibbler chips with a magnet, not your hands. The chips are sharp and scatter widely.
- Keep chips off painted surfaces. Steel chips rust in place and leave orange stains that won’t wash off.
Using an Angle Grinder
The grinder can handle almost any job. That flexibility also tempts people to use it where it doesn’t belong.
- Fit a thin cut-off disc, 1–1.6 mm thick. It removes less metal, makes less heat, and warps the panel less than a thick disc. Never cut with a grinding wheel.
- Keep the guard on. Position it between the disc and your body, and stand out of the disc’s line of rotation.
- Control heat on thin sheet:
-
- Make short passes.
- Let the panel cool between cuts.
- Clamp it to the bench or a heat sink to pull heat away.
- Keep the disc straight in the cut. Don’t twist or bend it. Side load is how cut-off discs shatter.
- Wear a face shield over safety glasses, and keep flammables out of the spark path.
Know when it’s the wrong tool. Skip the grinder for:
- thin sheet that must stay flat
- galvanized steel indoors
- finish-critical edges
- long straight cuts, where shears work faster and cleaner
Using a Plasma Cutter
A plasma cutter rewards good setup more than steady hands. Most bad plasma cuts I see trace back to settings, not skill.
- Match amperage to thickness using the cut chart, not the maximum rating on the box. An entry-level 30–40 A unit cuts mild steel cleanly up to a modest thickness. Its higher “sever” rating only means it can push through, with a rough edge.
- Feed it clean, dry air at the pressure your manual recommends. Moisture quietly ruins cut quality and burns through consumables.
- Hold the right standoff. Use a drag shield or the specified pierce height. On thicker stock, start from an edge or tilt the torch to pierce. That keeps molten metal from blowing back into the nozzle.
- Read the dross to set your travel speed:
-
- Heavy dross on the bottom means you’re moving too slowly.
- Spatter on top, or a cut that won’t go through, means you’re moving too fast.
- Use a guide. A straightedge or circle guide improves the cut more than any amount of practice.
- Replace consumables early. Swap the nozzle when its hole turns oval, and swap the electrode when it pits. Worn parts widen the kerf and bevel the edge.
Always wear a shaded face shield, gloves, and a flame-resistant jacket. Keep the cut zone clear of anything that can burn.
No Power Tools? Straight Cuts by Hand
You can still make a clean straight cut without power tools. It just takes patience.
- Hacksaw: Use a 24–32 TPI blade so at least three teeth stay in the metal. Sandwich thin sheet between two boards to stop chatter, then saw through all three layers.
- Score and snap: On the thinnest gauges only, score the line deeply and clamp the sheet along a straight edge. Bend it back and forth until it snaps. On anything heavier, this tears the edge instead of breaking it cleanly.
Material-Specific Tips for Cleaner Cuts
Every tool rating assumes mild steel. Switch metals, and the rules shift. Here’s what I change for each one.
|
Metal |
Best Methods |
Avoid |
Watch Out For |
|---|---|---|---|
|
Mild steel |
Any tool rated for the gauge |
Nothing special |
Rust on bare edges |
|
Galvanized steel |
Snips, shears, nibblers |
Grinding or plasma indoors |
Zinc fumes, exposed edges |
|
Stainless steel |
Sharp shears, plasma, inox discs |
Dull blades, shared discs |
Work hardening, rust spots |
|
Aluminum |
Shears, carbide blades, plasma |
Standard abrasive discs |
Clogged discs, burrs |
|
Copper and brass |
Sharp snips, shears |
Dull blades |
Heavy burrs |
What Changes Metal by Metal
The table gives you the quick version. The notes below explain why each choice matters.
Mild steel is your baseline. When a tool claims 16 ga capacity, it means 16 ga mild steel. Bare cut edges start rusting within days in a humid shop, so prime or paint them soon after cutting.
Galvanized steel needs cold cutting. Snips, shears, and nibblers leave the zinc coating intact near the cut. Grinding and plasma burn the zinc off and release fumes that can cause metal fume fever, with flu-like chills and nausea. If you must use heat, work outdoors or use fume extraction and a suitable respirator. The cut edge loses its zinc either way, so brush on zinc-rich paint to seal it.
Stainless steel fights back. It work-hardens, so dull blades and hesitant cuts make every pass harder. Use sharp tools, keep a steady feed, and never stop mid-cut.
Grind only with iron-free, inox-rated discs. Never share discs or wire brushes with carbon steel, because stray iron leaves rust spots weeks later. Also derate your tools. Treat stainless capacity as about two gauges thinner than the mild steel rating.
When a stainless part needs machined features, tight hole positions, or a finish that hand cutting can’t deliver, it’s often faster to send it to a shop that handles stainless steel CNC machining with dedicated tooling.
Aluminum cuts easily, which creates its own problem. The soft metal loads up standard abrasive discs, and a clogged disc can grab or shatter. Switch to aluminum-specific discs, or use a carbide blade with a wax stick lubricant. Check every edge for burrs and smeared metal. If you own a plasma cutter, it handles aluminum well.
Copper and brass are soft and gummy. Use sharp snips and plan extra time for burr cleanup.
Common Mistakes When Cutting Sheet Metal
Most of the rework I see traces back to a few habits. Each one looks minor while you’re cutting. Then it costs you a part, a tool, or an injury.
|
Mistake |
What Happens |
How to Fix or Avoid It |
|---|---|---|
|
Undersized parts: ignoring kerf |
You cut down the middle of the line, and the disc or arc removes metal from your part. Grinders and plasma do the most damage. |
Mark the finished size, then cut on the waste side of the line. |
|
Sprung jaws: pushing snips past their rating |
The edge deforms, the jaws spread, and your wrist takes the strain. |
Measure the sheet first. Switch to shears or a nibbler when snips need two hands. |
|
Kinked curves: wrong snip direction or twisting |
The waste curls into your part and kinks the edge. |
Pick red or green so the waste curls away. Never twist the snips to force a turn. |
|
Warped panels: grinding thin sheet |
Heat ripples a panel that needs to stay flat. |
Cut thin sheet cold with snips or shears. |
|
Torn edges: unsupported offcut |
The offcut drops, tears the last inch, or bends the panel. |
Support both sides of the cut, or have a helper hold the offcut. |
|
Extra grinding: wrong plasma speed |
Heavy dross takes longer to clean off than the cut took. |
Read the dross and adjust your travel speed. Test on scrap first. |
|
Rust spots on stainless: contaminated discs |
Iron from shared discs shows up as rust weeks later. |
Keep inox-rated discs and wire brushes for stainless only. |
|
Metal fume fever: hot-cutting galvanized indoors |
Burning zinc releases fumes that cause chills and nausea. |
Cut galvanized cold. If you must use heat, work outdoors or use extraction and a respirator. |
|
Cut hands and peeling paint: leaving burrs |
Sharp edges slice skin, parts won’t sit flush, and paint won’t stick to the edge. |
Deburr every edge before handling or assembly. |
|
Eye injuries: skipping glasses “just this once” |
A sliver or spark reaches your eye in a split second. |
Wear safety glasses for every cut. |
Most of these mistakes come from rushing. A 30-second check of gauge, tool, and setup saves far more time than it costs.
Look twice at the last row. Big accidents cause very few eye injuries in sheet metal work. Most come from snipped slivers and grinder sparks during quick jobs. Keep your glasses on the bench next to your snips so you never have to go looking for them.
Finishing the Edge and Staying Safe
A cut isn’t finished when the offcut drops. A burr or crooked line will cause problems again at assembly. Two minutes of cleanup now saves twenty later.
Deburring and Checking the Cut
Match the deburring tool to the edge you’re working on:
- Hand deburring tool: Best for long, straight edges. One pass on each side does the job.
- File: Best for corners and tight spots. Push on the forward stroke only.
- Flap disc: Best for heavy burrs or plasma dross. Use light pressure so you don’t round the edge.
Next, check the part. Lay it on a flat bench and look for rocking or gaps. Then hold a square against two edges before assembly.
Use this rule to decide what comes next. If the edge sits more than about a blade’s width off the line, re-cut it. If it’s just a burr or minor wander, file it.
Safety Essentials for Every Cut
These rules apply to every tool you use:
- Wear safety glasses for every cut, and add a face shield for grinding and plasma work.
- Use hearing protection whenever a power tool runs.
- Wear cut-resistant gloves to handle sheet and to snip.
- Clamp the work to the bench. Never hold it by hand.
- Clear anything flammable from the spark zone before you start.
When to Outsource Instead of Cutting Yourself
Some jobs cost more to cut yourself than to send out. I tell customers to call a laser or waterjet shop when any of these apply:
- Tight tolerances: You need accuracy better than about ±0.5 mm.
- Repeat parts: You need many identical pieces.
- Complex inside shapes: The part has detailed internal cutouts or tight inside corners.
- Heavy stock: The metal is thicker than your tools can handle.
- Finish-critical edges: The part is stainless or aluminum and the edge has to look good.
Laser cutting handles thin-to-medium sheet fast and holds tight tolerances. Waterjet adds no heat, so the part won’t warp or show heat tint, and it cuts almost any material.
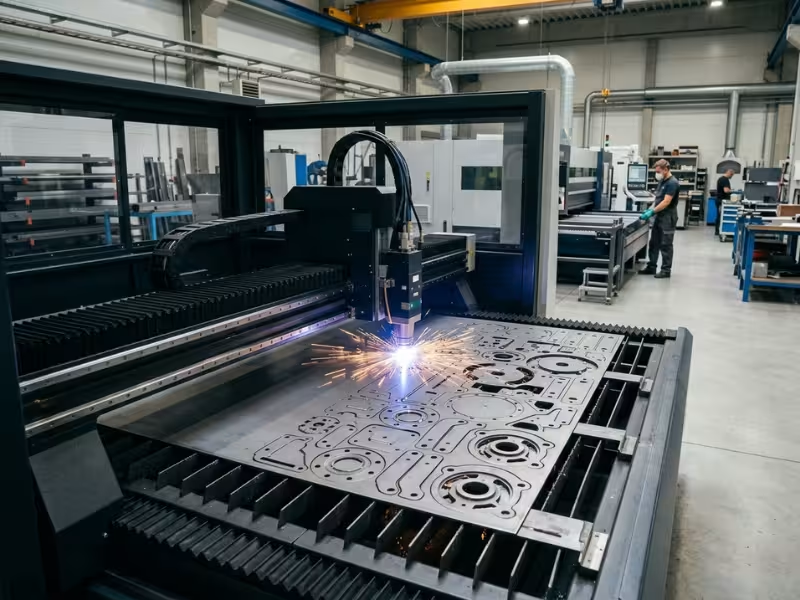
If your cut parts also need bending, welding, or assembly, a custom metal fabrication shop can take the job from flat sheet to finished part in one order.
Shops usually price by cut length and setup time. If you batch your parts into one order, the cost per part drops.
FAQs
What’s the best tool for cutting sheet metal at home?
It depends on the gauge. For 26–24 ga, a $20 pair of aviation snips handles most jobs. For 22–18 ga, electric shears or a nibbler give you faster, cleaner cuts. For 16–14 ga, step up to a thin cut-off disc or a corded nibbler. For 12 ga and heavier, a plasma cutter or metal-cutting circular saw is worth the cost.
Can you cut sheet metal with a circular saw?
Yes, but only with a blade rated for metal. A carbide-tipped ferrous blade on a dedicated metal-cutting saw works best. These saws run at lower speeds and catch hot chips in a closed housing. Never use a wood blade. The teeth can snap off and fly, and the saw can kick back hard. Clamp the sheet and wear a face shield.
What gauge can aviation snips cut?
Most standard aviation snips cut up to 18 ga mild steel and about 22 ga stainless. Some heavy-duty or offset models stretch a little further. Check the rating stamped on the handle or listed on the packaging. Those numbers assume sharp, well-adjusted blades. A worn pair hits its limit sooner, so derate older snips by a gauge.
How do you cut a straight line without a shear?
Clamp a straightedge to the sheet as a fence. Run a thin cut-off disc or a jigsaw with a fine metal-cutting blade along it. Keep the tool’s base pressed tight against the guide. Support both sides so the kerf doesn’t pinch the blade. For very thin stock, score the line deeply, clamp it at a bench edge, and flex it until it snaps.
How do you keep thin sheet metal from warping?
Cut thin sheet cold whenever you can. Snips, shears, and nibblers add almost no heat to the panel. If you must use a disc or a torch, make short passes and let the metal cool between them. Clamp the panel flat to the bench or a heat sink. Support the offcut too, so its weight doesn’t bend the sheet as you finish.
Can a plasma cutter cut aluminum and stainless steel?
Yes. Plasma cuts any metal that conducts electricity, including aluminum, stainless, copper, and brass. Aluminum often needs more amperage than steel of the same thickness and leaves a slightly rougher edge. Stainless cuts cleanly but can show heat tint along the kerf. Use your machine’s cut chart for each metal, and set the travel speed separately for each one.
Final Thoughts
Most clean cuts start before the blade touches metal. Measure the real thickness, check the metal type, then choose the tool that cuts cold and clean at that gauge.
That order saves you from warped panels, chewed edges, and wasted sheet. It also tells you when a job belongs at a laser or waterjet shop instead of your bench.
Before you cut the final piece, grab a scrap of the same sheet and make a test cut. Check the edge, the flatness, and the fit. Then cut with confidence.