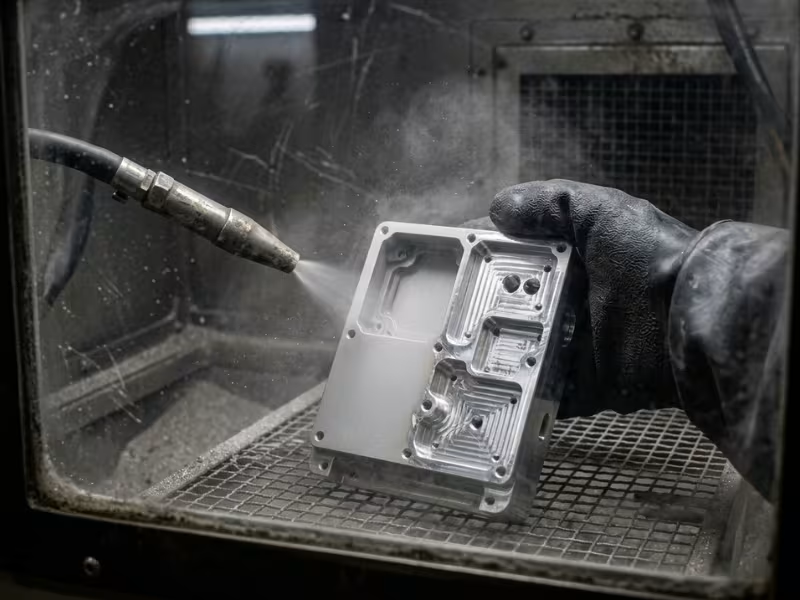
Many engineers and buyers want CNC machined metal parts that look clean and consistent. Raw machined surfaces, however, often show tool marks, uneven shine, and small burrs. Bead blasting fixes all three in one step.
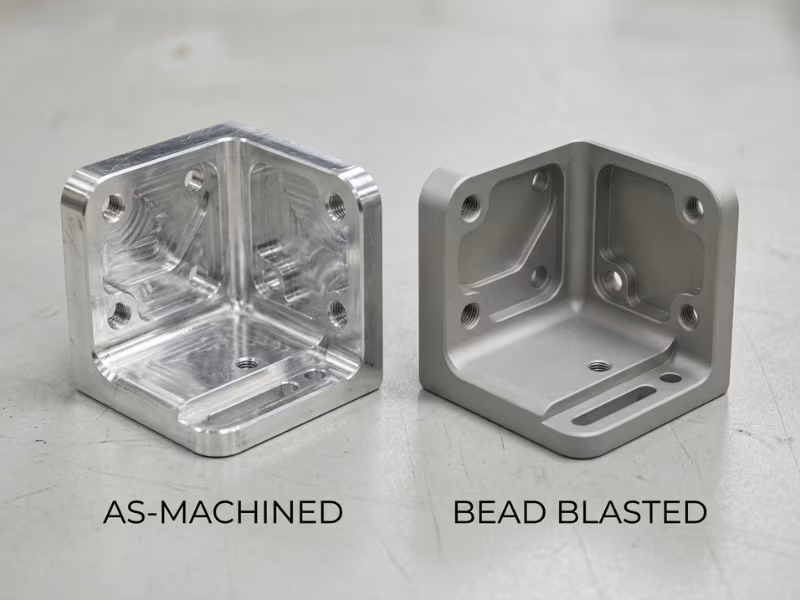
Bead blasting gives a part a uniform matte finish. It hides light tool marks, softens sharp edges, and preps aluminum for anodizing. That’s why shops use it so often on housings, brackets, and covers.
Bead blasting does change your part. It alters the surface, and it can affect tolerances if you skip masking.
This guide covers:
- What bead blasting changes on a part
- When to use it and when to avoid it
- How it compares with other CNC machining surface finish options
- How to specify it and check it so your parts pass inspection
What Bead Blasting Is
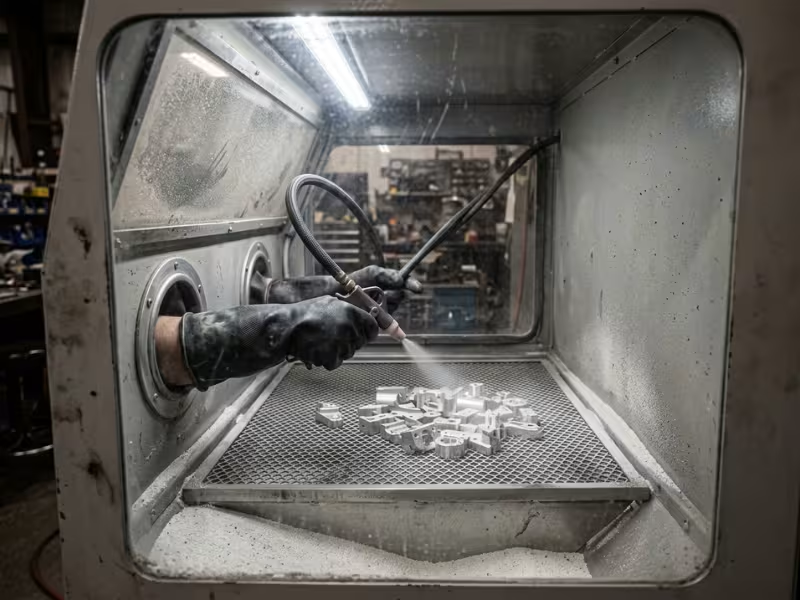
Bead blasting is a mechanical surface treatment. A blast cabinet uses compressed air to fire small, round media at the part. Most shops use glass beads.
Each bead hits the surface and leaves a tiny dimple. Millions of these dimples overlap and form an even matte or satin texture. Light tool marks fade, and the part looks uniform from every angle.
I describe it to clients as “peening, not cutting.” The round beads press and flatten the surface. They don’t dig into it the way sharp grit does. That difference clears up three common mix-ups.
It’s not a coating. Bead blasting adds no paint, no oxide layer, and no film. You still see bare metal or plastic with a new texture. If you need corrosion protection or color, plan for anodizing, powder coating, or plating afterward.
It’s not a stock-removal process. The beads remove only a trace of material, often a few microns. That won’t fix an oversized diameter or a deep scratch. It can still shift tight tolerances, so masking matters.
It’s not sandblasting. Sandblasting uses sharp, angular grit like aluminum oxide. It cuts aggressively and leaves a rough profile. Bead blasting is gentler and gives a finer finish.
|
Process |
What it does |
Typical result |
|---|---|---|
|
Bead blasting |
Round media peen the surface |
Uniform matte or satin finish |
|
Sandblasting |
Angular grit cuts the surface |
Rough, etched profile for coating |
|
As-machined |
No post-treatment |
Visible tool marks, uneven shine |
Think of bead blasting as a cosmetic and prep step. It changes how the surface looks and feels, but it doesn’t change what the part is.
Why Bead Blasting Is Common on CNC Parts
A CNC machine makes parts accurate. It doesn’t always make them look good. That gap explains why bead blasting shows up on so many quotes I review.
Machined surfaces rarely look uniform. A face mill leaves swirls. A ball end mill leaves scallops on curved walls. Turned faces show fine spiral lines. One housing can show three or four textures on a single side, and customers often read that as poor quality, even when every dimension passes.
Batches don’t match by default. Inserts wear, and the finish drifts over a run. Part 1 and part 200 can look different under the same light. Blasting resets every surface to one matte texture.
It preps parts for anodizing and coating. Anodizing doesn’t hide tool marks. It highlights them. Blast first, and you get more consistent color, especially with black or clear anodize. Powder coat and paint also grip better on a lightly textured face.
It suits small and medium batches. A blast cabinet needs no custom tooling. One operator can blast 10 prototypes in an afternoon or 500 parts in a few days. For runs up to about 1,000 parts, blasting usually costs less than tumbling and handles complex shapes better.
My advice: if a part faces your customer, plan the finish when you request the quote.
What Bead Blasting Changes on a Part
Bead blasting looks like a simple cosmetic step, but it changes the texture, the edges, the cleanliness, and sometimes the size of your part. I check each of these before I approve a blast finish.
Surface Texture and Appearance
The most visible change is the shine. A machined aluminum face often has bright streaks next to dull, swirled areas. After blasting, the whole surface turns an even matte or satin gray.
Bead size sets the texture. Fine beads give a soft satin look, often around Ra 0.8–1.6 µm on aluminum. Coarser beads give a grainier matte, closer to Ra 1.6–3.2 µm. Air pressure, nozzle distance, and blast time also shift the result.
Light tool marks fade, and small burrs soften. The biggest win, though, is lot consistency. When the operator holds the same media, pressure, and distance, part 1 and part 300 look like twins.
Dimensional Effect
This is where buyers often get surprised. Glass beads remove a few microns and round sharp edges slightly. On a bracket with ±0.1 mm tolerances, nobody will measure the difference. On a bearing bore at ±0.01 mm, those microns can push a part out of spec.
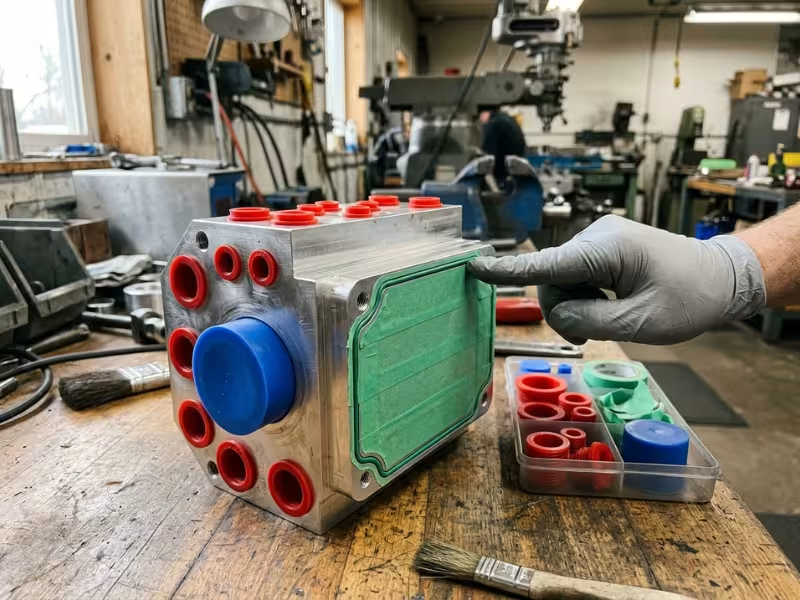
That’s why I always ask clients to mask these features:
- Threads: Blasting dulls thread crests and can lodge beads in the roots.
- Sealing faces: O-ring grooves and gasket faces need their original finish to seal.
- Datums and precision bores: A changed surface means changed measurements.
- Press-fit diameters: Even a slight size change can loosen a fit.
Shops mask with silicone plugs, caps, and high-temperature tape. Masking adds a little labor, but it costs far less than scrapping a batch.
Surface Condition and Downstream Finish
An even blasted texture gives anodizing a uniform base, with fewer bright spots and streaks. Powder coating and paint grip better too.
Clean media is critical here. If a shop blasts steel parts and then aluminum parts with the same media, iron particles can embed in the aluminum. They later show up as dark spots or rust stains under anodizing. Worn, broken beads also turn sharp and etch unevenly.
I ask shops three questions:
- Do you keep separate media for aluminum, steel, and stainless steel parts?
- How often do you replace or screen the beads?
- How do you clean parts after blasting?
Post-blast cleaning removes trapped beads from blind holes, threads, and pockets. Skip it, and loose media can fall into an assembly or contaminate an anodize tank.
What It Cannot Fix
Bead blasting improves how a good part looks. It can’t turn a bad part into a good one. Deep scratches, chatter marks, and torn surfaces still show, especially after anodizing. An undersized hole or an out-of-flat face stays that way.
|
What it changes |
What it does not fix |
|---|---|
|
Shine turns into an even matte or satin look |
Deep scratches and gouges |
|
Light tool marks and swirls fade |
Chatter marks and torn surfaces |
|
Small burrs and sharp edges soften |
Undersized or oversized features |
|
Lot-to-lot appearance becomes consistent |
Out-of-flat or out-of-round faces |
|
Surface gets ready for anodizing or coating |
Poor material quality or porosity |
|
Unmasked tight features may shift slightly |
Wrong toolpaths or bad programming |
My rule is simple. Machine the part right first, then let bead blasting make it look right.
When to Use Bead Blasting — and When Not To
Bead blasting solves some finish problems very well. On the wrong part, it creates new ones. Here’s the two-sided check I run on every drawing.
Good Reasons to Blast
If two or more of these fit your part, blasting usually earns its place on the quote.
You want one uniform matte look. Housings, covers, knobs, and panels face your customer. A blast removes glare and evens out mixed milled and turned surfaces.
You need consistency across batches. A reorder six months later should match the first lot. Locked bead size, pressure, and distance repeat far better than raw machining.
The part goes to anodizing or coating next. I blast almost every cosmetic part before black or clear anodize. For aluminum CNC parts, this one step does more for color uniformity than anything else.
Light edge cleanup helps. Blasting takes the bite off tiny burrs and sharp edges. It won’t replace real deburring on heavy burrs.
The part can absorb slight surface change. Features at ±0.05 mm or looser rarely notice a few microns.
Times to Skip It or Limit It
Tight tolerances sit on exposed surfaces. Bearing bores and press-fit diameters at ±0.01 mm can drift. If you can’t mask them, don’t blast.
Critical features resist masking. Deep internal threads, cross-drilled ports, and small blind holes trap beads.
You need a mirror finish. Blasting kills shine on purpose. Choose polishing or electropolishing instead.
Walls are thin or details are delicate. Walls under about 1 mm can warp. Fine engraving and laser marks lose crispness, so add markings after blasting.
You run thousands of small, simple parts. A vibratory or tumbling machine processes hundreds per cycle at much lower labor cost.
Choose or Avoid at a Glance
|
Factor |
Choose bead blasting when… |
Avoid or limit it when… |
|---|---|---|
|
Cosmetic goal |
You want an even matte or satin look |
You need mirror or high-gloss shine |
|
Batch appearance |
Lots must match across reorders |
Appearance doesn’t matter at all |
|
Next process |
Anodizing, powder coat, or paint follows |
Polishing or electropolishing follows |
|
Edges |
Light burrs and sharp edges need softening |
Heavy burrs need real deburring |
|
Tolerances |
General tolerances of ±0.05 mm or looser |
Exposed features at ±0.01 mm |
|
Critical features |
Threads and seals mask easily |
Deep threads, ports, or blind holes resist masking |
|
Wall and detail |
Solid walls and robust features |
Thin walls, fine engraving, small marks |
|
Volume |
Prototypes to roughly 1,000 parts |
Thousands of small, simple parts |
One habit saves most of the trouble: mark every no-blast zone on the drawing before you send it out.
Bead Blasting vs Other CNC Finishes
Clients rarely ask “Should I bead blast?” They ask “Should I bead blast, or use something else?” Some finishes compete with blasting. Others work best right after it. Here are the comparisons that matter most.
Bead Blasting vs As-Machined
Every CNC part starts as-machined, so the real question is whether blasting adds enough value.
As-machined costs nothing extra and keeps every dimension exact. Milled aluminum often lands around Ra 0.8–3.2 µm. But it looks uneven, and fingerprints show clearly on bare, shiny aluminum. Blasting turns mixed marks into one satin texture and hides handling smudges.
My rule: if nobody sees the part, leave it as-machined. If a customer holds it or looks at it, blasting usually pays for itself.
Bead Blasting vs Anodizing
These aren’t rivals. Blasting changes texture. Anodizing grows an oxide layer, often 5–25 µm for Type II, that adds corrosion resistance, wear resistance, and color.
Anodizing shows what lies underneath, and dark colors make tool marks stand out more. That’s why the usual sequence is machine → bead blast → anodize. Most matte black aluminum enclosures in electronics follow this path. Mask the same tight features for both steps, since anodizing also adds thickness.
Bead Blasting vs Sandblasting
Glass beads are round, so they peen. Sandblasting grit is angular, so it cuts. Sandblasting strips rust and mill scale fast, removes more material, and leaves a rough profile, often Ra 3.2 µm or higher. That anchor pattern helps thick coatings grip on steel structures, but it looks coarse on a precision part.
For cosmetic CNC parts, I almost always choose beads.
Bead Blasting vs Tumbling and Vibratory Finishing
This comparison comes down to volume and shape:
- Throughput: Blasting is mostly manual. A vibratory bowl handles hundreds of small parts per cycle.
- Consistency: Tumbling treats a batch evenly. Blasting depends on locked operator settings.
- Edges: Tumbling rounds edges more and can cause part-on-part dings.
- Geometry: Blasting reaches the faces you aim at. Tumbling media can jam in small holes.
For complex housings in small to medium runs, I blast. For thousands of pins or washers, I tumble.
A Few Other Finishes Worth Knowing
Electropolishing dissolves a thin layer of stainless steel to create a bright, clean surface. Powder coating adds a thick colored layer, often 60–120 µm, usually over a blasted base. Vapor polishing makes clear plastics like polycarbonate and acrylic glossy, which is the opposite goal of blasting.
Finish Comparison at a Glance
|
Finish |
Method |
Typical result |
Effect on size |
Best use case |
|---|---|---|---|---|
|
As-machined |
No post-treatment |
Visible tool marks, mixed shine |
None |
Hidden or functional parts |
|
Bead blasting |
Round media peen the surface |
Even matte or satin texture |
Very slight |
Cosmetic parts, pre-anodize prep |
|
Anodizing |
Electrochemical oxide growth |
Color plus corrosion and wear protection |
Adds 5–25 µm (Type II) |
Aluminum parts needing protection or color |
|
Sandblasting |
Angular grit cuts the surface |
Rough, etched profile |
Moderate |
Heavy cleanup, thick coating prep |
|
Tumbling / vibratory |
Parts tumble with media in a bowl |
Smooth, rounded edges |
Slight edge rounding |
High volumes of small, simple parts |
|
Electropolishing |
Electrochemical metal removal |
Bright, smooth, clean |
Slight |
Stainless steel for medical or food use |
|
Powder coating |
Electrostatic powder, then curing |
Thick, durable colored layer |
Adds 60–120 µm |
Outdoor and rugged parts |
|
Vapor polishing |
Solvent vapor smooths plastic |
Glossy, clear surface |
Negligible |
Transparent PC and acrylic parts |
How to Choose the Right Finish for Your Part
Stop asking “Which one looks best?” Ask instead “What does this part need to show, survive, and cost?” I walk clients through six quick checks.
- Material: Anodizing works on aluminum. Electropolishing suits stainless. Vapor polishing needs clear plastics. Blasting covers the widest range.
- Cosmetic target: Matte points to blasting. Shine points to polishing. Color points to anodizing or powder coat, usually after a blast.
- Tolerance-sensitive features: List everything at ±0.02 mm or tighter. If the finisher can’t mask it all, lean toward as-machined.
- Next process: Anodizing and powder coating reward a blasted base.
- Volume: Under about 1,000 complex parts, blast. Thousands of small parts belong in a tumbler.
- Cost and lead time: Each step often adds 2–5 days. Don’t pay for a finish nobody sees.
|
If you need… |
Consider… |
|---|---|
|
An even matte look on a visible aluminum part |
Bead blasting |
|
Matte color plus corrosion protection on aluminum |
Bead blasting, then Type II anodizing |
|
A thick, tough color layer for outdoor use |
Bead blasting, then powder coating |
|
A bright, easy-to-clean stainless surface |
Electropolishing |
|
Zero size change on precision features |
As-machined, or blasting with full masking |
|
Deburring thousands of small pins or washers |
Tumbling or vibratory finishing |
|
Heavy rust or scale removal on steel |
Sandblasting |
|
Glossy, transparent plastic parts |
Vapor polishing |
|
The lowest cost on hidden parts |
As-machined |
When two checks pull in different directions, let function win. A slightly uneven look still works. A bore out of spec doesn’t.
How to Specify Bead Blasting on a Drawing or PO
“Bead blast finish” is the most common callout I see. It’s also the vaguest. Two shops can read that line and ship two very different parts. Use this checklist instead:
- Name the media. Write “glass bead.” Otherwise a shop may use aluminum oxide, which etches a rougher, darker surface.
- Set the texture. State “fine” or “medium.” Add an Ra value, such as Ra 0.8–1.6 µm, only when function demands it.
- Mark every no-blast zone. Hatch the areas and label them “MASK – NO BLAST.”
- Give a visual reference. Send a golden sample, photo, or swatch number.
- Define the process order. For example: “Bead blast, then Type II anodize, black.” Note that masking applies to both steps.
- Require post-blast cleaning. Ask for media removal from holes and threads, and steel-free media on aluminum.
A complete note can stay short:
FINISH: Glass bead blast, fine, uniform matte. Mask all threads and surfaces marked “A.” Match approved sample #BB-01. Bead blast before Type II black anodize. Clean all media from holes and threads.
Keep technical rules on the drawing. Put commercial terms, such as first-article approval and sample retention, on the PO.
Six Bead Blasting Mistakes That Cost You Parts
Most blasting problems start before the cabinet, with a vague drawing or a wrong assumption.
Expecting blasting to rescue bad machining. A buyer once sent me 200 housings with chatter marks on every wall, hoping a blast would hide them. It didn’t, and anodizing made them worse. Fix the toolpath or insert first.
Skipping masking. One unmasked M6 thread can fail a go/no-go gauge. One unprotected O-ring face can leak.
Using dirty or mixed media. Steel-contaminated beads cause dark spots on anodized aluminum. Keep separate media and screen it on a schedule.
Over-blasting thin walls. Walls under about 1 mm can bow. Ask for around 2–3 bar, finer beads, and even blasting on both sides.
Leaving the finish undefined. “Bead blast” alone invites guessing. Name media, texture, and masked zones.
Ignoring post-blast cleaning. Trapped beads fall into assemblies or contaminate anodize tanks. Require a blow-off and wash.
Quality Checks After Bead Blasting
A blasted part can look great and still fail at assembly. These five checks catch most problems:
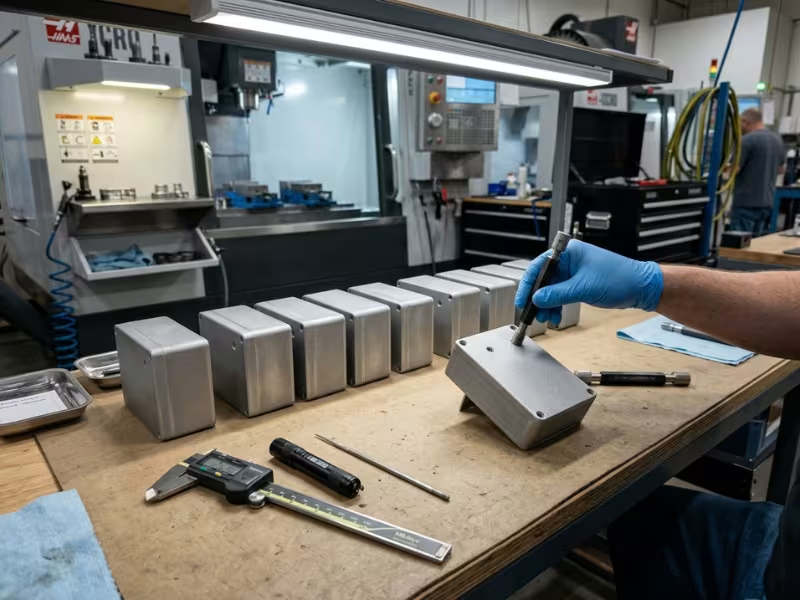
- Visual consistency: Lay 10–20 parts side by side under daylight-balanced LED. Tilt them at a low angle to spot blotches or missed areas.
- Critical dimensions: Recheck masked bores, press-fit diameters, and datums. Gauge all threads. Measure first, middle, and last parts at minimum.
- Masking verification: Look for overspray under tape edges. A matte halo on a sealing face means the mask leaked.
- Trapped media and contamination: Shine a flashlight into blind holes and thread roots. On aluminum, watch for dark specks.
- Golden sample: Keep one approved part tagged with media, pressure, and date for every reorder.
These checks take minutes. They cost far less than one rejected shipment.
FAQ
What is bead blasting used for?
It gives CNC parts an even matte or satin finish. It hides light tool marks, softens small burrs, and preps aluminum for anodizing or coating. You’ll see it most on housings, covers, brackets, and knobs.
Is bead blasting the same as sandblasting?
No. Bead blasting uses round glass beads that peen the surface into a smooth satin texture. Sandblasting uses angular grit that cuts a rough profile. Choose beads for finished, toleranced parts.
Does bead blasting remove material?
Only a trace, usually a few microns, plus slight edge rounding. That won’t fix an oversized feature, but it can matter on tight-tolerance surfaces.
Can you bead blast aluminum?
Yes. Aluminum is the most common material I see in the blast cabinet. Ask for clean media that has never touched steel to avoid dark spots after anodizing.
Does bead blasting affect tolerances?
It can. Features at ±0.05 mm or looser rarely change. Features at ±0.01 mm can drift, so mask them and remeasure after blasting.
Is bead blasting a good prep for anodizing or powder coating?
Yes, it’s one of its best uses. A blasted base gives more uniform anodize color and better coating adhesion. Keep the same masking for both steps.
Can bead blasting remove machining marks?
It removes light ones, like face-mill swirls and fine scallops. Deep scratches, chatter, and gouges stay visible.
How does bead blasting compare to tumbling?
Blasting suits complex parts up to roughly 1,000 pieces and keeps edges fairly crisp. Tumbling handles thousands of small, simple parts at lower labor cost but rounds edges more.
Blast With a Plan, Not by Habit
Bead blasting earns its place on many CNC parts. It turns mixed tool marks into one even matte look, softens light burrs, and gives anodizing a clean base.
But it isn’t a neutral step. It changes how the surface looks and removes a few microns. Nobody notices on a loose bracket. You will notice on a ±0.01 mm bore or an unmasked thread.
So match the blast to the part. Check the material, the tight features, and the finish that comes next. Mask anything that must stay exact, and name the media and texture on your drawing.
Not sure whether your part needs bead blasting, anodizing, tumbling, or an as-machined finish? Send us your drawing, and we’ll review the finish with you before production starts.