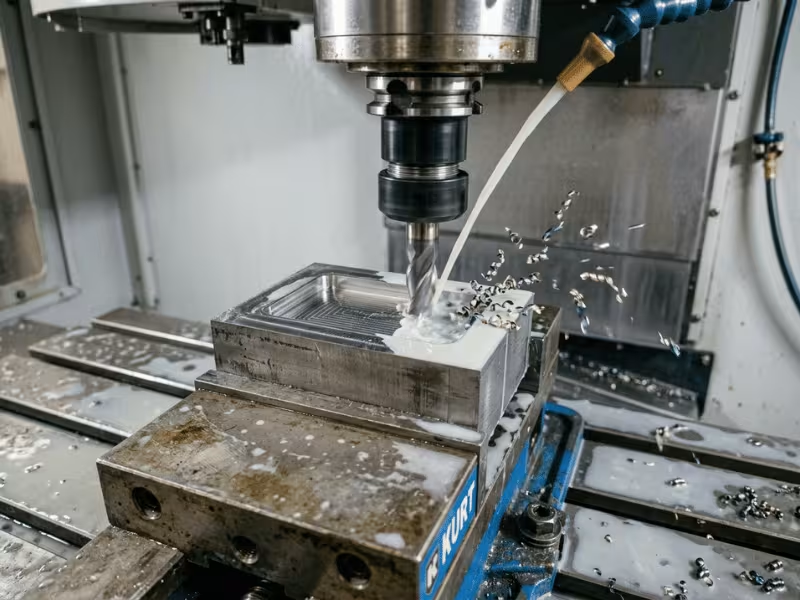
Many machinists move from aluminum to steel in CNC milling applications and hit a wall fast. The cutter heats up. The edges wear out in minutes. The spindle starts to chatter, and the surface finish turns rough.
Steel pushes back much harder than aluminum. It punishes small mistakes in tooling and settings right away.
I help machine shops and home hobbyists solve these exact problems every week. In this guide, I show you how to choose the right tool, set safe starting speeds and feeds, and fix the most common steel milling issues.
Why Steel Fights Back Harder Than Other Metals
Steel won’t forgive the shortcuts that aluminum lets you get away with. Before you pick a cutter or set a feed rate, you need to know what you’re up against.
What Makes Steel Tough on Your Cutter
Steel pushes back on the cutting edge with far more force than aluminum or brass. That force loads your spindle, your holder, and every weak spot in your setup.
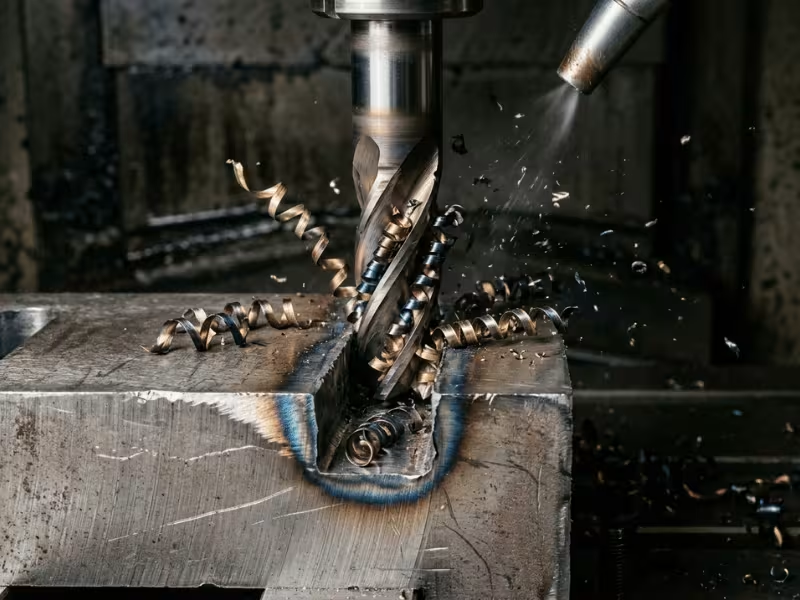
Heat comes next. Steel keeps heat at the cutting zone instead of carrying it away in the chips. That heat softens the edge and wears the tool down faster.
Chips cause trouble too. Steel chips come off tough and hot. If they pack into the flutes or get cut a second time, they can chip an edge in seconds.
When a steel job goes wrong, I check force and heat first. Most failures trace back to one of them.
Not All Steel Behaves the Same
The grade on your print changes the whole job. I always ask three questions first:
- How hard is it?
- How hot will it run?
- Will it work-harden?
The answers tell me how careful I need to be.
|
Steel Type |
Machining Behavior |
Main Milling Challenge |
|---|---|---|
|
Mild steel (1018, A36) |
Soft, predictable, forgiving |
Gummy chips and built-up edge at low speeds |
|
Alloy steel (4140, 4340) |
Stronger, needs more power |
Higher cutting forces and faster wear |
|
Tool steel (D2, O1, H13) |
Hard and abrasive |
Rapid edge wear and chipping |
|
Stainless steel (304, 316) |
Holds heat, work-hardens |
Heat buildup and a hardened surface if the tool rubs |
Mild steel is the best place to learn. Alloy steel needs a stiffer setup and steadier feeds. With tool steel, slow down and plan for shorter tool life. Stainless steel punishes hesitation, so keep the tool cutting and never let it dwell in the cut.
How to Choose the Right Milling Tool for Steel
Your cutter decides how much heat, force, and wear the job can handle. Choose well, and many speed and feed problems disappear before the first chip.
HSS, Cobalt, or Carbide? Start With Your Machine
I don’t pick the tool first. I look at the machine. A cutter can only perform as well as the spindle and setup behind it.
HSS suits budget work, manual mills, and lower spindle speeds. It tolerates minor vibration and uneven hand-feeding better than carbide. The weak point is heat. Push it too fast in steel, and the edge softens quickly.
Cobalt (M35 or M42) is the logical step up. It holds an edge at higher heat and lasts longer in alloy and stainless steel. If your HSS tools burn out but your machine can’t reach carbide speeds, try cobalt first.
Carbide wins on productivity. It often runs two to four times faster than HSS and stays sharp much longer. But carbide is brittle. It needs a rigid machine, a solid holder, and low runout. On a loose setup, it chips instead of cutting.
My rule: on a stiff, fast machine, buy carbide. On a light or manual mill, a sharp cobalt tool often beats a chipped carbide one.
|
Tool Option |
Best For |
Main Advantage |
Main Limitation |
|---|---|---|---|
|
HSS |
Manual mills, low speeds, tight budgets |
Cheap and tough |
Loses its edge fast under heat |
|
Cobalt (M35/M42) |
Alloy and stainless on modest machines |
More heat resistance than HSS |
Still far slower than carbide |
|
Uncoated carbide |
Rigid CNC work, mild steel |
High speed and long tool life |
Chips easily on weak setups |
|
Coated carbide (TiAlN/AlTiN) |
High-heat cuts, harder steels |
Handles heat and wear best |
Costs more, needs rigidity |
|
Variable-helix carbide |
Chatter-prone jobs |
Quieter, smoother cuts |
Higher price per tool |
Which Coatings Actually Earn Their Price
A coating can extend tool life. It can’t rescue a bad setup.
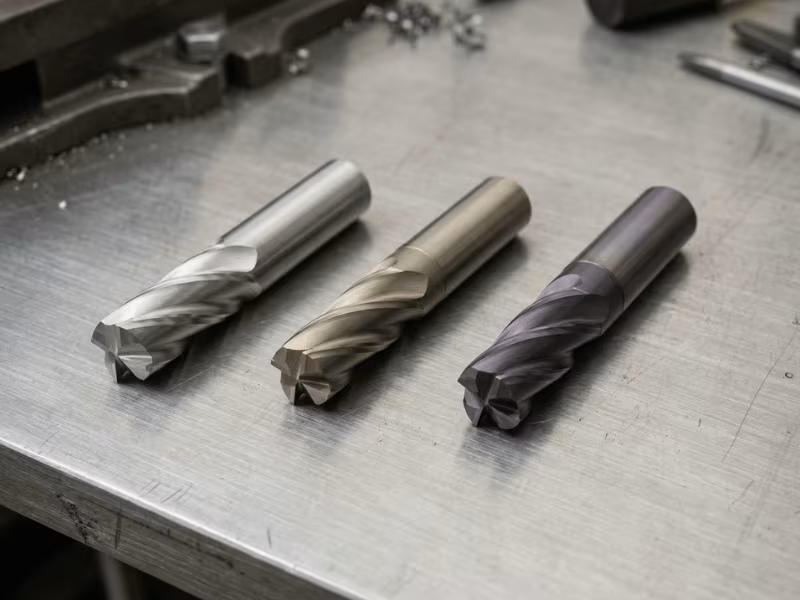
TiAlN and AlTiN shine when heat runs high. They work best on carbide at higher speeds, in dry or air-blast cuts, and in alloy, tool, and stainless steels. AlTiN carries more aluminum, so it tolerates even more heat.
TiCN adds hardness and wear resistance. It suits HSS and cobalt tools at moderate speeds, especially in mild and abrasive steels.
Here’s how I decide. If a tool fails from chatter or runout, a premium coating won’t help. If it wears out from heat at correct speeds, upgrade the coating.
Geometry Choices That Change Your Results
Shape matters as much as material. Small details decide whether chips clear and whether the cut stays quiet.
- Flute count: Use 3–4 flutes for slotting and general steel work. Save 5–7 flutes for finishing and light radial cuts. If chips pack the flutes, don’t add more. Fewer flutes give chips room to escape.
- Helix angle: 35–40° works for most steel. Higher angles cut smoother but pull harder on the tool.
- Corner radius: A small radius (0.010–0.030″) protects the corner from chipping and extends tool life over a sharp corner.
- Variable helix: If chatter keeps showing up, choose variable helix or variable pitch. Uneven flute spacing breaks up the vibration pattern.
Match the Cutter to the Operation
Each operation asks something different from your cutter. Here’s what I reach for in steel and why.
- Roughing: Use a 3–4 flute carbide end mill with chipbreaker (serrated) edges. The serrations split chips into small pieces and cut down tool pressure. That lets you take deeper cuts without overloading the spindle. On a manual mill, a cobalt roughing end mill does the same job at lower speeds.
- Slotting: Choose a 3-flute carbide or a 2–3 flute cobalt end mill. A full-width slot traps chips, so flute space matters more than flute count here. Keep slot depth near 1× diameter unless you switch to trochoidal toolpaths.
- Finishing: Switch to a fresh 5–7 flute carbide end mill with a small corner radius. More flutes give a finer finish at light radial cuts. Don’t finish with the tool you just roughed with. A worn edge rubs instead of cutting, and the surface shows it.
- Face milling: Grab an indexable face mill with carbide inserts for large flat areas. It covers more ground per pass, and you replace inserts, not the whole body. On lighter machines, pick a smaller diameter with positive-rake inserts to reduce load. A fly cutter also works well on a manual mill.
- 3D contouring: Pick a ball nose or bull nose end mill. A bull nose removes more material on gentle slopes. A ball nose handles tight curves and fine detail. Keep stick-out as short as the part allows. Long reach invites chatter fast.
How to Set Speeds and Feeds for Steel
Speeds and feeds scare a lot of new steel machinists. They don’t need to. You just need a sensible starting point and the habit of reading what the cut tells you.
The Only Four Terms You Need
SFM (surface feet per minute) is how fast the cutting edge travels across the steel. Tool makers list it by material, and it controls heat more than anything else.
RPM is how fast your spindle turns. You calculate it from SFM and cutter diameter.
Chip load is how thick a chip each flute takes per revolution. It decides whether the tool cuts or rubs.
Feed rate is how fast the table moves, in inches per minute (IPM).
Two formulas cover almost every job:
- RPM = (SFM × 4) / cutter diameter
- Feed rate = RPM × chip load × flute count
Say you run a 1/2″ 4-flute carbide end mill in mild steel at 300 SFM. That gives you 1,200 ÷ 0.5 = 2,400 RPM. At 0.002″ per tooth, your feed is 2,400 × 0.002 × 4, or about 19 IPM.
The “× 4” is a shop shortcut for 3.82. It’s close enough for a starting point.
Safe Starting Points for Common Steels
Treat these numbers as starting ranges, not targets. I begin at the low end and work up once the cut sounds and looks right. Chip loads assume a 1/2″ end mill. Smaller tools need less.
|
Steel Type |
Tool Type |
Conservative Starting Speed |
Feed Guidance (per tooth) |
Adjustment Note |
|---|---|---|---|---|
|
Mild steel (1018, A36) |
HSS |
80–100 SFM |
0.001–0.002″ |
Slow down if chips turn blue |
|
Mild steel |
Carbide |
300–400 SFM |
0.002–0.004″ |
Running too slow invites built-up edge |
|
Alloy steel (4140, annealed) |
HSS / cobalt |
50–70 SFM |
0.001–0.002″ |
Cobalt handles the top of the range |
|
Alloy steel |
Carbide |
250–350 SFM |
0.0015–0.003″ |
Keep the feed steady and avoid pauses |
|
Tool steel (annealed) |
HSS / cobalt |
30–50 SFM |
0.001–0.0015″ |
Expect short tool life |
|
Tool steel |
Carbide |
150–250 SFM |
0.001–0.002″ |
Drop speed further on prehardened stock |
|
Stainless (304, 316) |
HSS / cobalt |
40–60 SFM |
0.001–0.002″ |
Never let the tool dwell |
|
Stainless |
Carbide |
200–300 SFM |
0.0015–0.003″ |
Keep chip load up to beat work hardening |
Running a manual mill, a benchtop machine, or an older knee mill? Cut those speeds by 25–30% and take lighter radial cuts.
Here’s the catch: don’t slash chip load along with speed. Chips that are too thin make the tool rub, and rubbing wears edges faster than a solid cut does. Keep chip load near the middle of the range and reduce depth of cut instead.
Read the Cut, Then Adjust
The table gets you started. Chips, sound, and heat tell you where to go next. I change one thing at a time so I know what actually fixed the problem.
- Rubbing (squealing, glazed surface, dusty chips): The tool isn’t biting. Raise the chip load or correct the feed. Slowing down only makes it worse, especially in stainless.
- Overheating (smoke, steaming coolant, a hot tool): Reduce SFM first and keep the chip load where it is. Then confirm the coolant actually reaches the cutting edge.
- Blue or burnt chips: Too much heat. Light straw chips are fine on dry carbide cuts. Dark blue or purple chips mean you should drop speed 10–15% or improve coolant flow.
- Chatter: Fix rigidity before touching the numbers. Shorten tool stick-out, tighten the clamping, and reduce radial engagement. Then shift RPM up or down 10–15% to move out of the vibration zone.
- Inconsistent chip shape: The cut is unstable. Check runout, workholding, and edge wear before you change speeds or feeds.
Good steel chips look uniform, curl into small shapes, and come off silver to light straw in color. When you see that, you’ve found your settings.
Best Practices That Make Steel Milling Easier
Good numbers only work on a solid setup. These habits do more for tool life and finish than any speed chart, and I apply them in this order.
Lock Down Rigidity Before You Chase Speed
Every bit of flex in your setup turns into vibration at the cutting edge. Steel finds those weak spots fast.
Start with the tool. Grip it as deep in the holder as the job allows. Overhang hurts more than most people expect. Double the stick-out, and the tool becomes roughly eight times less stiff. If one feature needs reach, use a long tool there and a short one everywhere else.
Next, look at the part. Clamp it low in the vise, with only what you need above the jaws. Seat it on parallels and tap it down before final tightening.
Then check the workholding. Worn vise jaws, a loose gib, or an unlocked table axis will undo the best cutter you own.
My rule is simple. A rigid setup at moderate parameters beats an aggressive program on a shaky one every time. Fix the setup first, then raise the numbers.
Keep Heat and Chips Under Control
Heat and trapped chips cause most of the sudden tool failures I see. Control both, and your cutter lasts far longer.
Consistency matters more than volume. Coolant that hits the edge one second and misses the next does real damage. Aim nozzles at the cutting zone, not the shank, and readjust them as the tool moves.
Choose your method by tool and job:
- Flood coolant suits HSS, cobalt, and most carbide work in mild and stainless steel. It cools the edge and flushes chips at the same time.
- Air blast or mist pairs well with TiAlN or AlTiN-coated carbide at higher speeds. A steady dry cut keeps edge temperature even.
Whichever you pick, clear the chips. Recut chips arrive hot and hardened, and they chip edges quickly. In pockets and slots, direct air or coolant to push chips out of the tool’s path.
One warning for carbide: never switch coolant on mid-cut or spray a hot tool off and on. The sudden temperature swing cracks the edge. Run flood from the start or stay fully dry.
Use Smarter Entry and Toolpath Strategies
How the tool enters and moves through steel matters as much as speed. Many broken end mills fail in the first second of the cut.
- Climb mill on rigid machines. The edge starts with a thick chip and exits thin, which cuts down on rubbing and heat. On a manual mill with backlash, stick with conventional milling. Climb milling can pull the table into the cutter.
- Ramp or helix into pockets. Most end mills cut poorly straight down. A 2–3° ramp or a helical entry spreads the load along the edge.
- Go trochoidal for deep or demanding slots. Small circular passes keep radial engagement low, often 5–15% of diameter. You use more flute length while heat stays down. If your CAM offers adaptive clearing, use it in alloy steel, tool steel, and stainless.
- Leave finishing stock. Rough to about 0.010–0.020″ per side, then finish with a sharp tool. Too little stock makes the finisher rub. Too much makes it deflect.
Common Steel Milling Problems and How to Fix Them
Steel gives you warning signs before it ruins a part or a tool. If you learn to read them, you can fix most problems in minutes. For each issue below, I follow the same path: what it means, what usually causes it, and what to change first.
Chatter and Vibration
What it usually means: You hear a loud squeal or a steady, rhythmic hum. The wall shows evenly spaced ripples, almost like a washboard. Your setup is flexing, and the tool bounces in and out of the cut.
Most likely causes: The usual suspects are long tool overhang, loose workholding, and too much radial engagement. An RPM that matches the setup’s natural vibration can also cause it.
What to change first: Work through this list in order, and stop when the noise goes away.
- Shorten tool overhang.
- Tighten the clamping and lower the part in the vise.
- Reduce radial engagement.
- Shift RPM up or down 10–15%.
- Switch to a variable-helix end mill.
Most people jump straight to step 4. I rarely get that far, because the first two steps fix chatter more often than anything else.
Poor Surface Finish
What it usually means: The surface looks torn, smeared, or hazy instead of clean and bright. You may also see uneven tool marks. In both cases, the tool pushes or tears the steel instead of shearing it.
Most likely causes:
- Dull tool: A worn edge smears material instead of cutting it.
- Rubbing: The chip load is too low, so the edge skids across the surface.
- Wrong finishing strategy: You left too little finishing stock, used too wide a stepover, or ran conventional milling on a rigid machine.
- Runout or instability: One flute cuts harder than the others and leaves uneven marks.
What to change first: Start with a fresh finishing tool, and never finish with the cutter you roughed with. Next, check runout with an indicator. Aim for less than 0.0005″ at the tool.
If the finish still looks rough, raise the chip load slightly. A thicker chip often cleans up the surface better than a slower feed. Then climb mill the final pass with light, even stock.
Fast Tool Wear or Broken Tools
What it usually means: Your end mill goes dull after a few parts, or it snaps without warning. The way it fails tells you a lot, so study the edge before you toss it.
Most likely causes:
- Too much speed: The corners discolor or round off because heat softens the edge.
- Poor coolant application: The coolant misses the cut, or the flood switches on and off. Carbide cracks from the thermal shock.
- Weak holder or runout: One flute wears faster than the rest, or small chips break off along the edge.
- Wrong carbide grade or geometry: A tool built for aluminum dies fast in steel, and sharp corners chip in hard alloys.
- Overly aggressive engagement: The tool breaks in full slots or deep cuts as chips pack the flutes and the load spikes.
What to change first: Match the fix to the wear pattern.
- Worn, discolored corners: Drop SFM 15–20% and aim the coolant right at the edge.
- Chipped edges: Check runout and holder grip before you try a new brand.
- Sudden breakage: Reduce radial engagement, choose a tool with a corner radius, or switch to a trochoidal toolpath.
Many machinists blame the tool brand first. Most of the time, the cutter is fine, and the real problem is the speed, the coolant, or the holder.
Can You Mill Steel on a Manual Mill?
Yes. Plenty of good steel parts come off knee mills and benchtop machines. You just need to work with your machine, not against it.
Most speed and feed charts online assume a rigid CNC with a stiff spindle and no backlash. Your manual mill flexes more. If you copy those production numbers, you’ll hear chatter before the first pass ends.
Pick the tool to suit the machine. On a light or worn mill, sharp HSS or cobalt end mills handle vibration and hand-feeding better. Carbide pays off only on a solid knee mill with a tight spindle and a good collet. Even then, a 3-flute tool with a small corner radius gives you more room for error.
Then build stiffness into every setup:
- Choke up on the tool and keep overhang short.
- Clamp the part low in a solid vise.
- Lock every axis you aren’t moving.
- Take lighter radial cuts and feed steadily without pausing.
Watch the chips, not the chart. Silver or straw-colored curls mean the cut works. Your machine will show you where its limit sits.
FAQ
These are the questions I hear most from machinists moving into steel. Here are the short answers.
What is the best end mill for milling steel?
For most jobs, I reach for a 3–4 flute carbide end mill with a TiAlN or AlTiN coating and a small corner radius. It handles heat, clears chips, and resists corner chipping. If chatter keeps showing up, pick a variable-helix version. On a light or manual mill, a sharp cobalt end mill often outperforms carbide.
How do I calculate RPM for milling steel?
Use RPM = (SFM × 4) / cutter diameter. Find the SFM on the tool maker’s chart for your steel and tool type. A 1/2″ carbide end mill in mild steel at 300 SFM gives you 2,400 RPM. Start at the low end of the range and adjust from there.
Can I use the same speeds and feeds for stainless steel and mild steel?
No. Stainless holds heat and work-hardens, so it needs a lower SFM, often 25–35% below mild steel. Don’t cut the chip load along with the speed, though. A thin chip makes the tool rub, and rubbing hardens the surface. Keep the feed steady and never let the tool dwell.
How do I prevent chatter when milling steel?
Fix rigidity before you touch the numbers. Work through these steps in order:
- Shorten tool overhang.
- Tighten the clamping and lower the part in the vise.
- Reduce radial engagement.
- Shift RPM up or down 10–15%.
If chatter still won’t quit, switch to a variable-helix end mill.
Should I use carbide or HSS for steel milling?
Let your machine decide. Carbide runs two to four times faster and lasts longer. But it needs a rigid setup and low runout, or it chips. HSS costs less and tolerates vibration and hand-feeding, so it suits manual mills. Cobalt sits in between and makes a smart upgrade from HSS.
What coolant works best when milling steel?
Flood coolant with a quality water-soluble oil works for most HSS, cobalt, and carbide jobs. It cools the edge and flushes chips out at the same time. For coated carbide at high speeds, air blast or mist often works better. Whatever you choose, keep it consistent. Coolant that switches on and off can crack carbide.
Getting Steel Milling Right
Steel milling works when your tooling, rigidity, and parameters match the material in front of you. When those three line up, steel cuts cleanly and predictably.
Start conservatively. Choose speeds at the low end of the range, keep the chip load steady, and raise the numbers only after the cut runs stable.
Then let the cut guide you. Chip color, tool heat, and spindle sound tell you more than any chart can.
When something goes wrong, check the setup first. Shorten the overhang, tighten the workholding, and measure runout. Most “bad” cutters I see are good tools stuck in weak setups.
Fix the setup first. Your tools will last longer, and your parts will come out cleaner.