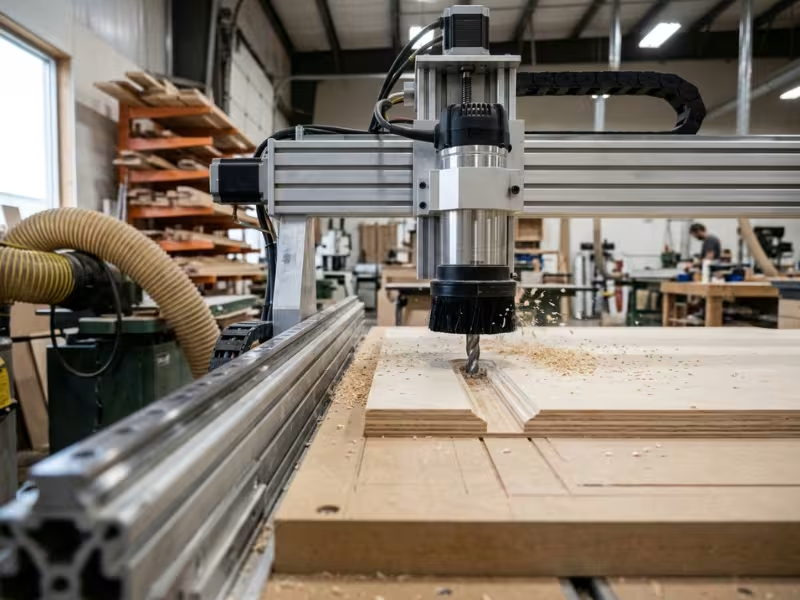
Burned edges. Fuzzy tops. Plywood that splinters on every pass. MDF dust that coats the whole shop. Parts that drift off size after a day on the bench.
I run into these problems in customer shops every week. Still, wood machines beautifully on a CNC router when you set it up right.
The real question in CNC wood machining is not whether you can cut wood. It is whether your material, bit, settings, and hold-down match the job.
This guide walks you through each of those choices. You will learn how to pick the right wood, bit, and strategy for cleaner, more accurate cuts. Many of these decision rules also carry over to broader CNC machining workflows, from prototypes and fixtures to production parts.
What Makes CNC Wood Machining Different?
Metal and plastic behave far more consistently from one sheet to the next. Wood doesn’t. Every board has its own history, and your router feels all of it.
When a customer shows me a bad cut, I look at the wood before I touch the machine settings. These five traits cause most of the trouble:
- Grain. Wood fibers run in one direction. Cut against them, and the bit pries fibers loose instead of slicing them. You get tear-out and chipped edges.
- Moisture. A board at 12% moisture cuts differently from one at 6%. Damp spots often leave fuzzy, raised fibers that resist sanding.
- Glue layers and voids. Plywood hides hard glue lines that dull bits fast. Its hollow inner gaps can make edges crumble without warning.
- Resin. Pine and other sappy woods coat the cutter with gum. Friction rises, heat builds, and burn marks follow.
- Movement. Wood releases internal stress as you remove material. A flat panel can cup or twist halfway through the job, which throws off your depth and dimensions.
So the machine is rarely the whole story. Wood also behaves less predictably than most metals and engineering plastics, which is one reason many shops treat wood routing separately from their broader CNC machining service workflows.
Most cut-quality problems start with wood’s natural instability. Once you plan around it, picking the right material, bit, and settings gets much easier.
Best Wood Materials for CNC Machining
The wood you load onto the bed shapes your results before the spindle even starts. I’ve watched people blame bits and settings for problems the material caused.
So skip the question “Can I cut this?” Ask instead: “Will this material give me the edge, detail, and finish this job needs?” Here’s how the common options compare.
Hardwood: Sharp Detail, With a Grain Warning
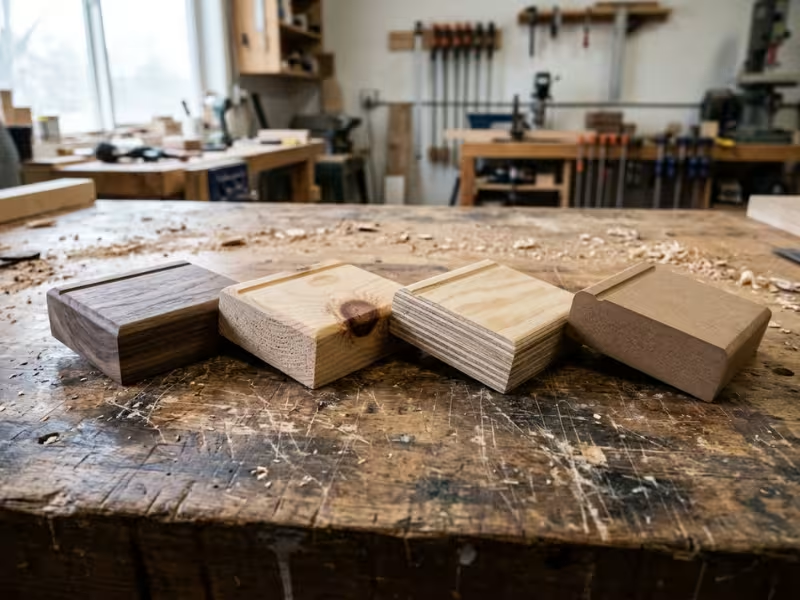
Maple, walnut, oak, and birch are my go-to picks when a part has to look good up close. Their dense fibers hold fine detail, crisp corners, and clean V-carved lettering. They also stand up to daily use.
Each one machines a little differently:
- Maple cuts clean and holds tiny details, but it burns easily if you feed too slowly.
- Walnut is one of the friendliest hardwoods to carve. It cuts smoothly and looks rich with just a clear coat.
- Oak has open, coarse grain. It tends to chip along the grain lines, so it suits bold designs better than fine detail.
- Birch is hard and even. It works well for furniture parts that need tight fits.
The risk is grain direction. Hardwood tears out when the bit cuts against the fibers, especially on curves and end grain. Solid boards can also shift as you remove material, and the cost of a ruined board stings.
Choose hardwood for: decorative panels, carved signs, furniture components, and any part where the wood itself is the finish.
Softwood: Cheap and Easy, but Unpredictable
Pine is the classic budget pick. Poplar is technically a hardwood, but it’s soft, affordable, and machines a lot like pine, so I group them together. Both cut fast and go easy on your bits.
The trouble hides inside the board. Knots are much harder than the wood around them and can chip or even break a small bit. Pine resin gums up cutters and leads to burn marks. Uneven density means one area may cut clean while the spot next to it turns fuzzy.
Poplar behaves better than pine. It has fewer knots and less resin, and it takes paint well.
Choose softwood for: prototypes, test cuts, jigs, and simple parts where looks don’t matter much. Check each board for knots before you put it on the machine.
Plywood: The Stable Choice for Sheet Work
Plywood stays flat and stable because its layers run in alternating directions. That makes it ideal for nested sheet jobs, where you cut many parts from one full panel.
It does have three weak points, though:
- Surface chipping. The thin top veneer splinters easily, especially with the wrong bit.
- Glue lines. The hard glue between layers wears down bits faster than solid wood does.
- Hidden voids. Gaps in the inner layers show up as holes along a cut edge.
Quality makes a huge difference here. Baltic birch and other void-free grades cost more, but their edges usually come out cleaner and they waste fewer parts. Construction-grade plywood saves money upfront and often costs you later.
Choose plywood for: cabinet boxes, shelving, structural parts, and flat cut-outs.
MDF: Smooth, Even, and Ready for Paint
MDF has no grain, no knots, and no voids. It cuts the same way in every direction. That consistency makes it great for 3D carving and smooth, paint-ready surfaces.
You will pay for that in other ways. MDF throws off fine, heavy dust, so good dust collection and a proper mask are must-haves. It soaks up moisture and swells at cut edges. Screws also strip out of it more easily than they do in plywood.
Choose MDF for: painted signs, prototypes, molds, templates, and indoor décor. Seal cut edges before you paint, or they will drink up the finish.
When Cheap Sheet Goods Cost You More
Particle board and low-grade panels look like a bargain on the price tag. On a CNC, they often turn into the most expensive choice in the shop.
Here’s what I see when customers try to save money this way:
- Crumbling edges. Loose chips break away from the cut, so edges rarely come out crisp.
- Faster tool wear. Hard glue and grit inside these panels wear bits out quickly.
- More sanding. Rough edges and uneven surfaces add labor to every part.
- Higher scrap rates. Voids, soft spots, and blowouts ruin parts mid-run.
Here’s a simple test I give customers. Add up the panel cost, the scrapped parts, the extra sanding time, and the bit replacements. Better material usually comes out ahead once you count all of that.
If you do use budget panels, keep them for hidden parts, shop fixtures, or one-off tests. Avoid them for anything a customer will see or touch.
How to Choose the Right Wood for the Job
Knowing what each material does is only half the job. The other half is matching it to the part in front of you. When customers ask me which wood to buy, I walk them through the same five questions, in this order.
Step 1: Start With the Final Use
Before you think about species or panels, picture the finished part in use. What does it have to do?
- Structural: It carries weight or holds joints together. Strength and screw-holding come first.
- Decorative: People see it up close. Grain and color matter most.
- Painted: Paint covers the surface, so smoothness beats beauty.
- Prototype: You’ll toss it soon. Cheap and fast wins.
- Carved: Deep 3D work needs a material that holds detail in every direction.
This one answer often cuts your options in half.
Step 2: Decide How Much the Edges Matter
Next, look at where every edge ends up. An exposed edge on a shelf front or sign face must come off the machine crisp. A hidden edge inside a cabinet joint only needs to fit.
If edges show, pay for material that cuts cleanly. If they hide, you have room to save.
Step 3: Think About Stability
Ask how flat and true the part must stay, both during the cut and for years after. Large panels, tight joints, and nested parts need a material that won’t move. That points you toward plywood or MDF.
Solid wood can still work. Let boards sit in your shop for a few days to adjust, and keep parts narrow when tolerances are tight.
Step 4: Match the Material to the Finish
Your finish plan narrows the field again:
- Paint favors smooth, grainless surfaces.
- Stain reveals blotches and glue lines. Pick even-grained stock and test on scrap first.
- Clear finish puts the wood itself on display, so choose a species you’d enjoy looking at.
I once watched a customer stain a detailed carve in a wood that blotches badly. One test piece would have saved the whole project.
Step 5: Balance Cost Against Waste and Rework
Finally, price the whole job, not just the sheet. A cheap panel that scraps two parts, dulls a bit, and adds an hour of sanding costs more than a good one.
My rule is simple. Spend on material where customers look and touch. Save on jigs, tests, and hidden parts. Work through these five steps, and the right wood usually picks itself.
Best CNC Bits for Wood and What Each One Does
Your bit decides which way the wood fibers get pulled and where the chips go. Pick the wrong one, and even premium material can splinter, fuzz, or burn.
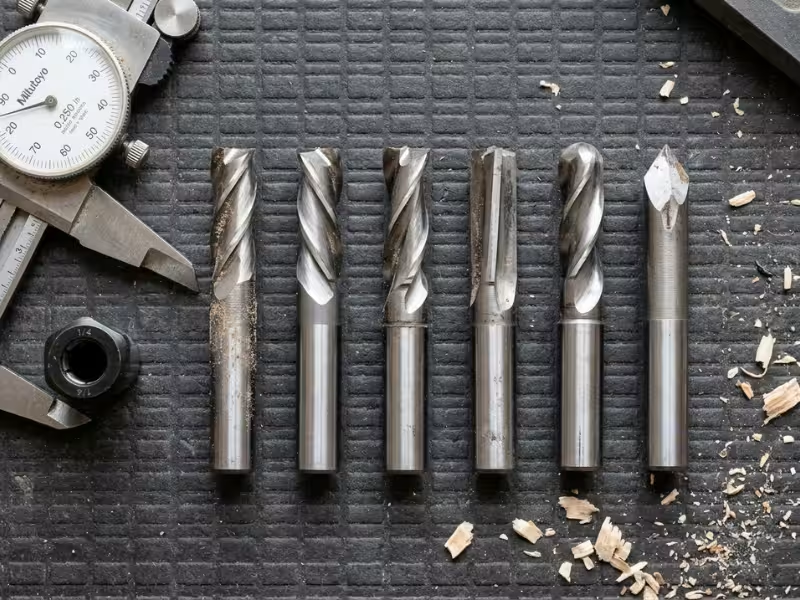
When a customer sends me photos of a bad edge, my first question is always, “Which bit did you use?” Here’s how the six common types behave, and where each one earns a spot in your tool rack.
Upcut Bits: Clear the Chips, Watch the Top Face
An upcut bit works like a small auger. Its spiral flutes lift chips up and out of the cut.
- Best use: Deep pockets, slots, and thick solid wood, where chips pile up fast.
- Key strength: Excellent chip clearing. Less packing means less heat, fewer burn marks, and a clean bottom edge.
- Common downside: That upward pull lifts fibers on the top surface. Plywood veneer and melamine often fray or chip along the top edge.
- Skip it when: The top face will show, like on cabinet doors or sign faces. Be careful with small parts too, because the lifting force can tug them loose if your hold-down is weak.
Downcut Bits: Crisp Top Edges, Trapped Chips
A downcut bit does the opposite. It pushes chips down, pressing fibers into the material instead of tearing them up. It also helps hold thin parts flat.
- Best use: Shallow pockets, inlays, dados, and veneered faces where the top edge must look clean.
- Key strength: One of the cleanest top edges you can get from a spiral bit.
- Common downside: Chips have nowhere to go. They pack into the groove, rub against the bit, and build heat. Burn marks and early dulling follow. The bottom edge may fray.
- Skip it when: You need a deep cut in one pass. As a general guide, once the cut runs deeper than about one bit diameter, take shallower passes or switch bits. Resinous pine makes the heat problem worse.
Compression Bits: The Plywood Specialist
A compression bit combines both designs. A short upcut section at the tip pushes fibers up, and a downcut section above pushes them down. Both faces get squeezed toward the middle of the sheet.
- Best use: Full-depth cutouts in plywood, melamine, and laminated panels. It’s the standard bit for nested cabinet parts.
- Key strength: Clean top and bottom edges in a single pass.
- Common downside: It only works when the downcut section actually reaches the top face. If your first pass is shallower than the upcut length, the top edge still frays. Check the spec sheet and set your first pass deeper than that upcut section. For shallower passes, look at a “mortise” compression bit, which has a shorter upcut zone.
- Skip it when: You’re cutting shallow pockets or dados. You’ll pay extra for a feature you can’t use.
Straight Bits: Fine for Basics, Rarely the Best
Straight bits have flutes that run parallel to the shank. They chop through wood instead of slicing it at an angle.
- Best use: Simple dados, rabbets, and rough cuts in softwood.
- Key strength: They’re cheap and easy to find.
- Common downside: Weaker chip clearing, more heat, and rougher edges than spiral bits. They also dull quickly in plywood and MDF.
- Skip it when: Edge quality matters or you’re running production work. A spiral bit usually pays for itself fast.
Ball Nose Bits: Built for 3D Shapes
A ball nose bit has a rounded tip that follows curves the way a flat bit can’t.
- Best use: 3D reliefs, contoured surfaces, coves, fluting, and finishing passes on carvings.
- Key strength: Smooth, flowing surfaces without stair-step marks. Your stepover controls the small ridges it leaves behind. A stepover of around 10% of the bit diameter is a common starting point for a fine finish.
- Common downside: It’s slow. Tight stepovers can turn a carving into a multi-hour job. It’s also poor at clearing bulk material.
- Skip it when: You’re roughing, cutting out profiles, or milling flat-bottomed pockets. Rough with a flat end mill first, then let the ball nose finish.
V-Bits: Lettering, Chamfers, and Fine Detail
V-bits have an angled tip, most often 60° or 90°. The deeper they cut, the wider the line gets. V-carve toolpaths use that to create sharp, varying strokes.
- Best use: Sign lettering, chamfered edges, decorative grooves, and crisp inside corners.
- Key strength: Sharp detail and pointed corners that flat bits can’t reach.
- Common downside: The fine tip is fragile and dulls fast in hard maple or oak. Wide letters need deep cuts, so pair the V-bit with a flat end mill to clear large areas.
- Skip it when: The job needs flat bottoms, vertical walls, or full cutouts.
If you’re building a starter kit, here’s what I suggest to most shops: a 1/4″ compression bit, one upcut and one downcut spiral, a 90° V-bit, and a 1/8″ ball nose. That set covers most everyday wood jobs.
Core Techniques That Most Affect Cut Quality
The right wood and bit set you up for a clean cut, but technique decides whether you get one. When I troubleshoot a shop, five habits explain most of the edges I see, good and bad.
Hold-Down: The Fix Most Beginners Overlook
If the workpiece shifts even a fraction of a millimeter, few bits or settings can save the cut. Movement shows up as chatter marks, wavy edges, and parts that come out the wrong size.
Each hold-down method has a job it does best:
- Clamps suit single boards and thick stock. Keep them low and well outside the toolpath.
- Screws pin down warped boards and the middle of large panels. Use brass or plastic screws in case the bit wanders into one.
- Vacuum tables hold full sheets quickly and evenly. They lose grip as small parts break free, so plan for that.
- Painter’s tape with CA glue holds thin or small parts that clamps can’t reach.
Thin and large panels cause the most grief. A 1/4″ sheet clamped only at the ends tends to bow up and drum under the bit. A full 4×8 sheet held at the edges can lift in the center. Add screws or a vacuum zone in the middle, and the vibration usually disappears.
Your spoilboard matters just as much. A warped or gouged one lets parts rock and leaves uneven depths. Resurface it flat every few months, or whenever vacuum hold starts to slip.
Once the part stays put, heat becomes the next thing to manage.
Chip Evacuation and Heat Control
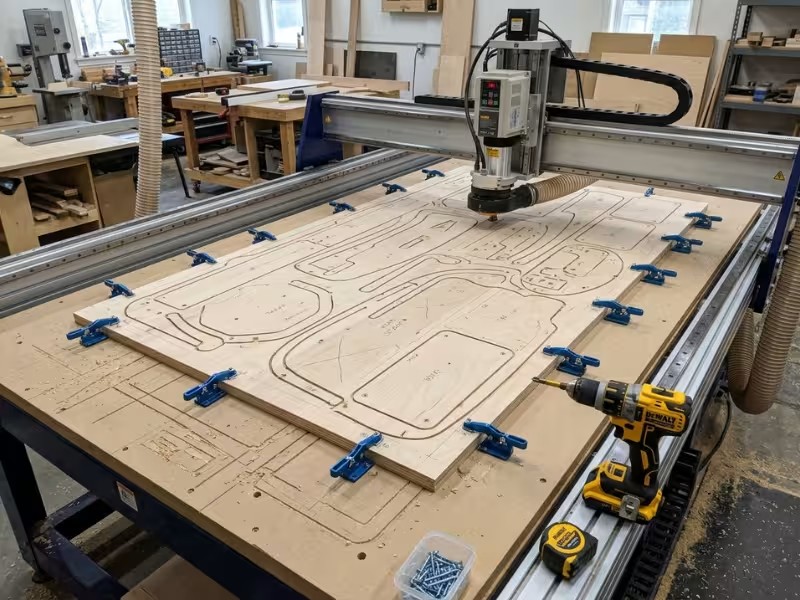
Wood burns mainly because the bit rubs instead of cutting. Chips carry heat out of the cut. When they can’t escape, or when each edge takes too thin a bite, the heat stays in the wood.
Your chips tell you what’s happening. Check them after every test cut:
- Clean, curled chips mean the bit is cutting well.
- Fine dust usually means the bit is scraping. Raise the feed rate or lower the spindle speed.
- Dark or scorched chips mean heat is building. Stop and check your setup.
Three situations raise the risk. Deep grooves trap chips at the bottom, so switch to an upcut bit or clear the slot in stages. MDF turns to powder that packs tight slots, so strong dust collection is essential. Pine resin coats the flutes with gum, adding friction on every pass. Clean bits with a resin remover before buildup turns into burn marks.
Heat is one way to ruin an edge. Torn fibers are the other.
Tear-Out Control Starts Before the Cut
Much of your tear-out gets decided in CAM, not at the machine.
Start with grain direction. Climb and conventional cutting treat fibers differently, and each board responds in its own way. Run both directions on a scrap piece and keep whichever leaves the cleaner edge. Slow down where curves swing into end grain.
Next, decide which face will splinter. Upcut bits tend to fray the top, and downcut bits tend to fray the bottom. Choose your bit based on the face people will see.
For through-cuts, these three tactics do the heavy lifting:
- Onion skin: Stop the profile 0.2–0.5 mm (about 0.01–0.02″) above the spoilboard, then take one light full-depth pass. The skin supports the bottom fibers and keeps small parts from flying loose.
- Sacrificial board: Cut slightly into an MDF sheet under the part so bottom fibers stay backed up until the very end.
- Roughing plus finishing: Leave about 0.5 mm on the walls while roughing, then shave the edge clean with a light final pass.
That leftover stock ties into a bigger question: how hard should each pass work?
Tool Engagement, Stepdown, and Pass Strategy
Stepdown is a balancing act. Go too deep, and the bit bends under load. You’ll hear chatter, see wavy walls, and find tapered edges. Go too shallow, and the bit skims instead of cutting. It rubs, heats up, and dulls faster than it would on full chips.
A practical starting point is a stepdown of about one bit diameter in softwood and MDF, and roughly half that in hardwood. A 1/4″ bit in maple, for example, might take about 1/8″ per pass. Keep tool stick-out as short as the job allows, because every extra bit of length adds flex.
Then finish with a single full-depth wall pass. It erases the step lines left by multiple roughing passes. It costs about a minute per part and often saves far more time at the sander.
The same thinking behind tool engagement, stepdown, and chatter control also drives precision CNC milling service work, even though wood responds very differently from metal.
Smart passes help, but some problems start back in the drawing.
Design Details That Make Wood Machining Easier
A round bit can’t cut a sharp inside corner. It always leaves a radius equal to its own. If parts must fit square, add dog-bone or T-bone reliefs in your CAD file.
Thin ribs and narrow fingers vibrate and snap. In hardwood, I generally avoid walls taller than about four times their thickness. When a design needs them, cut those features last so the surrounding material supports them.
Watch slot width, too. A slot exactly the width of the bit forces both sides to cut at once, which packs chips and builds heat. Draw slots 10–20% wider and cut them with a profile toolpath, or switch to a smaller bit.
Finally, place the good veneer face where your cleanest edge lands. With a downcut bit, keep the show face up. With an upcut bit, flip it down.
Steady hold-down, cool chips, balanced passes, and machine-friendly design give you clean edges before you ever pick up sandpaper.
Feeds, Speeds, and Spindle Strategy
No chart knows your machine, your bit, or the board on your table today. That’s why I teach customers to read the cut instead of copying numbers. Feed rate and spindle speed work as a pair, and the wood tells you when they fall out of balance.
Start by learning what each mistake looks like.
Signs You’re Feeding Too Slow
A slow feed gives each cutting edge a tiny bite. The bit rubs more than it cuts, and that friction turns into heat.
Watch for:
- Burn marks, especially in maple, cherry, and corners where the bit lingers
- Polished, shiny edges that look glazed instead of cut
- Fine dust in place of real chips
Slow feeds feel safe, but they can dull bits faster than almost anything else.
Signs You’re Feeding Too Fast
If you push too hard, the bit can’t keep up. It flexes, bounces, and rips fibers instead of slicing them.
You’ll notice:
- Chatter, a harsh buzz that leaves ripples on the walls
- Chip-out along veneers and edges
- A rough, torn finish that needs heavy sanding
Excess feed also strains the spindle and raises the odds of a snapped bit.
So if feed rate controls bite size, what does the spindle control?
What Spindle Speed Really Changes
Spindle speed sets how often the cutting edges strike the wood. Raise the RPM without raising the feed, and each bite gets thinner. You get more heat and more dust. Lower the RPM at the same feed, and bites get thicker, which can tear fibers.
Chip load ties it all together: feed rate = RPM × number of flutes × chip load. For example, a 1/4″ two-flute bit at 18,000 RPM with a 0.005″ chip load runs at 180 inches per minute. Bit makers publish chip-load ranges, so begin there.
You may need to slow the feed for a delicate part. If so, drop the RPM too, so the chips stay thick. Edges usually come out cleanest when the chip load sits mid-range, not at either extreme.
Numbers give you a starting point. Your senses do the fine-tuning.
How to Dial In Settings Safely
- Cut a test piece from the same material, using a middle chip-load value.
- Listen. A steady hum is good. A high whine often means rubbing, and a low growl means overload.
- Check the chips. Small curls or flakes mean the bit is cutting well.
- Inspect the edge for burns, fuzz, or ripples.
- Change one thing at a time, about 10%, then cut again.
Log every setting that works by material and bit. After a few jobs, that notebook will serve you better than any generic chart.
When you match feed and speed to what the wood shows you, clean edges become repeatable.
Common CNC Wood Machining Problems and How to Fix Them
When a cut goes wrong, many people change three settings at once. Then they can’t tell which change fixed the problem, or which one made it worse.
I troubleshoot the other way. Name the problem, list the likely causes, and change the cheapest, most likely culprit first. Here are the five problems I see most often, in the order I work through them.
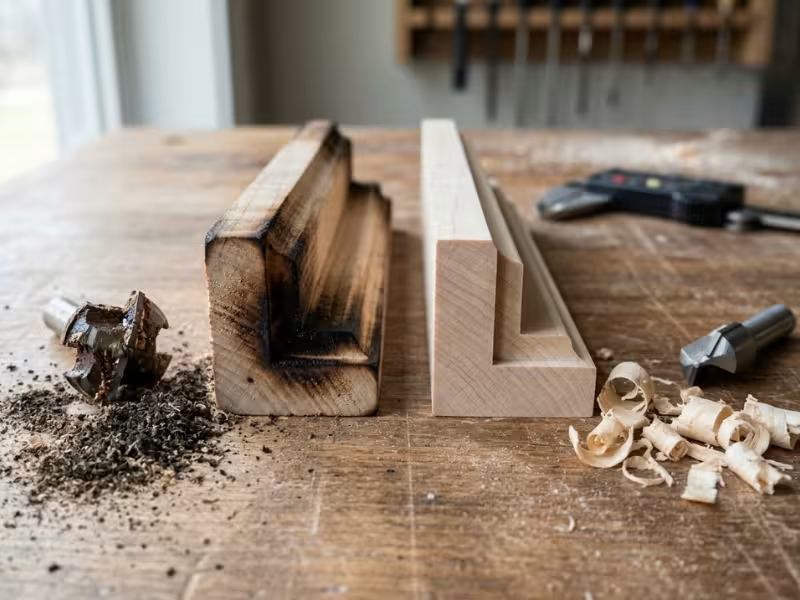
Burn Marks
Burns mean the bit is rubbing instead of cutting. Heat builds faster than the chips can carry it away.
Likely causes:
- Feed rate too slow for the spindle speed
- A dull or resin-coated bit
- Chips packing into deep or narrow slots
- The bit pausing in corners or at plunge points
What to change first: Pull the bit and look at it. Brown gum or rounded edges mean you should clean it or swap it. In my experience, a dirty bit causes more burns than bad settings do.
If the bit looks fine, raise the feed about 10%, or drop the RPM so the chips get thicker. Still seeing burns in corners? Replace straight plunges with ramp entries. Then let a light finishing pass create the final wall, so the edge barely heats up.
Burns come from heat. Tear-out usually comes from missing support.
Tear-Out and Splintering
Fibers break away when nothing holds them in place as the bit passes.
Likely causes:
- The wrong bit for the visible face, such as an upcut on a show face
- Cutting against the grain on curves and end grain
- No backing under the bottom fibers on through-cuts
- Low-grade plywood with thin, brittle veneer
What to change first: Match the bit to the face people will see. For plywood through-cuts, switch to a compression bit. Make sure your first pass goes deeper than its upcut zone.
In hardwood, run a test piece in the opposite cut direction. For bottom blowout, add an onion skin and cut slightly into a flat sacrificial board. If the veneer still lifts, suspect the sheet. Try a void-free grade before you chase settings.
Fuzzy edges can look like mild tear-out, but they usually have different causes.
Fuzzy Edges
Fuzz forms when the bit bends fibers over instead of slicing them. You’ll see it most in MDF, poplar, and pine.
Likely causes:
- A dull bit
- A chip load that’s too low, so the bit scrapes
- Damp or very soft material
What to change first: Run a test cut with a fresh bit. If the edge comes out clean, you’ve likely found your answer. Start logging run hours on each bit so you know when to swap the next one.
If a new bit still leaves fuzz, raise the chip load. Bump the feed or lower the RPM. Then check moisture. In many cases, boards above about 12% moisture fuzz even with well-tuned settings. Some soft pine will always fuzz a little, so plan for a quick sanding or a sealer coat followed by a light scuff.
Fuzz is a quiet problem. The next one is loud.
Chatter and Vibration
You usually hear chatter before you see it. A harsh buzz turns into ripples, wavy walls, and parts that measure slightly off.
Likely causes:
- Weak hold-down
- Too much tool stick-out
- Passes that are too deep
- Loose or worn machine parts
What to change first: Work from the part outward. Press on the workpiece. If it moves or drums, fix the hold-down before anything else.
Next, reseat the bit so only the flute length you need sticks out of the collet. Then cut your stepdown in half and test again.
If chatter survives all that, check the machine. Look for loose gantry bolts, worn V-wheels, slack belts, and a tired collet. Collets wear out quietly. Replace one when bits start slipping or you notice runout.
The last problem leaves a clean edge in the wrong place.
Toolpath and Dimensional Errors
Clean cuts at the wrong size usually point to your file or setup, not the wood.
Likely causes:
- Dirty vectors: Open shapes, duplicate lines, or tiny gaps that make CAM skip or double-cut
- Tool compensation mistakes: An inside profile set as outside, or a library diameter that doesn’t match the real bit
- Zeroing errors: Z set on the wrong surface, or sheet thickness assumed instead of measured
- No verification: Toolpaths that go straight to the machine without a preview
What to change first: Measure the error. It tells you where to look.
- Off by a full bit diameter: Check whether the profile cuts inside or outside the line.
- Off by a few thousandths: Measure the bit with calipers. A “1/4-inch” bit might really measure 0.245″. Update your tool library.
- Depth wrong: Measure the sheet. Nominal 3/4″ plywood often runs closer to 0.70″. Re-zero to match.
Before every new job, join your vectors and run the CAM simulation. Then do an air cut a few inches above the material. Those two minutes catch most mistakes before they cost you a sheet.
Fix one variable at a time, write down what worked, and each problem gets faster to solve the next time it shows up.
Practical CNC Wood Machining Scenarios
Everything up to this point makes more sense once you see it on a real job. Here’s how I set up four projects that customers bring me all the time, from material choice to the last pass.
Painted MDF Sign
MDF wins this job because paint shows texture, and MDF has very little. It carves letters cleanly in every direction, with no grain to fight and no knots to dodge.
For lettering, I reach for a 90° V-bit. I pair it with a 1/4″ flat end mill to clear wide letters and background areas. Cut the outer profile with a downcut bit so the face edge stays crisp.
Two issues catch people out:
- Dust. MDF turns into fine powder. Keep your dust shoe low and wear a mask, even on short runs.
- Thirsty edges. Cut edges soak up paint like a sponge. Seal them first with a shellac-based primer or thinned wood glue. Sand lightly, then paint. Skip this, and the edges often look fuzzy under the topcoat.
Plywood Cabinet Component
For cabinet sides and shelves in 3/4″ plywood, a 1/4″ or 3/8″ compression bit is my default. Check the spec sheet and set your first pass deeper than the upcut zone. Otherwise, the top veneer still frays.
Small parts move once they break free. Leave an onion skin of about 0.3 mm (roughly 0.01″), then take a light cleanup pass. On a vacuum table, add tabs to anything smaller than your hand, since suction drops as parts come loose.
Underneath it all, keep your MDF spoilboard flat. Resurface it before a big nested run. Even a 0.5 mm low spot can leave a ragged bottom edge in exactly that area.
Hardwood Decorative Panel
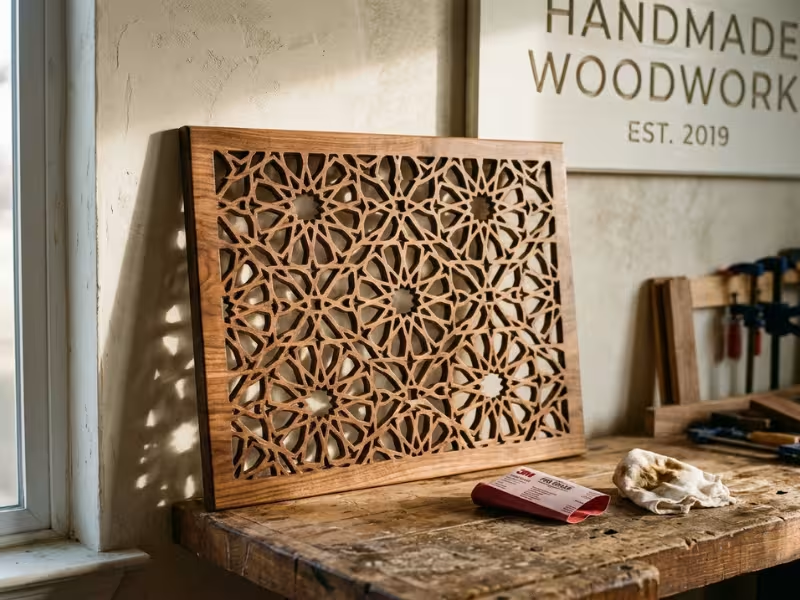
A walnut or maple panel with a pierced pattern rewards patience. Before you cut, mark the grain direction. Expect trouble wherever a curve swings into end grain. Test climb and conventional cuts on an offcut from the same board, and keep the cleaner one.
Keep your stepdown conservative. Use about half the bit diameter, so roughly 1/8″ per pass with a 1/4″ bit. Leave 0.5 mm on the walls, then run one full-depth finishing pass. That single pass removes step lines and most of the fuzz.
Cut the fragile inner details first and the outer profile last. The surrounding wood keeps the panel stiff while the bit works through delicate areas. Place screws or clamps well outside the design.
3D Carved Relief
I treat a relief as two separate jobs. First, rough with a 1/4″ flat end mill, leaving about 0.5 mm of stock across the surface. Then finish with a 1/8″ ball nose at roughly 10% stepover. For very fine detail, add a 1/16″ tapered ball nose pass on the busy areas only. That can save hours compared with finishing the whole surface at a tiny stepover.
Material choice matters more here than most people expect. A long carve removes a lot of wood, and solid boards release stress as you go. A panel that starts flat can cup by the end, which ruins your depths.
Pick stable, even stock. I use MDF for painted reliefs and basswood or cherry for natural finishes. For wide blanks, glue up narrow strips with alternating growth rings. Let the blank sit in your shop for a few days, flatten it, then zero your machine.
Each of these jobs follows the same pattern. Match the material to the finish, choose the bit for the visible face, and support the part until the last pass.
How Much Post-Processing Should You Expect?
I give every customer the same honest answer: plan on some sanding. Even a tuned machine with a sharp bit rarely hands you a part that’s ready for finish right off the table.
What changes is how much work you face. A few things decide that:
- Roughing marks. Skip the finishing pass, and step lines stay on the walls. They take real effort to sand out.
- Fuzz. Raised fibers in MDF, poplar, and pine stand out the moment paint or stain hits them.
- Resin. Sappy spots in pine resist stain and can leave blotchy patches.
- Glue lines. Plywood edges show dark layers that stain tends to make more obvious, not less.
Good machining shrinks that list fast. A sharp bit, a healthy chip load, and one light finishing pass can turn 20 minutes of sanding into a quick touch-up with fine grit. Across a full sheet of nested parts, that can save you hours.
If edge quality matters after machining, it helps to define your final CNC machining surface finish requirements before the first toolpath runs. That target shapes your bit choice, pass strategy, and how much stock you leave for the last pass.
One more habit spares a lot of grief. Test-fit your hardware before you sand or finish anything. Drop in the hinges, shelf pins, and fasteners. Dry-fit every joint.
A hole that’s a hair too small takes seconds to fix now. After three coats of finish, it turns into a repair job.
CNC Wood Machining FAQ
These are the questions customers ask me most often. Here are the straight answers I give them.
What is the best wood for CNC machining?
There’s no single winner. The best wood depends on how the part will be used and finished.
For natural-finish work with fine detail, I reach for walnut, cherry, or hard maple. Walnut tends to be the most forgiving of the three. For painted signs and 3D carvings, MDF usually gives the smoothest results. For cabinets and flat sheet parts, Baltic birch plywood is a strong choice. Save poplar and pine for prototypes and tests.
Is plywood or MDF better for CNC?
Each one wins a different job.
Choose plywood when the part needs strength, holds screws, or faces moisture. It works well for cabinet boxes, shelves, and structural pieces. Choose MDF when the part gets painted or carved in 3D. It has no grain, so it cuts the same in every direction and leaves a smooth surface.
If you need a strong part with a paint-grade face, you can get both. Use plywood for the box and MDF for the doors.
Which CNC bit gives the cleanest edge in wood?
For full-depth cutouts in plywood or laminated panels, a compression bit is usually the best choice. It leaves clean top and bottom edges in one pass.
For shallow pockets, inlays, and dados, a downcut bit gives a crisp top edge. Whichever bit you choose, add a light finishing pass. That final pass often does more for edge quality than a bit upgrade.
Why does wood burn during CNC machining?
Wood burns when the bit rubs instead of cutting. The usual causes are:
- A feed rate that’s too slow
- A dull or resin-coated bit
- Chips packing into deep slots
- The bit pausing in corners
Check the bit first, and clean or replace it if needed. Next, raise the feed about 10%. Finally, swap straight plunges for ramp entries.
How deep should a CNC router cut in one pass?
A practical starting point is about one bit diameter in softwood and MDF. In hardwood, use roughly half that. With a 1/4″ bit, that means about 1/4″ per pass in MDF and 1/8″ in maple.
Go lighter with bits 1/8″ and smaller, since they snap easily. Keep tool stick-out short. Then finish with one full-depth wall pass to remove step lines.
How do you reduce splintering in plywood?
Start with a compression bit, and make your first pass deeper than its upcut zone. Then add these habits:
- Leave an onion skin of 0.2–0.5 mm, then finish with a light full-depth pass.
- Cut slightly into a flat MDF spoilboard so the bottom fibers stay supported.
- Use a sharp bit. Plywood glue dulls edges faster than you’d expect.
- Buy void-free plywood when edges will show.
If cheap veneer still chips after all that, the sheet is the likely problem, not your settings.
Clean Cuts Come From Smart Choices
A better machine won’t fix a bad match. Clean, accurate wood parts come from pairing the right material with the right bit and the right cutting strategy.
When I visit a shop with edge problems, the router is rarely the main culprit. The fix usually lies in a mismatch between the wood, the bit, and the way the shop holds and cuts the part.
Repeatable results come from deliberate decisions, not luck. Control those decisions, and clean edges stop being a surprise.
So begin your next job before you open your CAM software. Pick your material and decide which edges people will see. Then work backward to choose your bit, passes, and feeds.