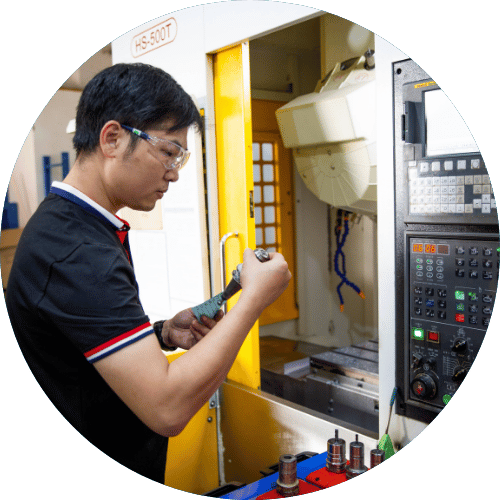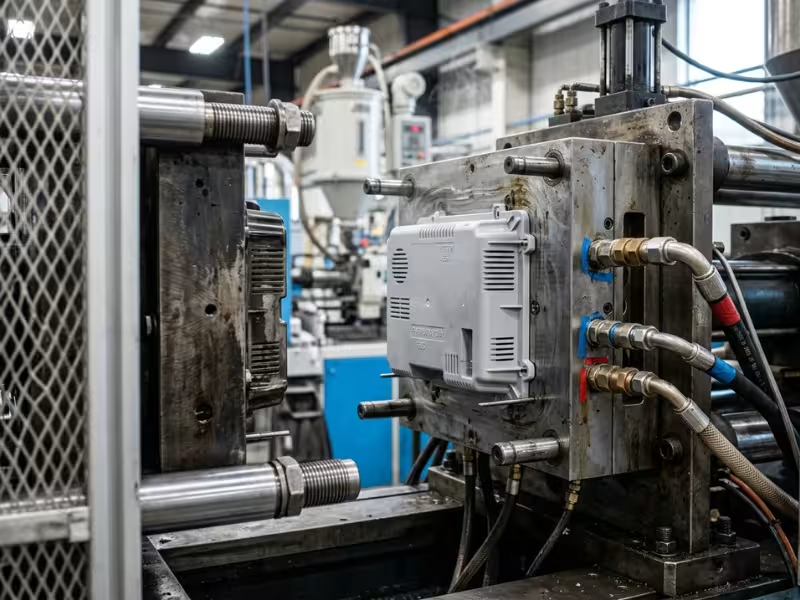
Thermoplastic injection molding melts plastic pellets and shoots the melt into a mold to form a finished part.
People search this term for different reasons. Students want a clear definition. Buyers want to understand quotes. Designers and new manufacturers want to know if their product fits.
I hear one question from all of them: can this process make my part well, at a fair price?
The answer often comes down to scale. One good mold can turn out thousands of identical parts, each in seconds.
Knowing the steps is only half the picture. You also need to know when molding makes sense and when it doesn’t.
What Thermoplastic Injection Molding Really Means
At its core, the process is simple. A machine melts plastic pellets and forces the melt into a closed steel mold. The plastic cools and hardens into the shape of the cavity. Then the mold opens and pushes the finished part out.
A typical cycle for a small housing takes 15 to 60 seconds. Most of that time goes to cooling, not filling.
The word “thermoplastic” matters here. Thermoplastics soften when you heat them and harden when they cool, and you can repeat that cycle. On many jobs, I regrind sprues, runners, and rejected parts and blend a small share back into fresh pellets.
Thermosets behave differently. They cure through a chemical reaction during molding. Once they set, heat won’t melt them again. It only scorches or breaks them down. Epoxy, phenolic, and many silicone rubbers fall into this group.
Here’s how I explain the difference to new buyers:
- Thermoplastics work like candle wax. You can melt, shape, cool, and melt them again.
- Thermosets work like baked bread. Once it bakes, you can’t turn it back into dough.
So why does this process suit repeat production so well? The mold does the hard work. Once a toolmaker cuts the cavity, every shot follows the same steel shape. Part 10 and part 100,000 come out nearly identical.
That consistency has a price. A production mold often costs thousands to tens of thousands of dollars. Molding pays off when you spread that cost across many parts.
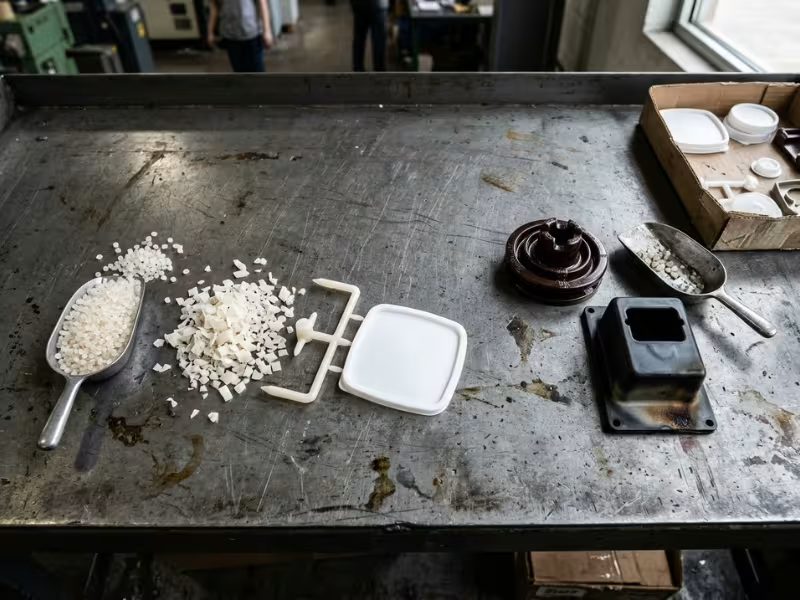
How the Injection Molding Process Works
Every molded part, from a bottle cap to a car dashboard, comes from the same short loop. Plastic goes in as pellets and comes out as a finished part, often in under a minute.
To see where quality is won or lost, start with the equipment.
The Machine and the Mold
An injection molding machine has two main jobs. It melts and pushes the plastic, and it holds the mold shut.
- The hopper sits on top and feeds pellets into the barrel. For resins that absorb moisture, such as nylon, PC, and PET, I always run a dryer first. Wet pellets cause bubbles, silver streaks, and brittle parts.
- The heated barrel wraps heater bands around a steel tube. Most common resins melt between about 180°C and 300°C, depending on the grade.
- The screw turns inside the barrel. It carries pellets forward, and its friction supplies a large share of the melting heat. It then moves forward like a plunger to inject the melt.
- The mold halves form the part. The fixed half receives the plastic through a sprue. The moving half usually carries the ejector pins.
- The clamping unit holds the halves together against injection pressure. Tonnage matters here. Many parts need roughly 2–5 tons of clamp force per square inch of projected part area. Too little force, and plastic leaks out at the parting line as thin “flash.”
The equipment sets the limits. The cycle decides what you actually get inside them.
The Molding Cycle, Step by Step
Each cycle runs through six stages, and each one has a clear job.
- Feeding. Pellets drop from the hopper into the rear of the barrel.
- Melting. The rotating screw shears and heats the pellets. It builds up a measured “shot” of melt in front of its tip.
- Injection. The screw drives forward and fills the cavity in about 1–3 seconds for most small parts. I fill roughly 95–98% of the cavity at a set speed, then switch to pressure control.
- Holding and packing. The machine keeps pressure on the melt. As the plastic shrinks, extra material flows in to fill the gap. This stage continues until the gate freezes.
- Cooling. Water lines inside the mold pull heat out of the part. Meanwhile, the screw prepares the next shot. Cooling often takes 50–80% of the total cycle.
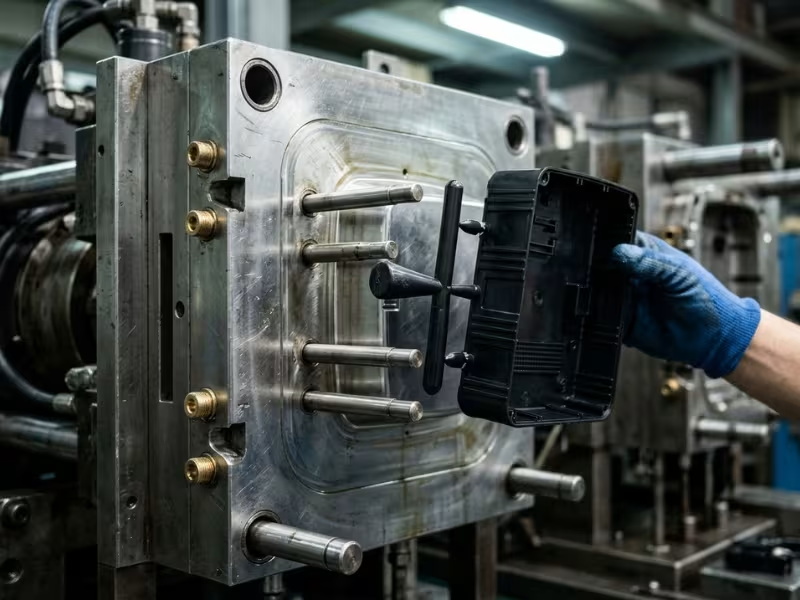
- Ejection. The mold opens, and pins push the part off the core. Walls need draft, usually 1° or more, so the part releases cleanly without drag marks.
Then the mold closes, and the loop starts again.
What Each Stage Changes in the Finished Part
When a customer sends me a defective sample, I trace it back to a stage. Most problems point to one of four outcomes.
Fill quality depends on injection. If the melt runs too cold or too slow, it freezes before it reaches the far end of the cavity. You get a “short shot,” a part with missing sections. Push too hard, and you get flash instead.
Detail reproduction comes from injection speed, packing pressure, and mold temperature. Fine textures, small ribs, and sharp logos need the melt to press firmly against the steel before it skins over. A warmer mold usually gives crisper detail and a glossier surface.
Cycle time rides on cooling. Cooling time grows roughly with the square of wall thickness. In practice, a 4 mm wall can cool about four times slower than a 2 mm wall. That is why I push designers toward thinner, even walls. It often saves more money than any machine setting.
Dimensional consistency comes from packing and cooling together. Short packing leaves sink marks and undersized parts. Uneven cooling makes one side shrink more than the other, and the part warps. Once I lock these settings in, a stable process holds dimensions shot after shot.
|
Stage |
Main effect on the part |
Common problem when it goes wrong |
|---|---|---|
|
Injection |
Fill and surface |
Short shots, flash, flow lines |
|
Holding/packing |
Size and density |
Sink marks, voids, undersize |
|
Cooling |
Cycle time and flatness |
Warpage, long cycles |
|
Ejection |
Clean release |
Drag marks, stress whitening |
The cycle looks simple from the outside. Each part, though, records exactly how well every stage ran.
What Controls Part Quality
Two molders can run the same mold and the same resin and still ship very different parts. The gap comes from a handful of settings and one design choice. When a customer brings me a warped lid or a housing with dents, I check these six things first.
Melt temperature sets how easily the plastic flows. Every resin has a working window. ABS usually runs around 220–260°C, while PC needs about 280–320°C. Run too cold, and the melt freezes early. You get short shots, visible weld lines, and stress locked inside the part. Run too hot, and the resin starts to break down. Burn marks, black specks, and yellowing follow, and the part takes longer to cool.
Mold temperature shapes the surface and the long-term stability. A cold mold speeds up the cycle, but it often leaves a dull finish and built-in stress. That stress can make a part warp weeks later in a warm warehouse. A warmer mold gives better gloss and steadier dimensions. For PP, nylon, and PET, mold temperature also changes how the plastic crystallizes, which shifts the final shrink rate.
Injection pressure pushes the melt into every corner and then packs it tight. Too little pressure leaves sink marks, voids, and undersized features. Too much forces plastic past the parting line as flash. It can also pack the part so hard that it sticks in the mold. I tune fill speed first, then set packing pressure to the lowest level that holds size.
Cooling time decides when the part is solid enough to leave the mold. Eject too early, and ejector pins leave marks, or the part keeps shrinking and bends on the bench. Cool too long, and you pay for machine time that adds no quality. I time cooling by measuring the part, not by guessing.
Those four settings belong to the molder. The last two start with the designer.
Shrinkage and warpage come with every molded part. Amorphous resins like ABS and PC shrink about 0.4–0.7%. Semi-crystalline resins like PP and PE can shrink 1.5–2.5% or more. The toolmaker cuts the cavity oversize to make up for it. Warpage happens when one area shrinks more than another. Uneven cooling, glass fiber direction, and mixed wall thickness cause most of it.
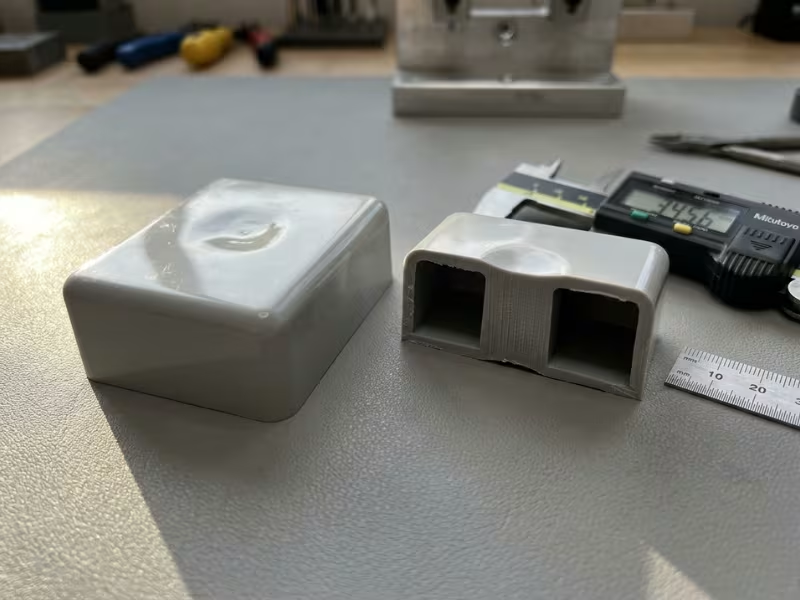
Wall thickness consistency matters more than any machine setting. Thick sections cool last, pull inward, and leave sink marks on the surface. Thin sections next to thick ones cool unevenly and twist the part. Here’s what I ask designers to do:
- Keep walls between about 1.5 and 3 mm for most small parts.
- Hold wall variation within about 15–25% across the part.
- Make ribs no thicker than 50–60% of the wall they support.
- Taper thickness changes gradually instead of stepping them.
Get the walls right, and the process settings have far less to fix.
Common Thermoplastics and How to Choose Them
Most material mistakes I see start with a datasheet. A buyer picks the strongest resin on paper, then pays for it in cost, cycle time, or warped parts. I start with what the part must survive, then match a resin to that job.
Five resins cover a large share of the parts I quote. Here’s how they compare at a glance:
|
Material |
Stiffness |
Toughness |
Clarity |
Heat resistance |
Relative cost |
Best fit |
|---|---|---|---|---|---|---|
|
PP |
Medium |
Good, with great fatigue life |
Translucent at best |
Moderate |
Low |
Hinged caps, containers, auto trim |
|
PE |
Low |
Excellent |
Opaque to hazy |
Low |
Low |
Flexible closures, buckets, squeeze parts |
|
ABS |
Medium–high |
Good |
Opaque |
Moderate |
Medium |
Housings, enclosures, cosmetic parts |
|
PC |
High |
Excellent |
Clear |
High |
High |
Lenses, guards, medical housings |
|
PET |
High |
Good |
Clear (amorphous) |
Moderate |
Medium |
Bottle preforms, glass-filled electrical parts |
The table shows the trade-offs. The details below explain how each one behaves in the mold.
PP: The Low-Cost Workhorse
Polypropylene is light, cheap, and shrugs off most chemicals. Its best trick is fatigue resistance. A thin PP “living hinge” can flex thousands of times without cracking, so most flip-top caps rely on it.
PP flows easily and molds fast. But it shrinks around 1.5–2% and tends to warp on large flat parts. I add ribs or ask for a filled grade when flatness matters. Choose PP for containers, hinged closures, and interior auto trim where low cost beats stiffness.
PE: Tough, Flexible, and Hard to Break
Polyethylene bends where other resins snap. HDPE gives you a firmer part. LDPE stays soft enough to squeeze.
PE handles cold well and resists acids and solvents. It softens at fairly low temperatures, though, so I keep it away from hot-fill or under-hood parts. It also shrinks heavily, often 1.5–3%, and paint and glue barely stick to it. PE fits buckets, closures, and caps that must take drops and stay cheap.
PP and PE win on price. When a part needs a better surface or more rigidity, I move up to the engineering resins.
ABS: The Go-To Housing Material
ABS gives you a stiff, tough part with a clean, glossy surface. It paints, plates, and takes fine textures well, so it dominates electronics enclosures and appliance housings.
ABS is amorphous, so it shrinks only about 0.4–0.7%. That makes tight snap fits and matched halves much easier to hold. I always dry ABS before molding, or you get silver streaks on the surface. Avoid it for long outdoor use unless you add UV stabilizers, because sunlight yellows and weakens it.
PC: Clear, Tough, and Heat-Resistant
Polycarbonate does what few resins can. It stays glass-clear, takes heavy impact, and holds up near 130°C. That combination makes it the default for safety lenses, machine guards, and light covers.
PC also asks more of the molder. It runs hot, around 280–320°C, and it flows thickly. Thin walls need higher pressure and good gate design. Even slight moisture in the pellets causes bubbles and brittle parts, so I dry it carefully. It also cracks when certain cleaners touch it under stress. Budget for higher resin cost, and test it with the chemicals it will meet.
PET: Clear and Strong When Processed Right
Most injection-molded PET becomes bottle preforms. A second machine then blows those preforms into bottles. PET offers clarity, strength, and a good gas barrier for drinks.
PET is the fussiest resin on this list. It must be dried thoroughly. Mold temperature changes the part itself: a cold mold keeps it clear, while a hot mold turns it opaque and more crystalline. Glass-filled PET also serves well in stiff, heat-resistant electrical parts.
The base resin sets the starting point. Additives let you adjust it for the job.
Additives, Fillers, and Colorants
Very few parts I ship use plain, natural resin. Small additions change both the part and the process:
- Glass fiber (often 10–30%) boosts stiffness and heat resistance. It also wears the mold faster, and fiber direction can make parts warp.
- Mineral fillers like talc cut shrinkage and improve flatness, especially in PP.
- UV stabilizers protect outdoor parts from cracking and fading.
- Flame retardants help electrical housings meet fire ratings, though they can reduce impact strength.
- Colorants usually come as a masterbatch at about 2–4%. Dark colors can hide flow lines. Some pigments slightly shift shrinkage, so I check dimensions after any color change.
My advice stays simple. Define the load, heat, chemicals, and look the part needs. Then choose the cheapest resin that meets all four, and add only what the job requires.
When Injection Molding Makes Sense
Most customers ask me the same thing before we cut any steel: “Is my part ready for a mold?” I don’t answer with a yes or no right away. I run the part through four quick checks. Then I look for four warning signs that point somewhere else.
Start with the reasons to commit.
Signs Your Part Is Ready for a Mold
Your volume is medium to high. The mold is a fixed cost, and volume spreads it out. Say a production mold costs $20,000, and each part costs $0.80 in resin and machine time.
- At 500 parts, tooling adds $40 to every piece.
- At 50,000 parts, it adds just $0.40.
As a rough guide, runs under 1,000 parts rarely justify a steel mold. Annual volumes above 5,000 usually do. An aluminum prototype tool, often $3,000–$10,000, can make molding pay off for a few thousand parts.
Repeatability matters. Snap fits, mating housing halves, and gasket grooves need every part to match the last one. Once I lock in a stable process, part 1 and part 50,000 come out nearly identical. Many small features hold about ±0.1 mm without special effort.
Your geometry is stable. A mold doesn’t forgive late changes. Removing steel to make a feature bigger is fairly easy. Adding steel back means welding or a new insert. Even small edits often cost $500–$3,000 and take one to three weeks. I tell designers to freeze the part after functional testing, not before.
Per-part cost matters more than tooling cost. This check settles most decisions. A CNC-machined ABS housing might cost $40–$60 each. The same housing, molded, often lands at $1–$3. If you sell 10,000 units a year, those savings can pay for the mold within months.
When a part passes all four checks, molding is usually the clear winner. When it fails even one, slow down and look harder.
When to Hold Off or Choose Another Route
The design still changes often. If engineering expects another revision, don’t cut steel yet. Use 3D printing or CNC machining until the part passes two rounds of testing with no changes. A printed prototype costs a few dollars to redo. A modified mold costs far more.
The quantity is too low. For 50 or 200 parts, tooling cost overwhelms everything else. I point those customers to:
- 3D printing for a few dozen parts or early fit checks
- Urethane casting for roughly 20–200 parts that need a molded look
- CNC machining when the part needs real engineering plastic and tight tolerances
Internal geometry favors additive methods. A mold must open and release the part in a straight pull. Closed internal channels, lattice structures, and sealed hollow cavities can’t come out of a standard mold. Side actions and collapsible cores handle some undercuts, but each one adds about $1,000–$5,000 to the tool. When the inside of a part does the real work, 3D printing or a two-piece molded design often makes more sense.
The application needs metal-level strength. Plastics have real limits. Unfilled ABS reaches roughly 40 MPa in tensile strength. 6061-T6 aluminum reaches about 310 MPa. Glass-filled nylon closes some of that gap, but it still creeps under constant load and heat. For load-bearing brackets near engines, high-pressure fittings, or parts that sit hot under stress, I recommend machined metal instead.
Run your part through both lists before you request a mold quote. If it clears the first and avoids the second, injection molding will likely give you the lowest cost per part and the most consistent quality you can buy.
Benefits, Limits, and Real Trade-Offs
Every molding brochure lists the same benefits: fast, precise, low waste. All three are true. But each benefit comes with a cost, and smart buyers weigh both before they commit.
Speed is the biggest draw. Once a mold runs, a small housing drops out every 20–40 seconds. A four-cavity tool on a 30-second cycle makes about 480 parts an hour. A CNC machine might need 15 minutes to finish one similar housing. That gap explains why molding dominates consumer products.
The catch is timing. That speed only starts once the mold exists. Toolmakers usually need 4–8 weeks to build a steel mold, plus one or two rounds of sampling. If your launch sits six weeks out, the fastest process on paper can become the slowest one in practice.
Complex shapes repeat at almost no extra cost. Snap fits, ribs, bosses, living hinges, and molded-in textures all come from the steel. The toolmaker cuts them into the mold once, and every shot copies them. Adding ten ribs to a molded part barely changes its price. On a machined part, those same ribs might add an hour.
The mold still has to open, though. Every feature must release in the direction of pull. Otherwise, it needs a side action or lifter, and each one adds cost and wear points to the tool. I often save customers more by redesigning one undercut than they could save by negotiating the mold price.
Scrap stays low once the process settles. A tuned production run often keeps scrap under 1–2%. Hot runner molds send nearly all the melt into the part. With cold runners, I regrind the runners and blend a share back in, often 15–25%, depending on the resin and the part’s requirements.
That low number takes work. The first runs after startup can scrap 5–10% while I dial in temperatures and packing. Medical and food-contact parts often bar regrind entirely, so the runner material becomes true waste. Ask your molder which runner system they plan to use before you compare quotes.
Those three benefits pull you toward molding. The next three push back.
Mold cost loads the whole project up front. A multi-cavity hardened steel tool with side actions can pass $50,000–$100,000. You pay most of that before you see a single good part.
Tool life varies as well. A P20 steel mold often runs several hundred thousand shots, while hardened H13 can pass a million. I match the steel to lifetime volume, not just the first order. Paying for a million-shot tool on a 20,000-part program wastes money.
Shrinkage, warpage, and sink marks never fully go away. Every resin shrinks as it cools. Good design and process control keep that shrinkage predictable, not absent. A large flat PP lid can bow 1–2 mm across 300 mm if the walls or cooling run uneven. A thick boss behind a cosmetic face can leave a visible dimple on the show side.
I catch most of these issues on the drawing. Some only appear at first sampling. Budget time and money for at least one round of tool adjustment, because almost every new mold needs it.
Plastic has a ceiling for structural work. Even glass-filled nylon creeps under steady load, especially when warm. It also loses stiffness as it absorbs moisture. A bracket that passes a quick bench test can sag after six months near a motor.
For parts that carry constant loads, run above 100°C, or hold high pressure, I compare against machined aluminum or steel before I recommend a mold. Sometimes the right answer is a hybrid: a molded housing with a metal insert where the load actually lands.
Put these trade-offs side by side, and a clear pattern appears. Molding rewards stable designs, high volumes, and patience at the start. It punishes late changes, small runs, and loads that belong to metal. If your part fits the first group, the trade-offs swing strongly in your favor.
Where Thermoplastic Injection Molding Is Commonly Used
Look around any room, and you’ll spot dozens of molded parts. Each industry below chose this process for a specific reason. That reason can tell you a lot about your own part.
Automotive runs on volume and weight. One car model can need 200,000 identical vent louvers, trim panels, or clip sets each year. Molding delivers them for a few cents to a few dollars each. Swapping a steel bracket for glass-filled nylon can also cut its weight by half or more, which helps fuel economy and EV range. Molded clips and connectors snap together on the line with no screws.
Consumer products depend on looks and low cost. Textures, colors, and gloss come straight from the steel, so a vacuum housing or toy rarely needs paint. Living hinges on PP caps and snap-fit battery doors remove fasteners and assembly steps. When a product sells for $15, those saved seconds decide the margin.
Medical housings need repeatability you can prove. Once a molder validates a process, every inhaler body or monitor housing matches the approved sample. That consistency supports regulatory audits and lot tracing. Many shops mold these parts in cleanrooms, using PC or medical-grade PP that holds up to sterilization.
Electronics enclosures demand precise fits and built-in features. Screw bosses, board-holding ribs, and snap latches all form in one shot. Flame-retardant ABS or PC/ABS blends help housings meet UL 94 fire ratings. Walls around 1.5–2 mm keep devices slim without losing strength.
Packaging pushes speed further than any other field. A 72-cavity cap mold on a 4-second cycle can turn out more than 60,000 caps an hour. Thin-wall food tubs and PET bottle preforms follow the same logic: tiny margins, huge counts.
The same pattern runs through all five. These industries need identical parts in large numbers, with features built in rather than added later. If your product shares those needs, molding likely fits.
Injection Molding vs 3D Printing and Other Options
Injection molding wins on volume, but it isn’t the only way to make a plastic part. I often steer customers to a different process, at least for a while. The right choice depends on quantity, geometry, and what the part has to do.
3D printing suits low volume and fast change. You can print a housing tomorrow, test it, edit the CAD, and print again. You need no tooling and no waiting. Printing also builds internal channels and lattices that a mold could never release.
The trade-off shows up in the part. Printed materials rarely match molded-grade resin, and FDM parts stay weaker between layers. Per-part cost also stays flat, so the hundredth part costs about as much as the first. Past a few hundred pieces, a mold usually pulls ahead.
CNC machining fits rigid materials and tight features. With CNC plastic machining, I cut parts from solid PEEK, POM, or nylon when a part needs a sealing face, a precise bore, or ±0.02 mm on a critical dimension. Machined parts have no draft, no knit lines, and no molded-in stress.
For structural loads, machining also opens the door to aluminum and steel. Most of the cost sits in machine time. That makes it a strong fit for prototypes, fixtures, and runs of up to a few hundred parts.
The last two options compete with injection molding only when the shape calls for them.
Blow molding makes hollow parts. Bottles, fuel tanks, and drums need a closed shell with thin, even walls. Injection molding can’t core out that shape in one piece. Blow molding inflates a heated tube or preform against the mold instead.
Thermoforming handles large, shallow, thin-wall parts. Think trays, clamshell packs, and equipment covers. A heated sheet stretches over a single-sided tool, often made of aluminum, which costs a fraction of an injection mold. The catch is wall control. The sheet thins at corners and deep draws, and you can’t form bosses or ribs on the back side.
Many products use two of these processes. I often machine or print the first 50 parts, freeze the design, and then cut the mold.
Thermoplastic Injection Molding FAQ
What is thermoplastic injection molding in simple terms?
A machine melts plastic pellets and pushes the melt into a closed steel mold. The plastic cools, hardens, and takes the shape of the cavity. Then the mold opens and ejects the part.
One mold can repeat that cycle thousands of times, often in under a minute per shot.
What is the difference between thermoplastics and thermosets?
Heat affects them in opposite ways. Thermoplastics soften when you heat them and harden when they cool. You can melt and reshape them again, which is why I can regrind runners and reuse them.
Thermosets cure through a chemical reaction. Once they set, heat only scorches them. Epoxy and phenolic belong to this group.
What is the difference between injection molding and 3D printing?
3D printing needs no tooling. It suits prototypes, design changes, and runs of a few dozen parts. But the hundredth part costs about as much as the first.
Injection molding needs a mold up front. After that, each part costs very little and comes out nearly identical to the last. Past a few hundred pieces, molding usually wins.
What causes shrinkage in injection molded parts?
Plastic takes up less space as it cools. Amorphous resins like ABS and PC shrink about 0.4–0.7%. Semi-crystalline resins like PP and PE can shrink 1.5–2.5% or more. The toolmaker cuts the cavity slightly oversize to make up for it.
Shrinkage becomes a problem when it runs uneven. Thick sections, uneven cooling, and short packing time cause sink marks and warpage. Even wall thickness prevents most of it.
Can injection molding make durable reusable parts?
Yes. Tool handles, appliance housings, car interior parts, and medical device bodies all last for years. Durability depends on the resin and the design. PC and glass-filled nylon handle impact and heat well. A PP living hinge can flex thousands of times without cracking.
Plastic still has limits. Under steady load and heat, it slowly creeps. For those parts, I add a metal insert or switch to machined metal.
How do I choose the right thermoplastic?
Start with what the part must survive, not with the strongest resin on the datasheet. Define four things:
- Load: impact, flexing, or steady weight
- Heat: the highest temperature the part will see
- Chemicals: cleaners, oils, fuels, or food contact
- Look: clear, glossy, textured, or colored
Then pick the cheapest resin that meets all four. Add glass fiber, UV stabilizers, or flame retardants only when the job calls for them. If you’re unsure, send your molder the part’s real use conditions along with the drawing.
Match the Mold to Your Product
Thermoplastic injection molding melts plastic, shapes it in a steel mold, and repeats that shot thousands of times.
No single factor decides whether a project succeeds. A solid process can’t save the wrong resin. The right resin can’t justify a mold for 200 parts. Success comes when process, material, and volume all line up.
Skip memorizing definitions. Study your own product instead. Check its geometry, the material it needs, and how many parts you’ll sell. Then bring those answers to your molder. You’ll get a sharper quote and better parts from the first shot.