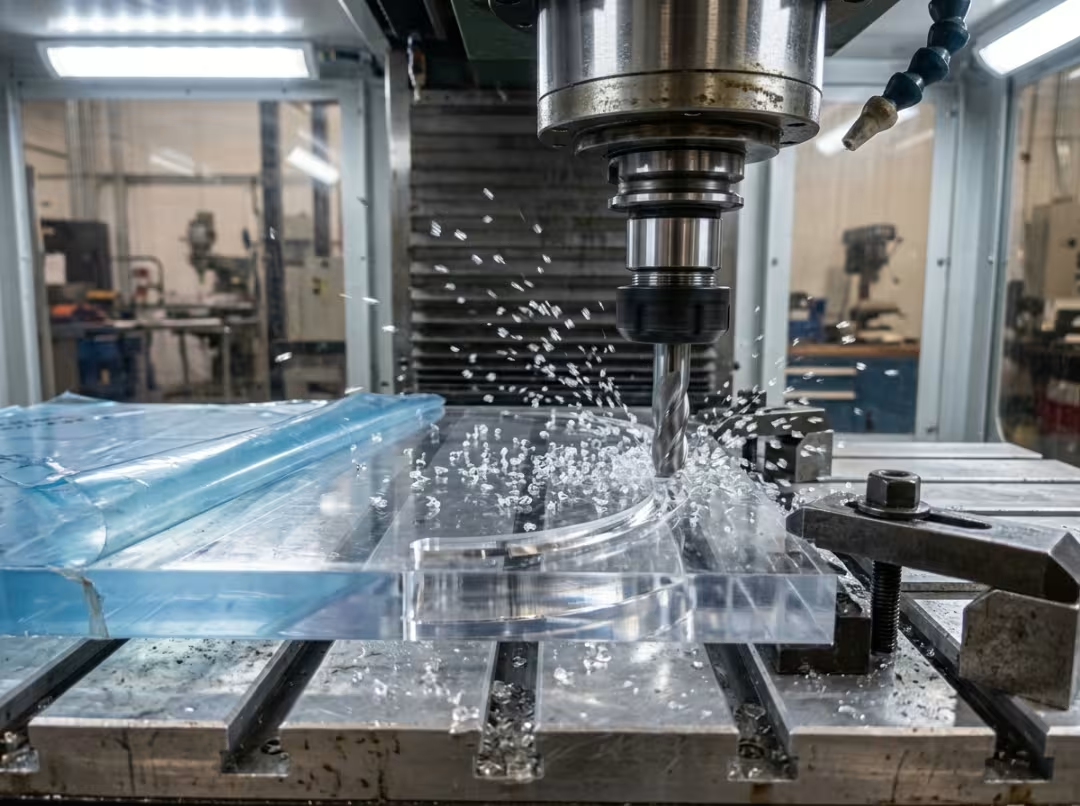
Acrylic is everywhere in CNC shops—display stands, signage, enclosures, light pipes—and for good reason. It’s clear, stiff, polishes well, and cheap enough to prototype with freely. It’s also easy to wreck. Get the parameters slightly wrong, and the machine tells you fast: a gummy smear where there should be a clean slot, a jagged edge that should be glass-smooth, a hairline crack that only appears when you drive in the first screw.
The difficulty isn’t cutting PMMA. It’s cutting it cleanly—which means avoiding two problems at once. Acrylic melts easily and cracks easily, and the fixes for each pull in different directions. This guide covers the decisions that actually shape the result: which type of acrylic to use, how to set up and adjust your cut on the fly, what’s really causing the failure in front of you, how to finish to a genuinely clear edge, and when PMMA is simply the wrong material and you should reach for something else.
Why Acrylic Fails Under a CNC Spindle
On paper, acrylic is a reasonable material for machining. It’s optically clear, UV-stable for outdoor use, rigid enough to hold shape, and takes a polished edge better than almost any other clear plastic. That’s why it’s the default on so many jobs.
Under a cutter, two weaknesses show up fast.
Heat. PMMA softens at a relatively low temperature, and a spinning tool generates friction quickly—especially when chips aren’t clearing. Once the material softens, it smears and re-welds right behind the cutter. That’s where melted-looking edges and foggy finishes come from. It’s not the tool wearing; it’s the acrylic fusing back.
Brittleness. Acrylic is rigid rather than tough. Push a dull tool into it, overtighten a fastener, or clamp in the wrong spot, and it fractures rather than deforming. Extruded sheet makes this worse because it carries more internal stress from the die process—stress that was already there before you touched it.
Almost every failure traces back to heat, stress, or both. Keep that in mind and most corrective steps stop feeling like guesswork.
Here’s what a good result actually looks like:
- Chips come off as long strings or curls—not fine powder, not smeared residue
- After the finishing pass, the edge is clear, not white or frosty
- No cracks radiating from holes or corners during machining or after assembly
- Post-processing is light—a quick flame pass or a little sandpaper, not a grinding session
If you’re not seeing that, the sections below tell you where to look.
Cast vs. Extruded Acrylic: The First Decision That Affects Everything
Before touching a single parameter, know what’s sitting on your table. Cast versus extruded isn’t a minor detail—it sets the ceiling for the whole job. A surprising number of cracking and edge-quality problems don’t originate at the machine at all. They start at the material supplier.
How they behave differently under a tool
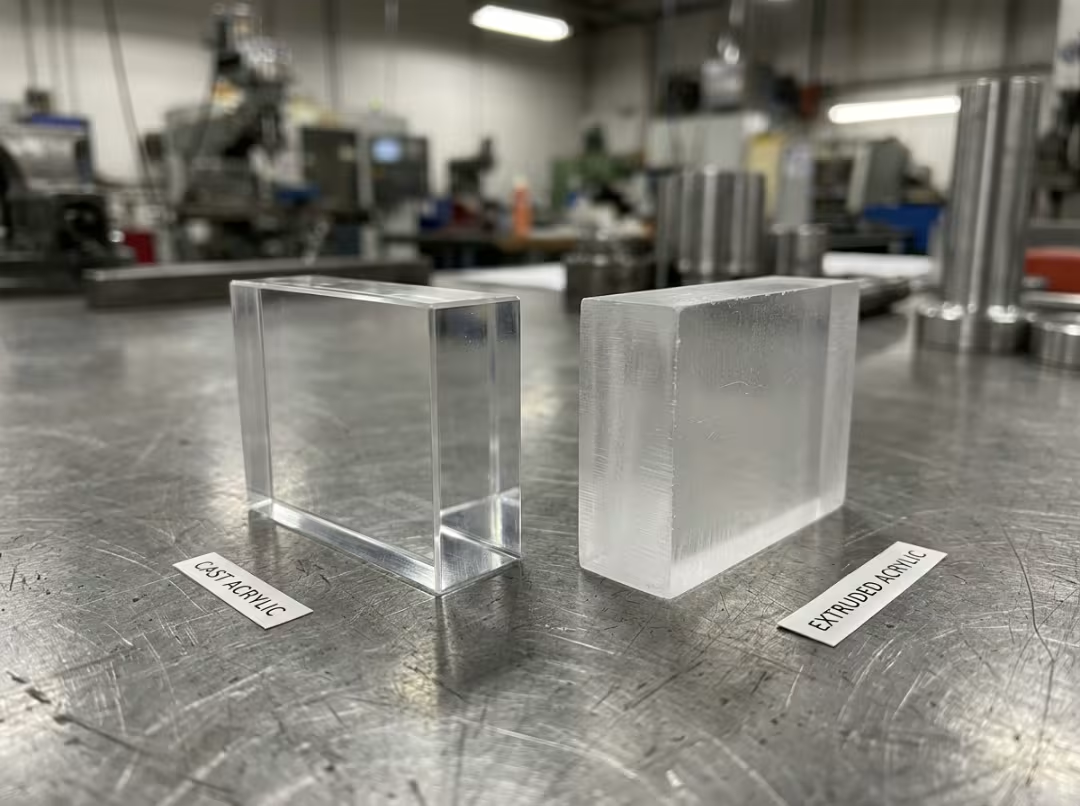
Cast acrylic is made by pouring liquid monomer into molds and curing it. The result is a high, uniform molecular weight with very low internal stress. It produces clean, stringy chips, holds up well against cracking, and polishes to a sharp, genuinely clear edge without much effort.
Extruded acrylic comes through a die. Tighter thickness tolerances, lower cost—but also lower molecular weight and more residual stress locked in from the process. It chips more readily under a cutter and tends to craze, meaning fine spider-web cracks around drilled holes or wherever a fastener loads the sheet. Sometimes this happens immediately. Sometimes it shows up during assembly a week later.
Run the same tool at the same feeds on both, and the difference is hard to miss. Cast throws long chips and a crisp edge. Extruded is more likely to break out at the cut surface and crack near holes.
Which one to use
Cast acrylic is the right call when:
- The edge needs to look clear and finished—displays, lenses, signage faces
- Holes are drilled close to an edge
- The part carries any structural load
- Visual quality is the point of the job
Extruded is acceptable when:
- The part is functional, and the edge won’t be seen
- Cost is a genuine constraint and appearance isn’t
- Consistent sheet thickness matters more than edge quality
- You’re not drilling near edges or applying significant fastener torque
The practical rule: if the part has to look clear, start with cast. If it’s a functional part buried inside something, extruded will do. Getting this call right eliminates an entire category of downstream problems before you even load the file.
The Three Core Problems in CNC Acrylic Machining
Most acrylic jobs that go wrong fall into one of three categories: melting, chipping, or cracking. Each has a distinct signature, a specific cause, and a clear correction sequence. This is where the detail matters most.
Melting and Weld-Back
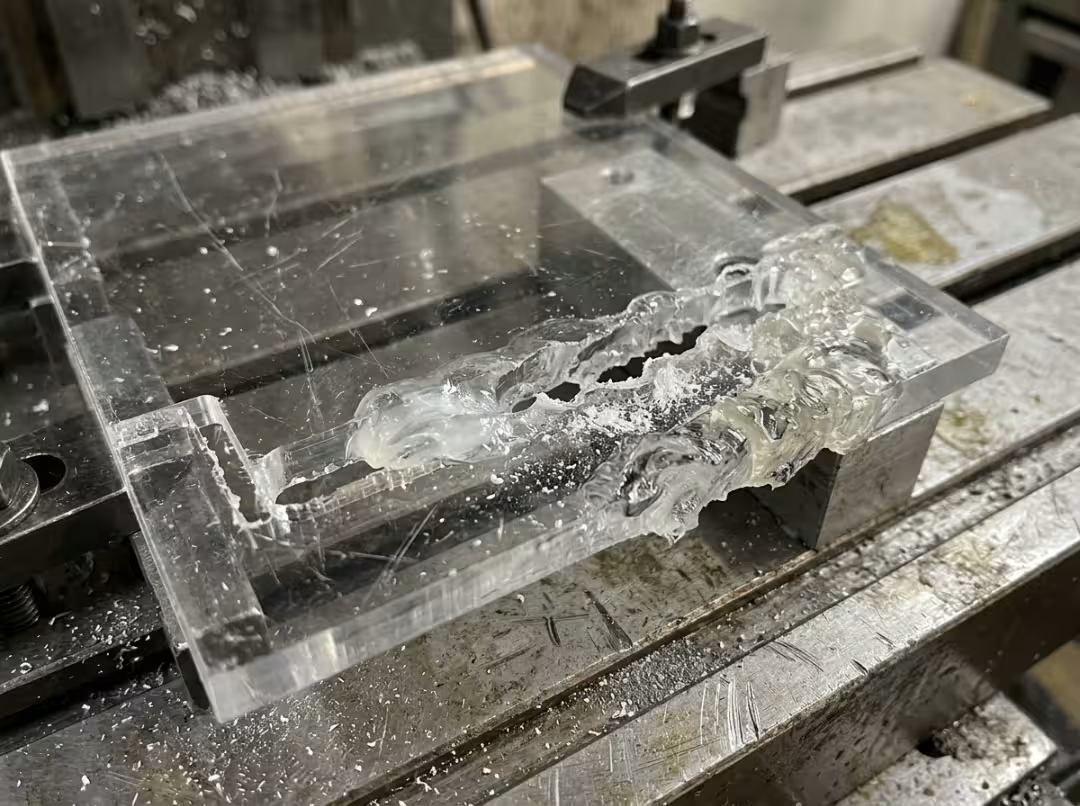
What it looks and sounds like. Instead of a clean cutting tone, you hear a low thud or a dull squeal. There’s a waxy white residue along the slot. Gummy strings re-weld into the cut right behind the cutter. The edge looks smeared—not sliced.
What’s driving it. The tool is rubbing, not cutting. The chip load is too low, so the edge slides across the surface, generating frictional heat rather than cleanly shearing the material. Poor chip evacuation makes it worse, as does a spindle speed that’s outpacing the feed rate. A dull tool compounds all of it.
What to fix, in order:
- Fit a sharp tool first—worn edges rub before anything else causes trouble
- Raise the feed rate so the tool is actually biting off material, not skating across it
- If the edge is still melting, bring the spindle speed down so chip load can catch up
- Add an air blast or coolant mist to clear chips and pull heat out of the cut zone
- Reduce depth or radial engagement if chips are packing and the flutes are choking
The counterintuitive part: melting usually calls for more feed. A chip thick enough to shear cleanly carries heat with it. A chip too thin just creates friction.
Chipping and Breakout
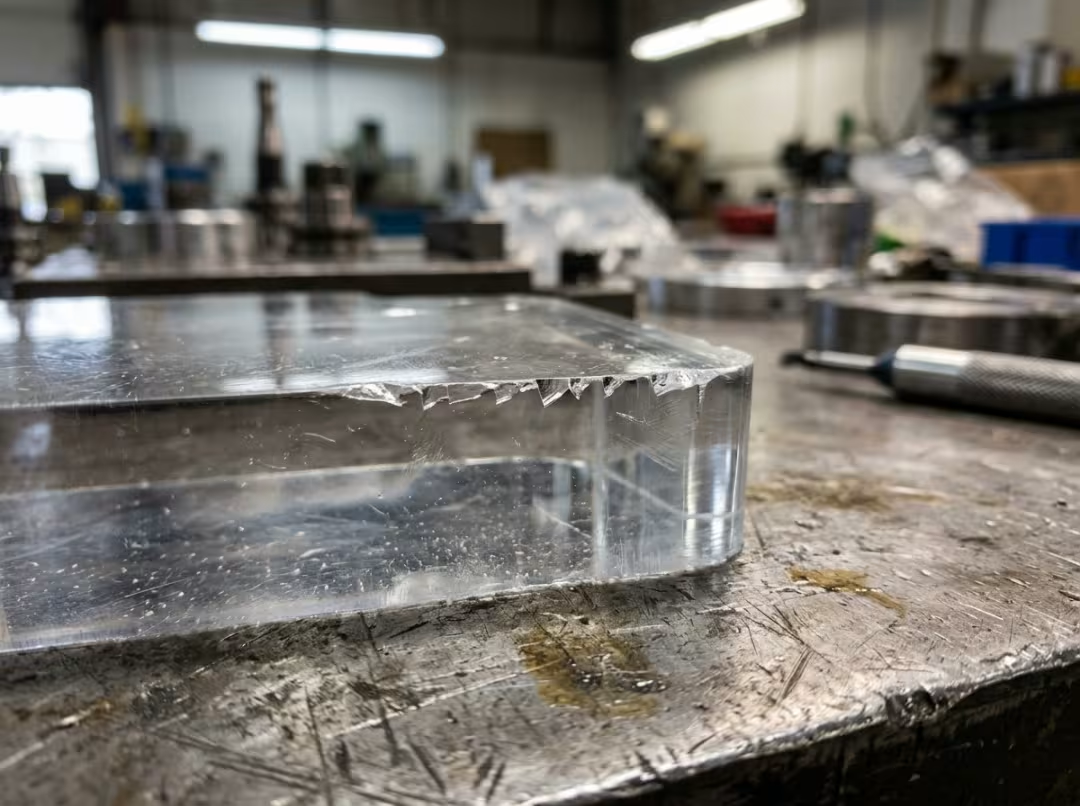
What it looks like. Small chips break out along the top edge of the cut, or the material tears on the exit side of a profile. The edge looks notched and irregular instead of smooth.
What’s driving it. Brittleness. A dull tool, the wrong cutter geometry for plastics, aggressive entry or exit moves, or a sheet that’s not properly supported at the surface—any of these let acrylic fracture at the edge instead of shearing cleanly.
What to fix, in order:
- Use a single-flute or O-flute bit designed for plastics—these shear cleanly and don’t re-cut chips on the way through
- Back up the cut with a sacrificial layer on top, bottom, or both
- Improve workholding so the sheet can’t lift or flex during the pass
- Slow entry and exit moves; follow with a light finishing pass that shaves off whatever roughing left behind
On through cuts where the top edge keeps chipping, an up-cut toolpath combined with a sacrificial cover sheet solves most of it.
Cracking Around Holes and Corners
What it looks like. The part comes off the machine looking fine. Cracks appear later—around holes, at sharp corners, or the moment you tighten a fastener. That delayed failure is the most frustrating kind because the machining looks correct.
What’s driving it? Stress concentration, heat, and a geometric weak point. An undersized hole, a sharp internal corner, a fastener driven too hard, or a drill that overheats the bore walls all give a crack somewhere to propagate from. Extruded acrylic—already carrying locked-in stress—is far more susceptible than cast.
What to fix, in order:
- Peck drill—retract every 0.05–0.1 inch to clear chips and let the hole walls cool
- Size fastener holes for clearance; don’t press-fit screws into PMMA
- Add radii to internal corners; stress concentrates at a point and radiates outward from there
- During assembly, clamp gently and back off on fastener torque
- For structurally or visually important parts, switch to cast acrylic to eliminate most of the residual stress before machining starts
A real example: a fabricator kept splitting extruded panels at the mounting holes during assembly. Peck drilling, larger clearance holes, and a small corner radius next to each hole stopped the cracking. Nothing else in the program changed.
Tooling and Cutting Parameters That Actually Work
A parameter table gets you started, but it won’t tell you what to do when the cut sounds wrong. Understanding why each setting does what it does is more useful than memorizing numbers—because then you can read the cut as it runs and correct before you scrap a part.
The right cutter for acrylic
Flute count and edge sharpness drive most of your outcome. Fewer flutes, keener edge—that’s the right direction almost every time.
- Single-flute and O-flute bits are the standard choice. One flute means maximum room for chip evacuation, less heat, and no re-cutting. O-flutes in particular tend to leave edges close to polished right off the machine.
- Two- and three-flute tools work for roughing but pack chips faster and run hotter. Use them when you have a reason; don’t use them by default.
- Compression bits perform well on through cuts—they pull chips inward and protect both surfaces—but the edge typically comes off slightly frosted and needs a polishing step.
- Straight-flute bits designed for plastics are reliable and forgiving, and worth keeping on hand.
Sharpness consistently matters more than geometry. A dull two-flute will melt acrylic long before a sharp single-flute runs into trouble.
The logic behind feeds and speeds
The goal is simple: produce chips, not powder.
- Too little feed and the tool rubs instead of cuts. Rubbing generates heat; heat melts acrylic.
- Too much spindle speed for the feed means each flute takes a bite too thin to shear properly—same result, same direction.
- Too much depth overloads the flutes, adds heat, and causes a long tool to flex and rub the wall.
Balancing those three is most of the job.
Starter ranges
Use these as a baseline, then correct based on what you’re seeing and hearing.
- Spindle speed: For a 1/8-inch bit on a desktop router, 18,000–24,000 RPM is a reasonable starting window—but only if the feed rate is high enough to produce actual chips at that speed.
- Chip load: 0.002–0.005 inches per revolution. Too low and it rubs; too high and it chips.
- Depth of cut: For slotting passes, target 0.25–0.5 times the tool diameter and step down incrementally.
- Peck drilling: Retract every 0.05–0.1 inch.
- Coolant: Water-soluble mist or a purpose-made plastic-cutting fluid works well. Compressed air handles thin stock and light cuts, but often can’t shed enough heat in thicker material.
These are starting points, not targets. The more useful skill is learning to read the cut in real time.
Reading the cut
Sound, chip form, and edge condition tell you whether you’re in the right zone.
- Good: Distinct curls or strings, a steady low tone, an edge that stays clear through the pass
- Bad: Squealing or a flat thud, fine powder or smearing, a white edge, chips re-welding into the path
When the bad signs appear, stop and adjust. Running on through a bad cut because the number looked right is how parts get scrapped.
How to Get a Clear Edge Instead of a Frosted One
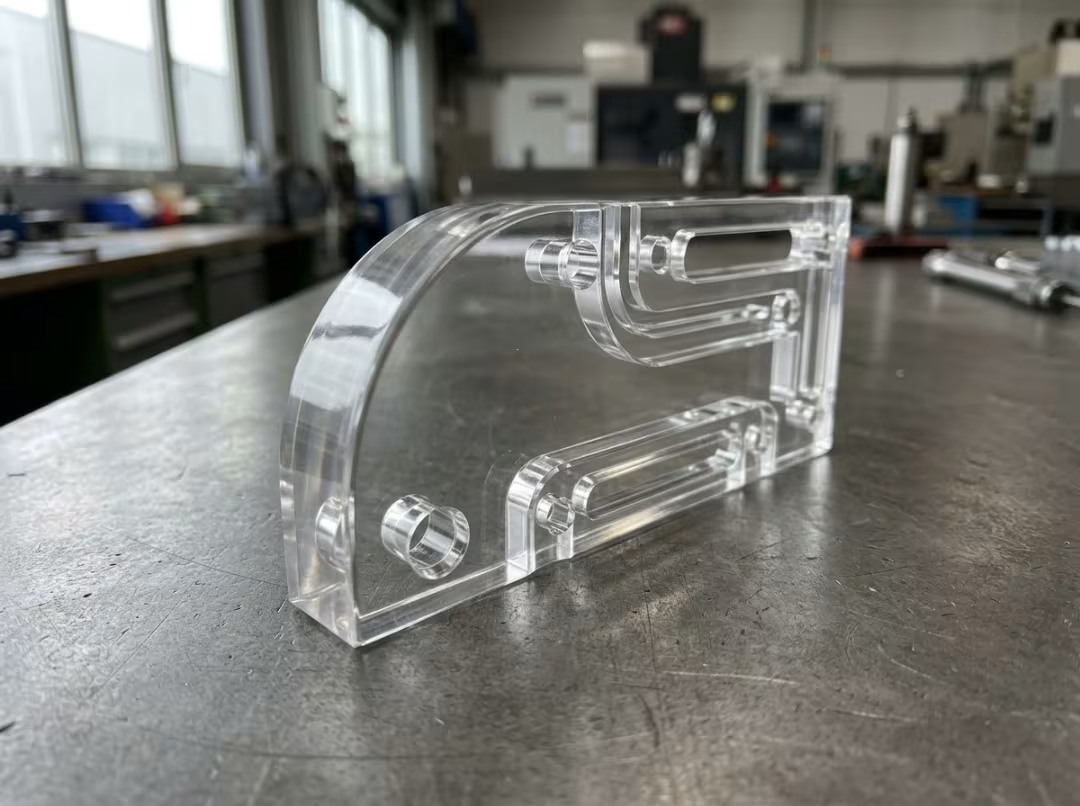
Edge clarity is often the whole measure of success on an acrylic part. A frosted or white wall is a defect—dimensional accuracy doesn’t rescue it. Getting a genuinely transparent machined edge takes a deliberate finishing approach, not just better roughing parameters. The same principle applies to any CNC plastic machining job where surface appearance drives the specification.
Why edges go white
A hazy edge usually comes from one of these:
- Tool deflection or chatter scoring the wall during the cut
- Chips re-cut and dragged across the finished surface
- A finishing pass that was too heavy and torn rather than sheared
- A stressed blank or lower-grade sheet that won’t finish cleanly regardless of technique
A finishing approach that works
- Leave 0.01–0.02 inch of stock through roughing so the finishing pass has clean, unstressed material to shear—not the heat-affected zone from the rough cut.
- Take the finishing pass at full depth with light radial engagement, around 5–10% of tool diameter. Deep and light produce wall clarity.
- Keep tool stickout short. A long tool vibrates, and vibration frosts the edge. Use the shortest tool the part geometry allows.
- Use a fresh cutter for the finishing pass when edge appearance matters. Save worn tools for bulk removal.
- Climb mill the finish pass. It pushes material down into the table rather than lifting it, and consistently leaves a cleaner edge on acrylic.
When machining alone doesn’t close the gap
Use the lightest method that gets you there:
- Sanding: Start at 320 grit, step through 600, then 1200, and finish with a plastic polishing compound. Takes time but gives good control.
- Flame polishing: A fast, moving pass with a propane or hydrogen-oxygen flame re-flows the surface micro-layer back to clarity. Keep the flame moving—any dwell and it bubbles. It’s effective, but localized heat can introduce internal stress, which occasionally shows up as delayed cracking.
- Chemical polishing: Dichloromethane-based solvents produce high clarity but are genuinely hazardous. Proper ventilation and PPE aren’t optional.
A good machined edge often only needs a light flame pass or a 1200-grit finish to reach display quality. Don’t reach for heavier methods when a lighter one will do.
Design Rules That Prevent Problems Before You Cut
The cheapest fixes are made in CAD. A few consistent habits eliminate most common acrylic failures before the spindle starts.
Wall thickness and fragile geometry
Thin walls and narrow tabs concentrate heat and snap easily. Keep wall thickness at or above 0.0625 inch for small parts and 0.125 inch for larger panels. If a feature looks thin on screen, it will behave worse in acrylic than in almost any other material.
Hole placement, edge distance, and radii
- Place holes at least two hole diameters from any part edge—closer than that and the wall is likely to blow out or craze under fastener load
- Avoid sharp internal corners; they concentrate stress and give cracks a reliable place to start
- Add a radius to internal corners of at least half the tool diameter
Workholding that doesn’t damage the sheet
Acrylic scratches easily and cracks under point clamping pressure.
- Leave the protective film on through machining whenever the geometry allows
- Use padded clamps, a vacuum table, or double-sided tape to a spoilboard
- Don’t overtighten—a localized clamp load will crack PMMA just as reliably as a bad toolpath
Acrylic vs. Polycarbonate vs. PETG: When PMMA Is the Wrong Material
Part of working with acrylic well is knowing when it’s the wrong answer entirely. No amount of parameter tuning makes PMMA right for the wrong application.
Acrylic vs. polycarbonate
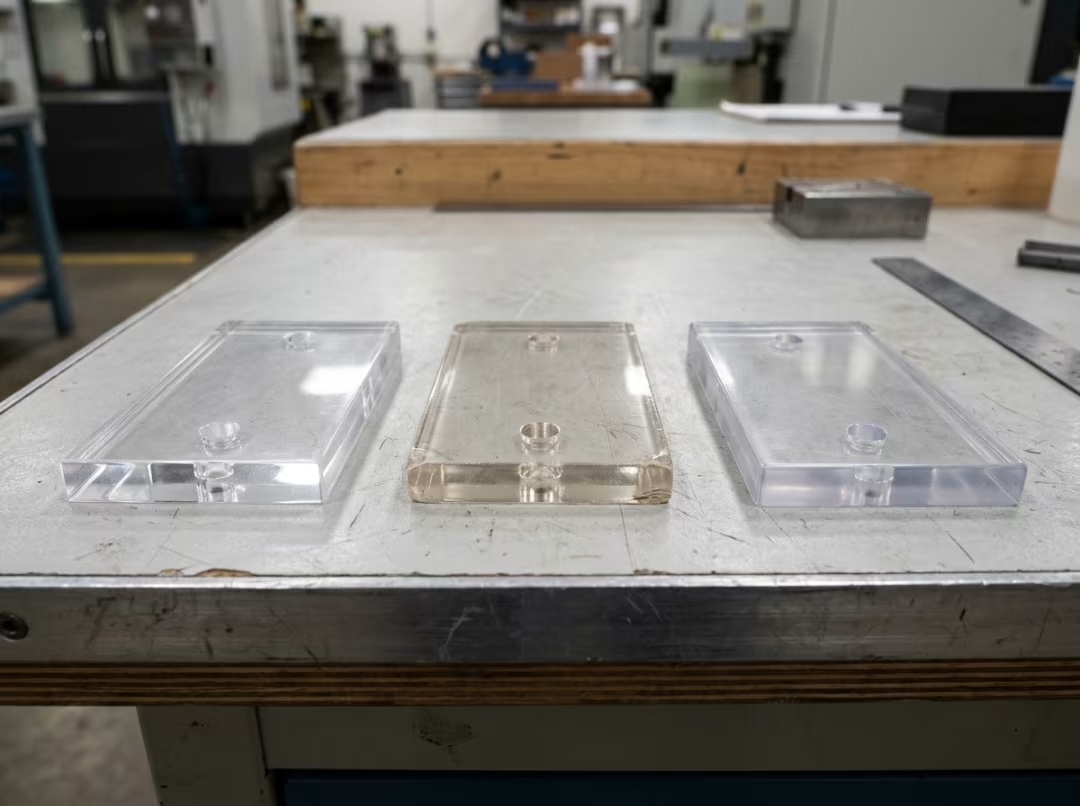
Acrylic has better optical clarity, stronger UV resistance, higher rigidity, and a far better edge finish. Polycarbonate wins on impact resistance—nearly unbreakable where acrylic would shatter. But PC scratches easily, yellows under UV over time, and cuts gummy, throwing stringy chips that load up the flutes. Use polycarbonate for safety glazing and impact-prone guards. Avoid it when a clean, polished edge is the deliverable.
Acrylic vs. PETG
PETG sits in the middle. Tougher than acrylic, cleaner-cutting than polycarbonate, and cheaper than both. What it won’t do is match cast acrylic’s optical clarity, rigidity, or UV stability. For prototypes that need to survive handling and assembly more than they need to look perfect, PETG is often the sensible call.
When to use which
- Optical clarity, displays, signage, enclosures: acrylic—cast when edge quality matters
- Safety glazing, machine guards, impact-prone parts: polycarbonate
- Tough, lower-cost prototypes: PETG
If the part has to take impact rather than transmit light, switching materials is the fix—not a better machining technique. For a broader look at how different plastics perform under a spindle, the CNC plastic machining services page covers the full material range.
Frequently Asked Questions
Is cast acrylic better than extruded acrylic for CNC machining?
For polished, visually important parts, yes. Cast acrylic has lower internal stress, resists cracking, and produces cleaner edges. Extruded is cheaper with tighter thickness tolerances—workable for functional parts where appearance isn’t the priority.
What causes acrylic to melt during CNC cutting?
The tool is rubbing rather than cutting. Chip load too low, spindle speed too high for the feed rate, or chips packing in the cut—any of these produces friction heat that softens the material. Start by fitting a sharp tool and raising the feed rate.
How do you prevent acrylic from cracking around drilled holes?
Peck drill to clear chips and cool the hole walls. Leave fastener clearance rather than press-fitting. Add radii at adjacent corners. Don’t overtighten during assembly. For critical parts, start with cast acrylic—it carries far less residual stress to begin with.
What is the best cutter for CNC acrylic?
A sharp single-flute or O-flute bit designed for plastics. Fewer flutes evacuate chips more effectively and generate less heat. Edge sharpness matters more than anything else.
Can CNC-cut acrylic edges be made fully transparent?
Yes. Leave a small finishing allowance, take a light full-depth finishing pass with a fresh tool, then sand through the grits, flame polish, or chemically polish to close the remaining gap.
When should you use polycarbonate instead of acrylic?
When the part needs impact resistance more than optical clarity—machine guards, safety shields, anything that takes direct contact. Accept that PC scratches more easily, yellows under UV, and cuts less cleanly than acrylic.
Conclusion
Getting clean results from CNC acrylic comes down to making the right call at each stage. Start with cast sheet when edge quality matters. Use a sharp, single-flute tool that evacuates chips rather than grinding them back in. Feed fast enough to produce chips rather than powder, keep the cut cool, and finish with a deliberate, light pass rather than chasing clarity in the rough.
The failures—melting, chipping, cracking—are almost always caused by heat or stress. Once you know what to listen for and what to look at, the diagnosis gets faster, and the corrections become obvious. And when a part genuinely needs to survive impact rather than transmit light, switch materials before you spend time fighting the PMMA.
Before the next job, run a short test cut and watch what comes off the tool. Long strings mean you’re in the right zone. Fine powder or the faint smell of burning plastic means something needs adjusting—and at this point, you know exactly where to start. If you’d rather hand the job to a specialist, the Acrylic (PMMA) CNC Machining service at Essengold handles everything from prototype to production run.